A few years ago, I brought raw vegetables to a Valentine’s Day chocolate party. True story.
I’m not sure what I was thinking at the time… probably that I was too busy to bake something, and that there would already be a lot of chocolate there, anyway. As it turns out, I was right about all the other chocolate, and so the veggies went over pretty well. But I certainly wasn’t going to win any awards for that dish. And even if I had baked something, all the desserts paled in comparison to the homemade truffles served by my friend Ellen, the hostess.
My truffles here actually aren’t anything like the ones Ellen made that night, but that was the first time I’d heard of homemade truffles. Everyone kept asking Ellen how she made them, and she insisted it was easy! But I, for one, didn’t believe her.
Well, as it turns out, truffles are easy to make! But not all truffle recipes are created equal.

I found this out the hard way last year near Valentine’s Day, when I tried my hand at truffle-making for the first time. (That was pre-blog!) My truffles did not turn out that well. (I won’t link to the recipe I was using!) They tasted pretty good – umm, I challenge you to create a bad-tasting truffle – but the texture was grainy and for the life of me, I couldn’t get them round. So they turned out to be little piles of grainy chocolate with sprinkles on top. I mean, we ate them, obviously, but… meh.
So I was very pleased last week when I happened across the Cook’s Illustrated technique for making smooth, creamy truffles. Their method uses the following key steps:
– Microwave the chocolate before adding the cream so that you can stir the cream in, rather than whisking it in, which adds air bubbles and can cause a gritty texture.
– Add corn syrup and butter to smooth the texture of the chocolate.
– Cool the chocolate down gradually (for 2 hours at room temp, then in the fridge for 2 hours) to avoid grainy crystals.
Yes please! Problem solved.
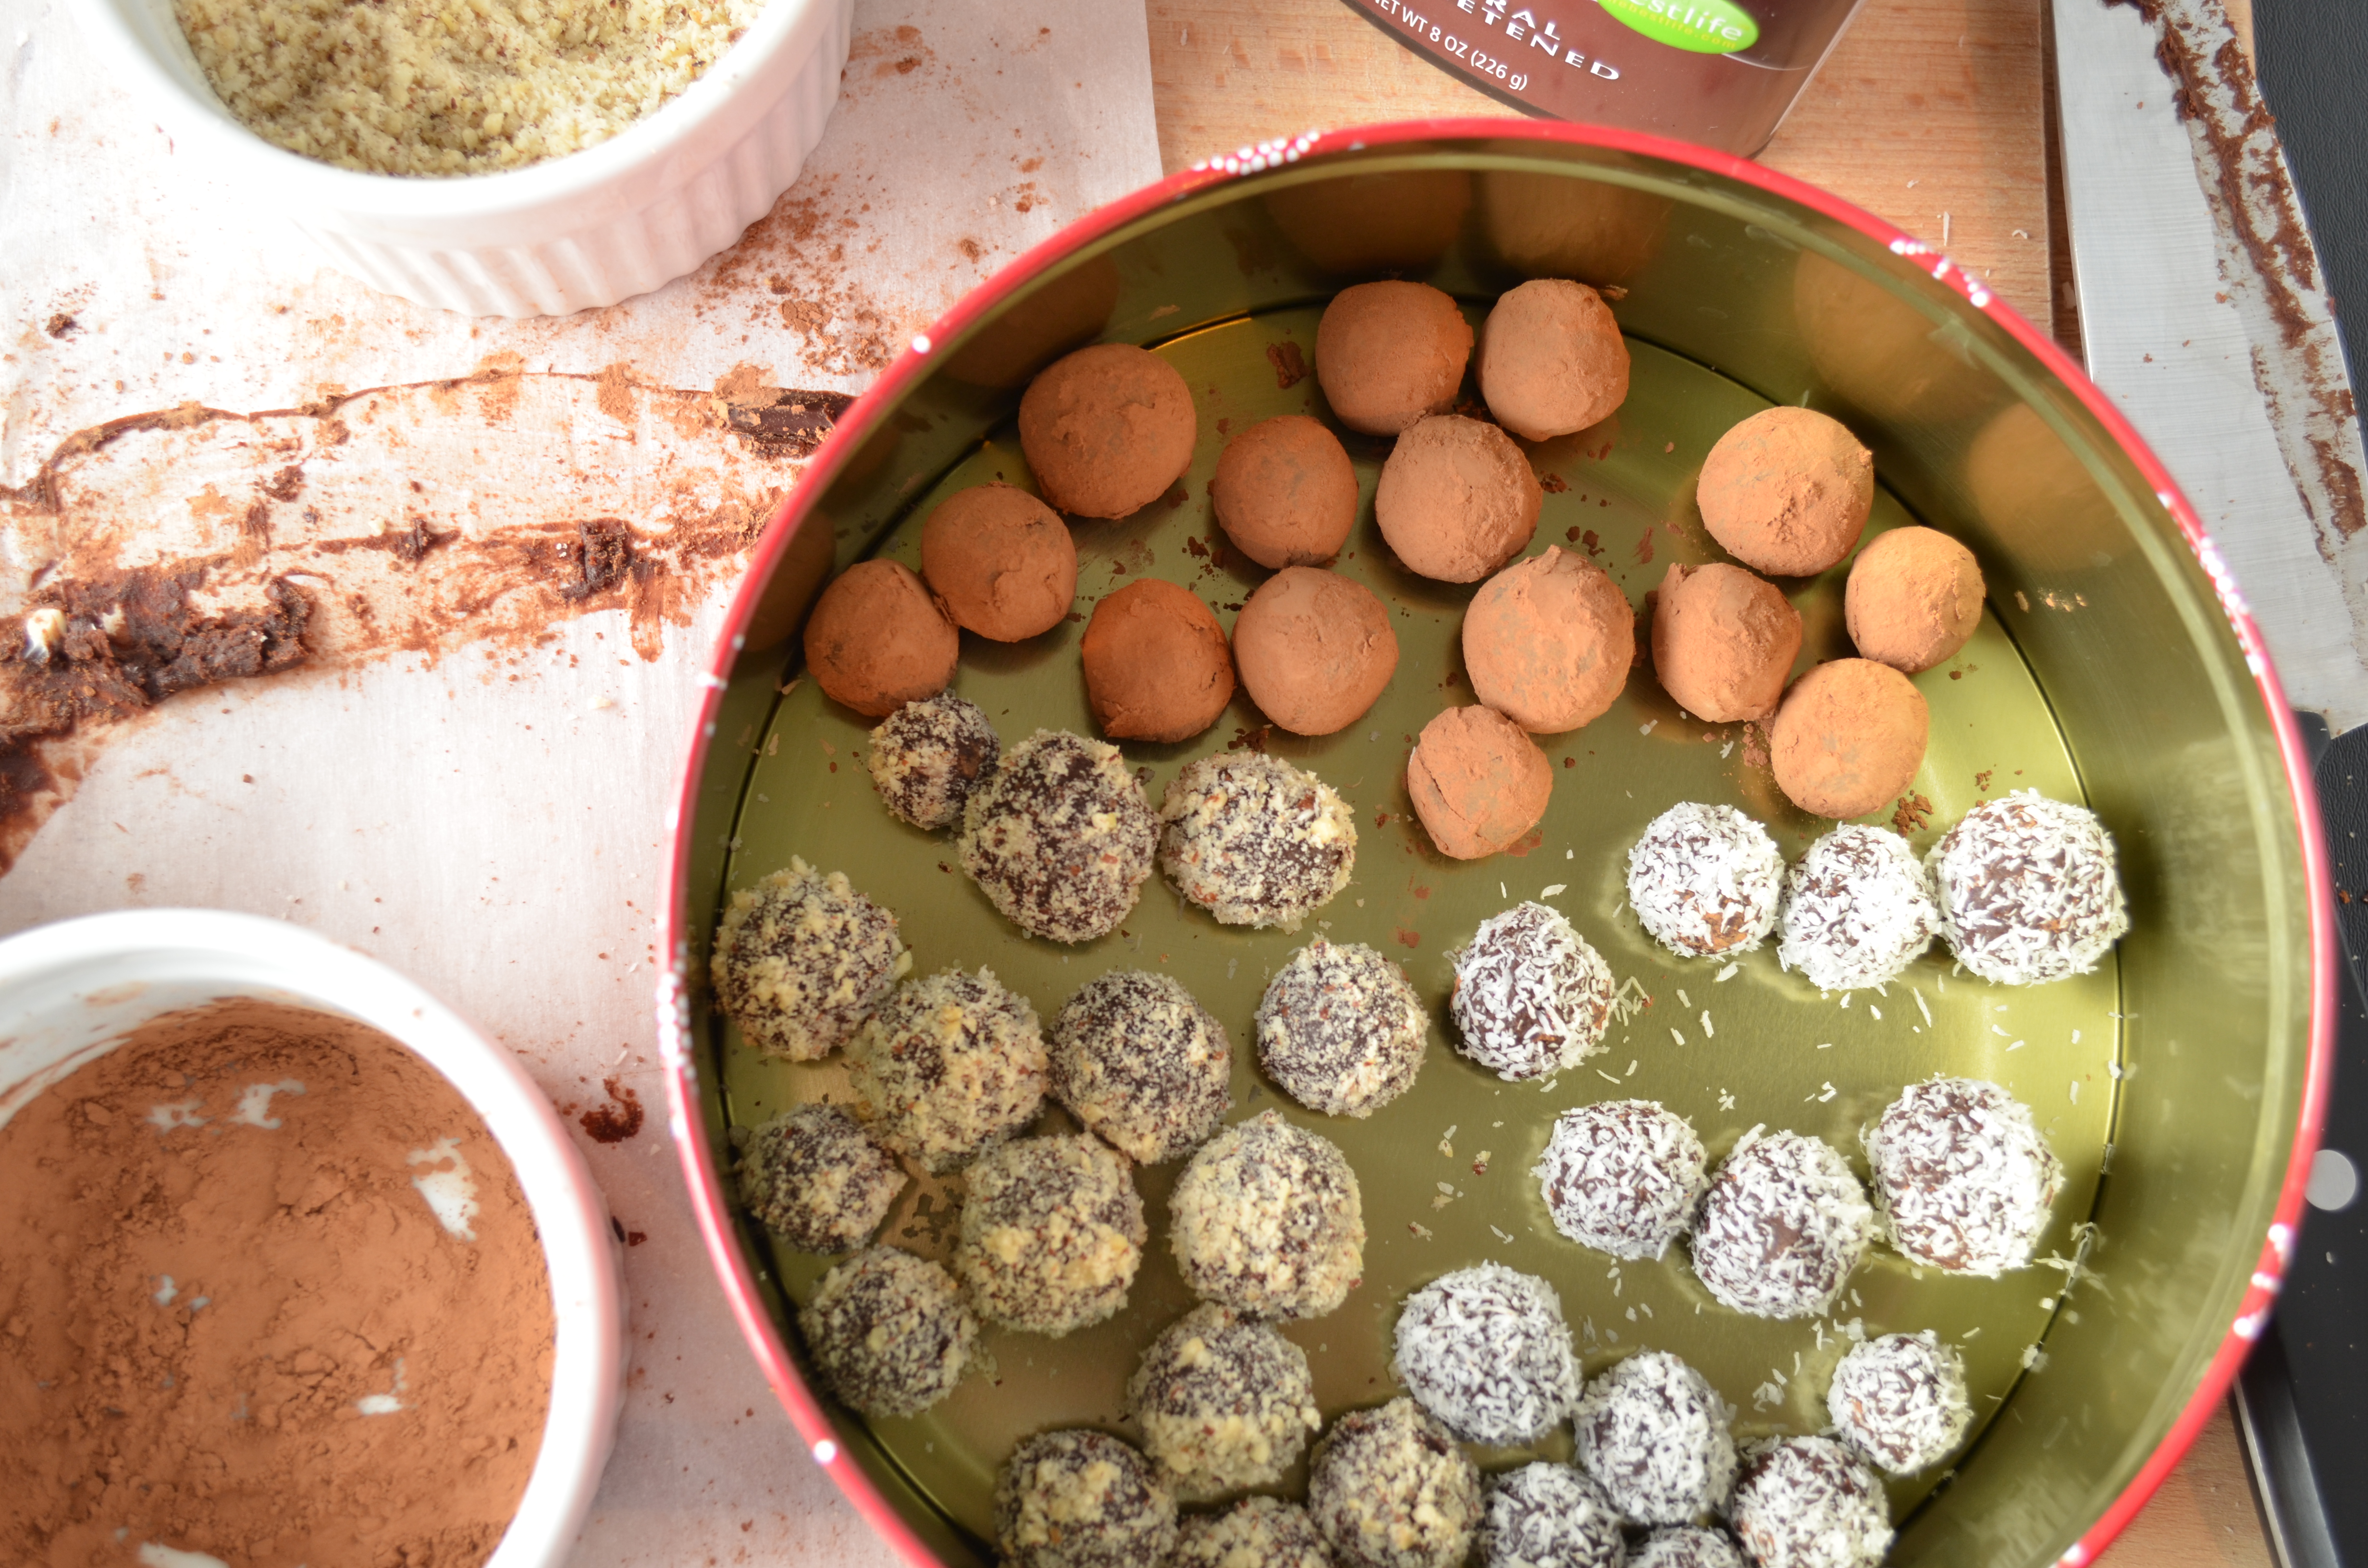
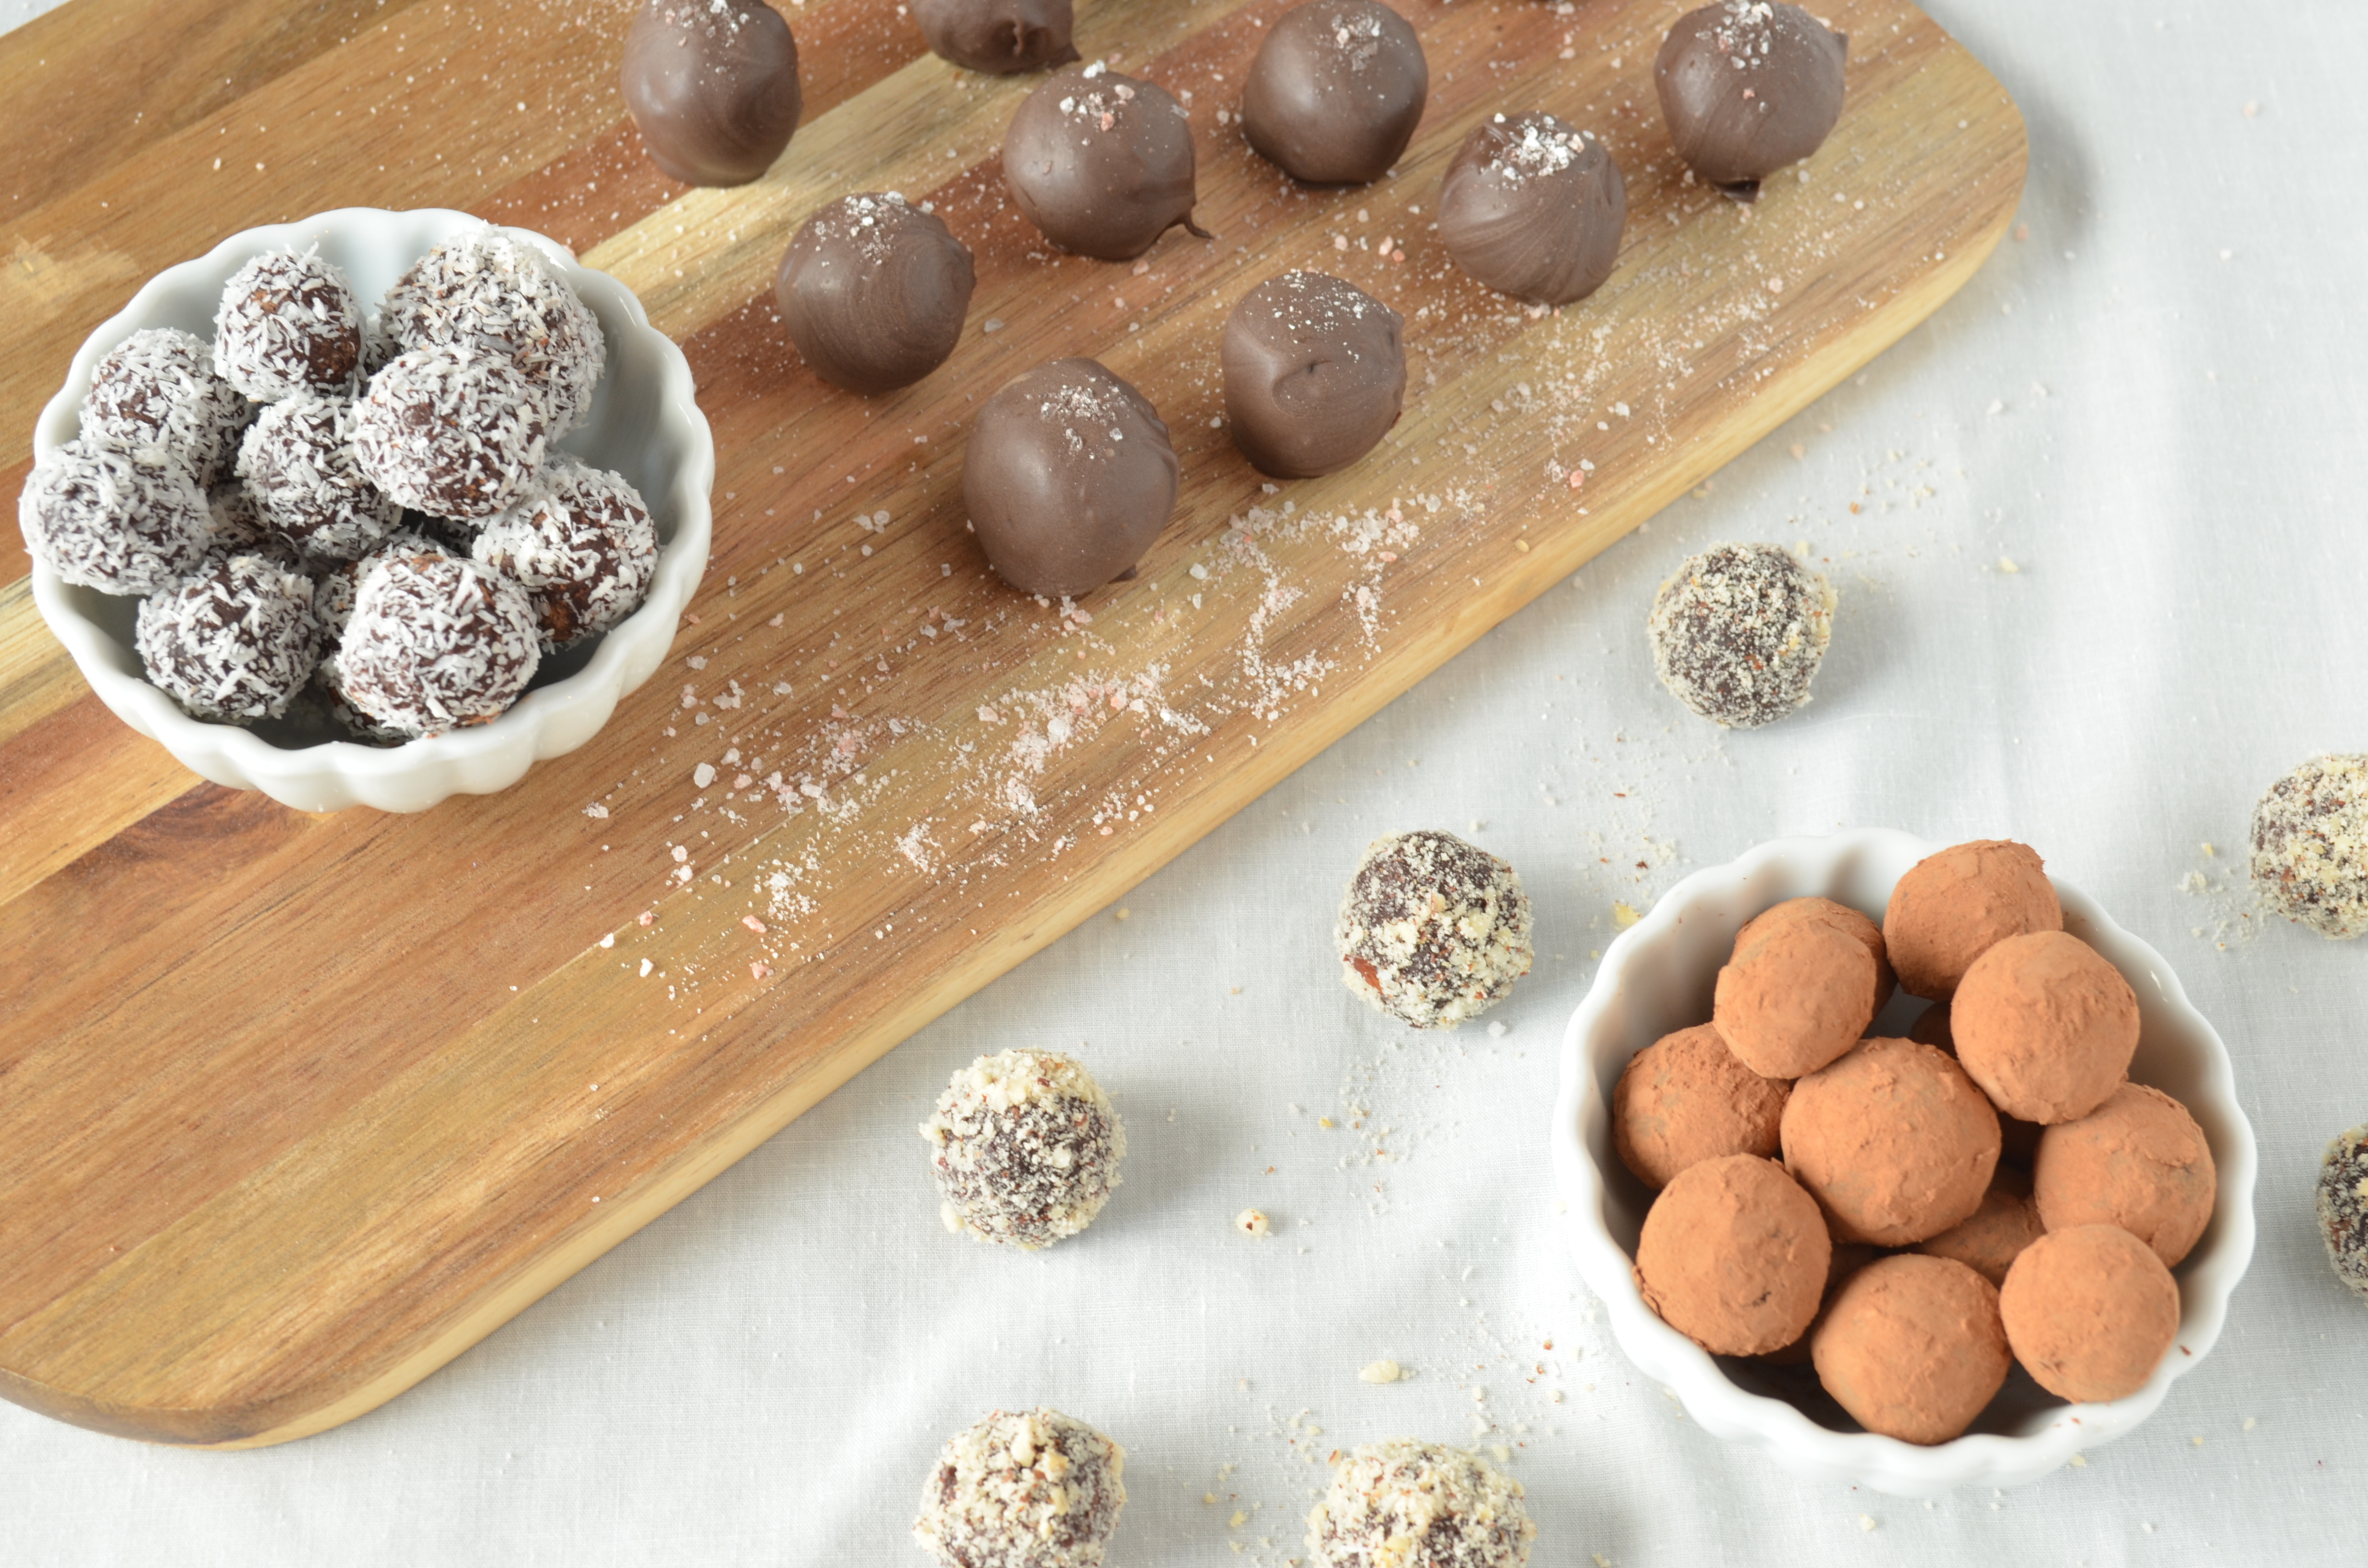
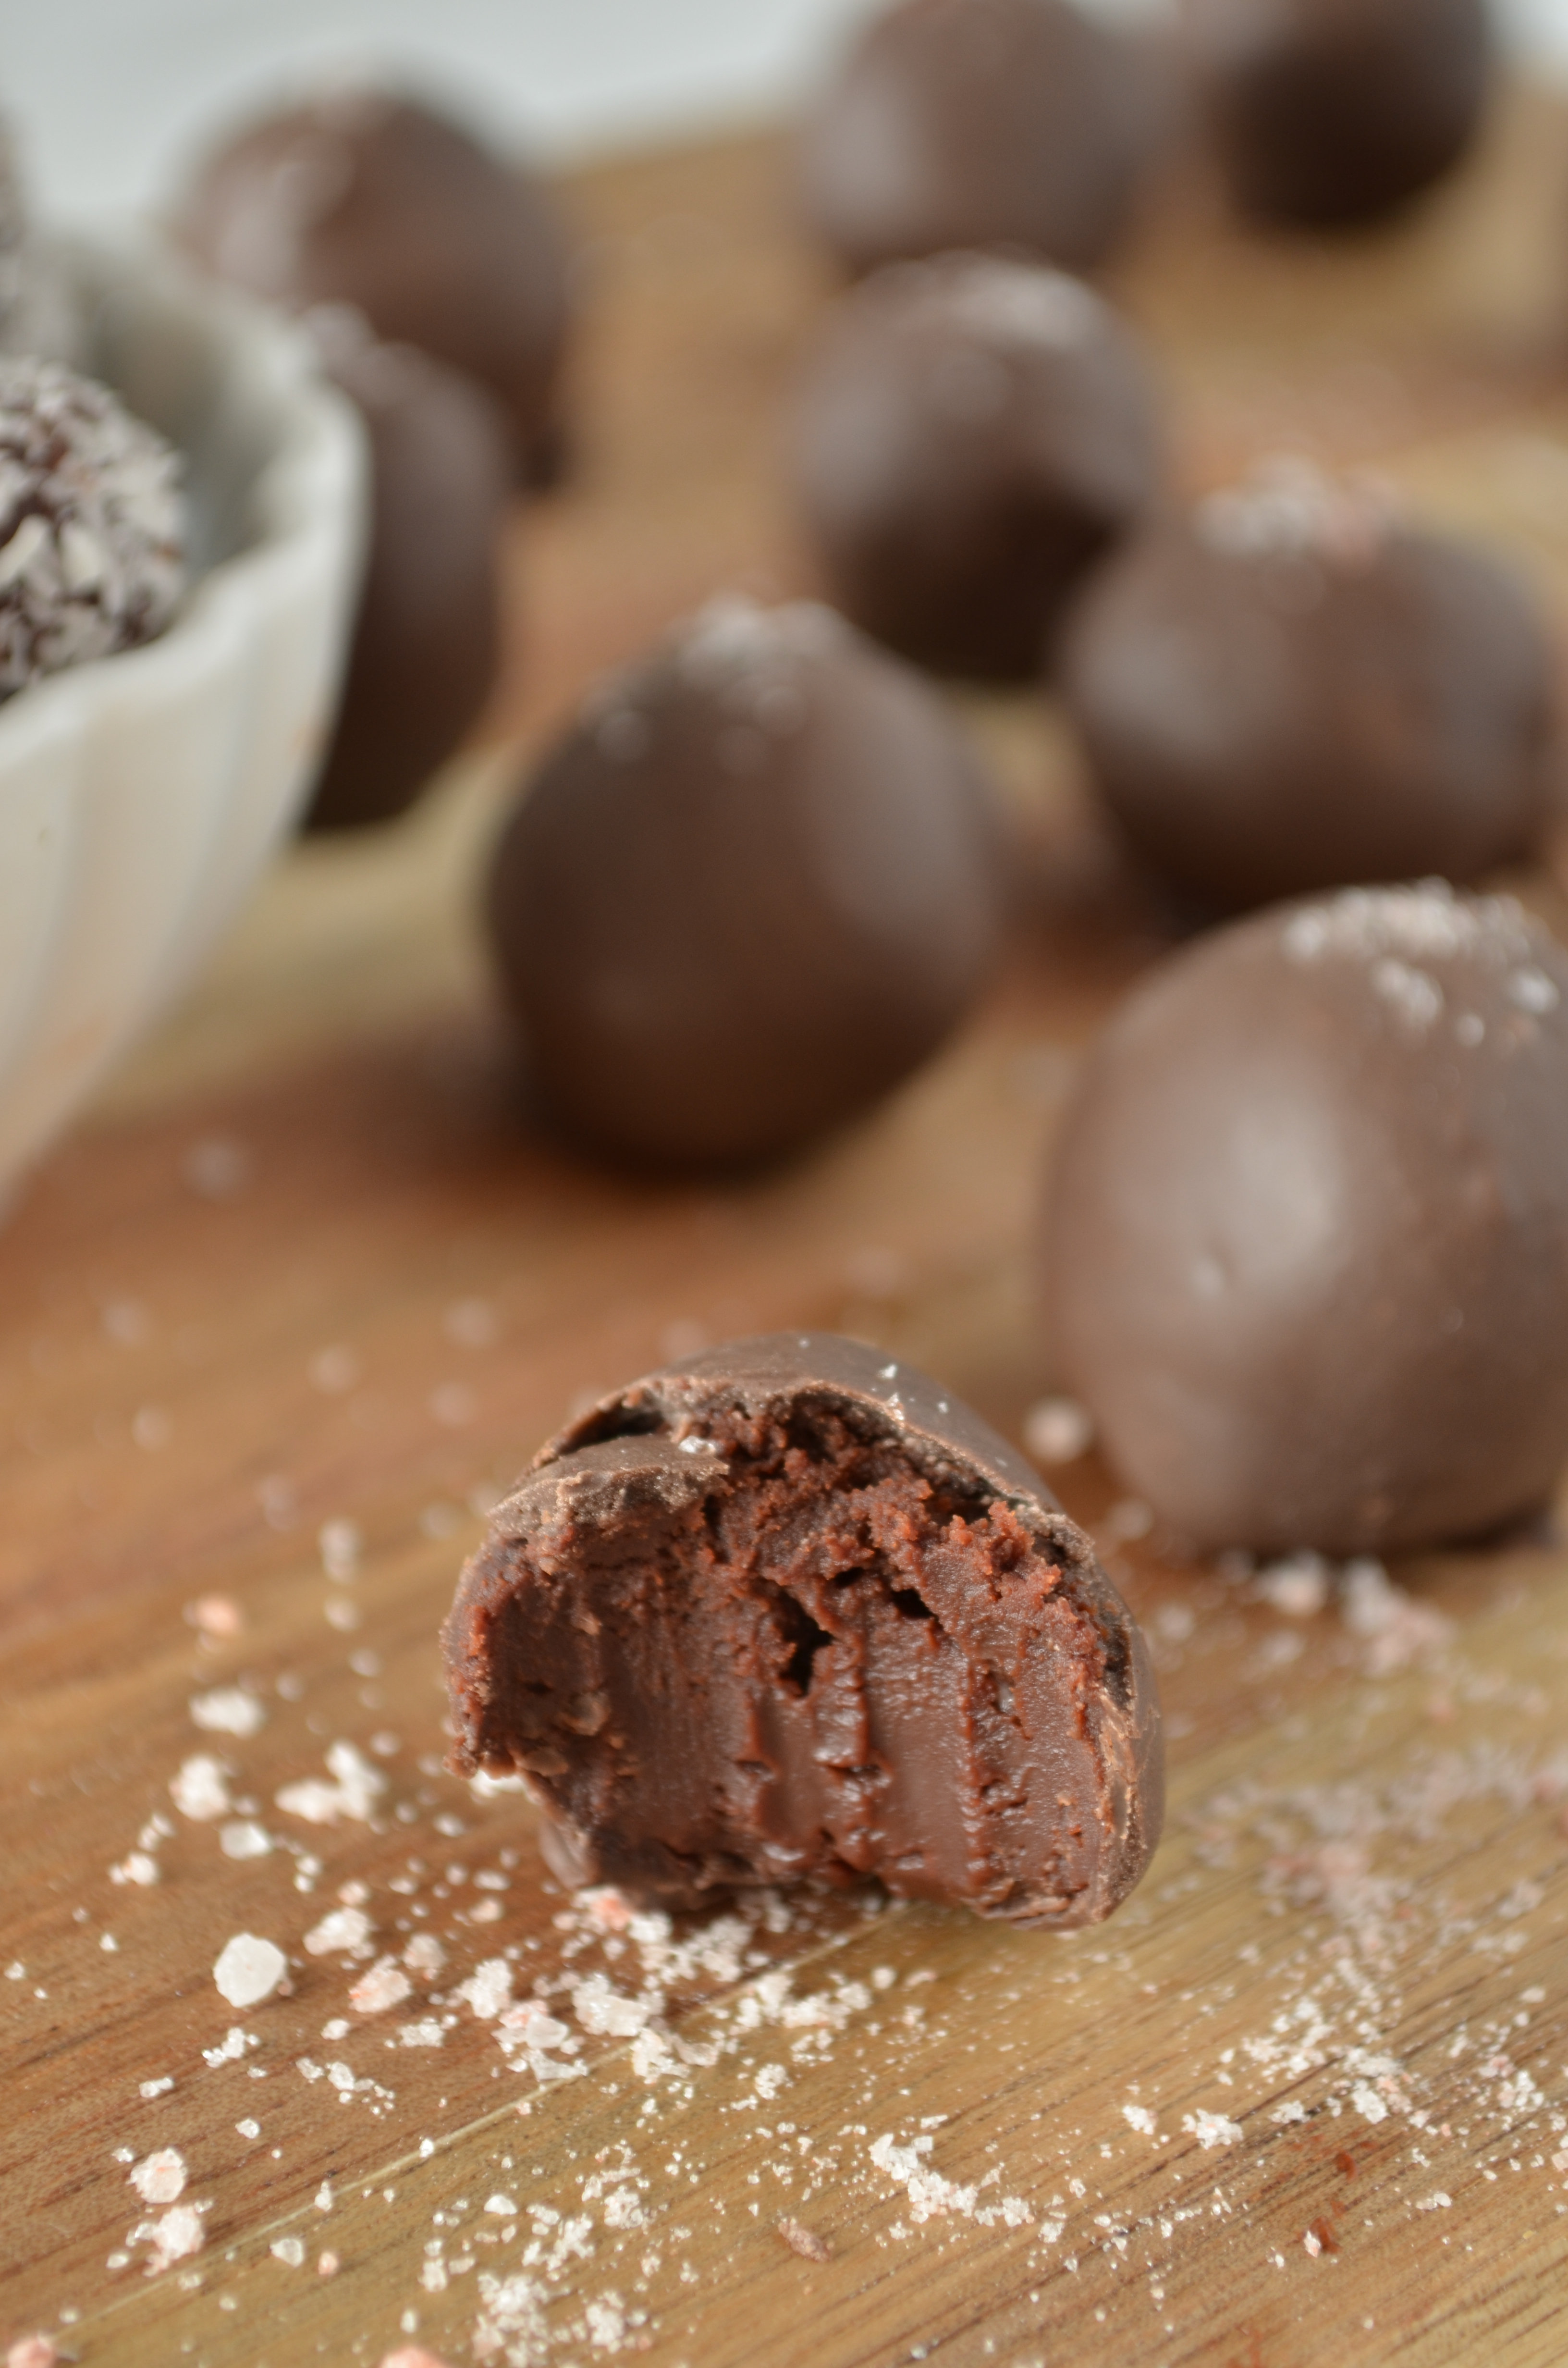
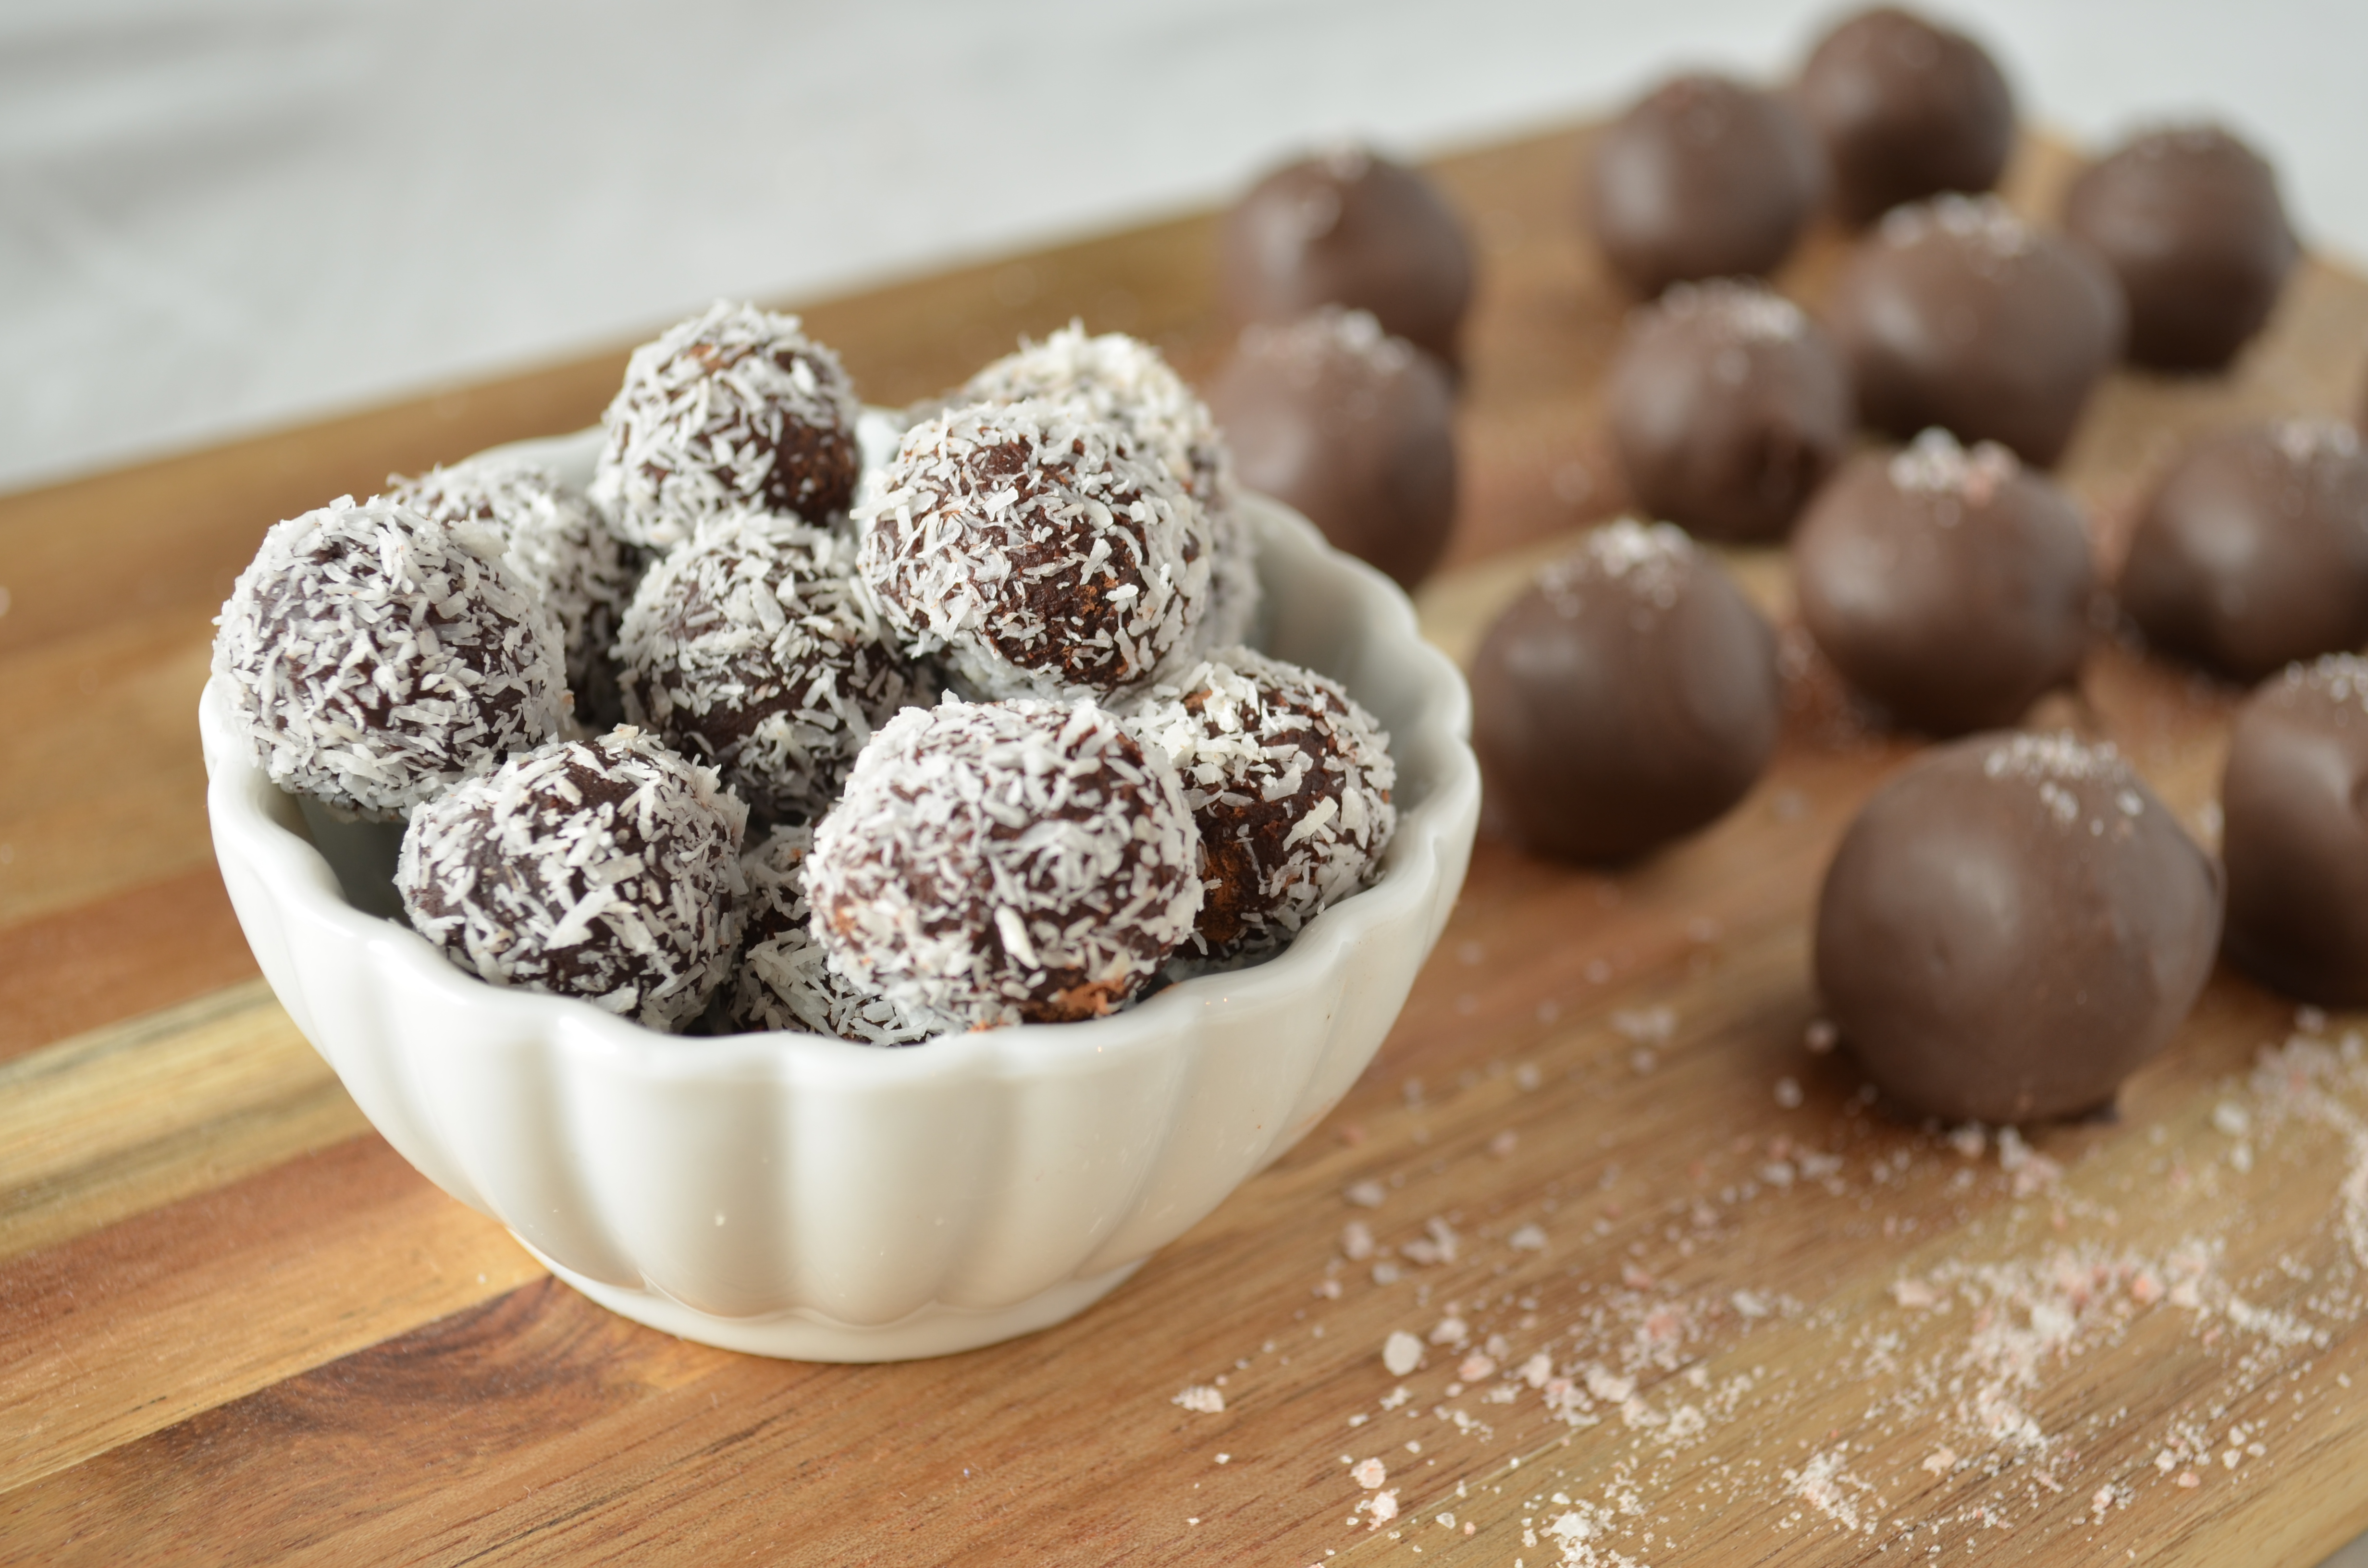
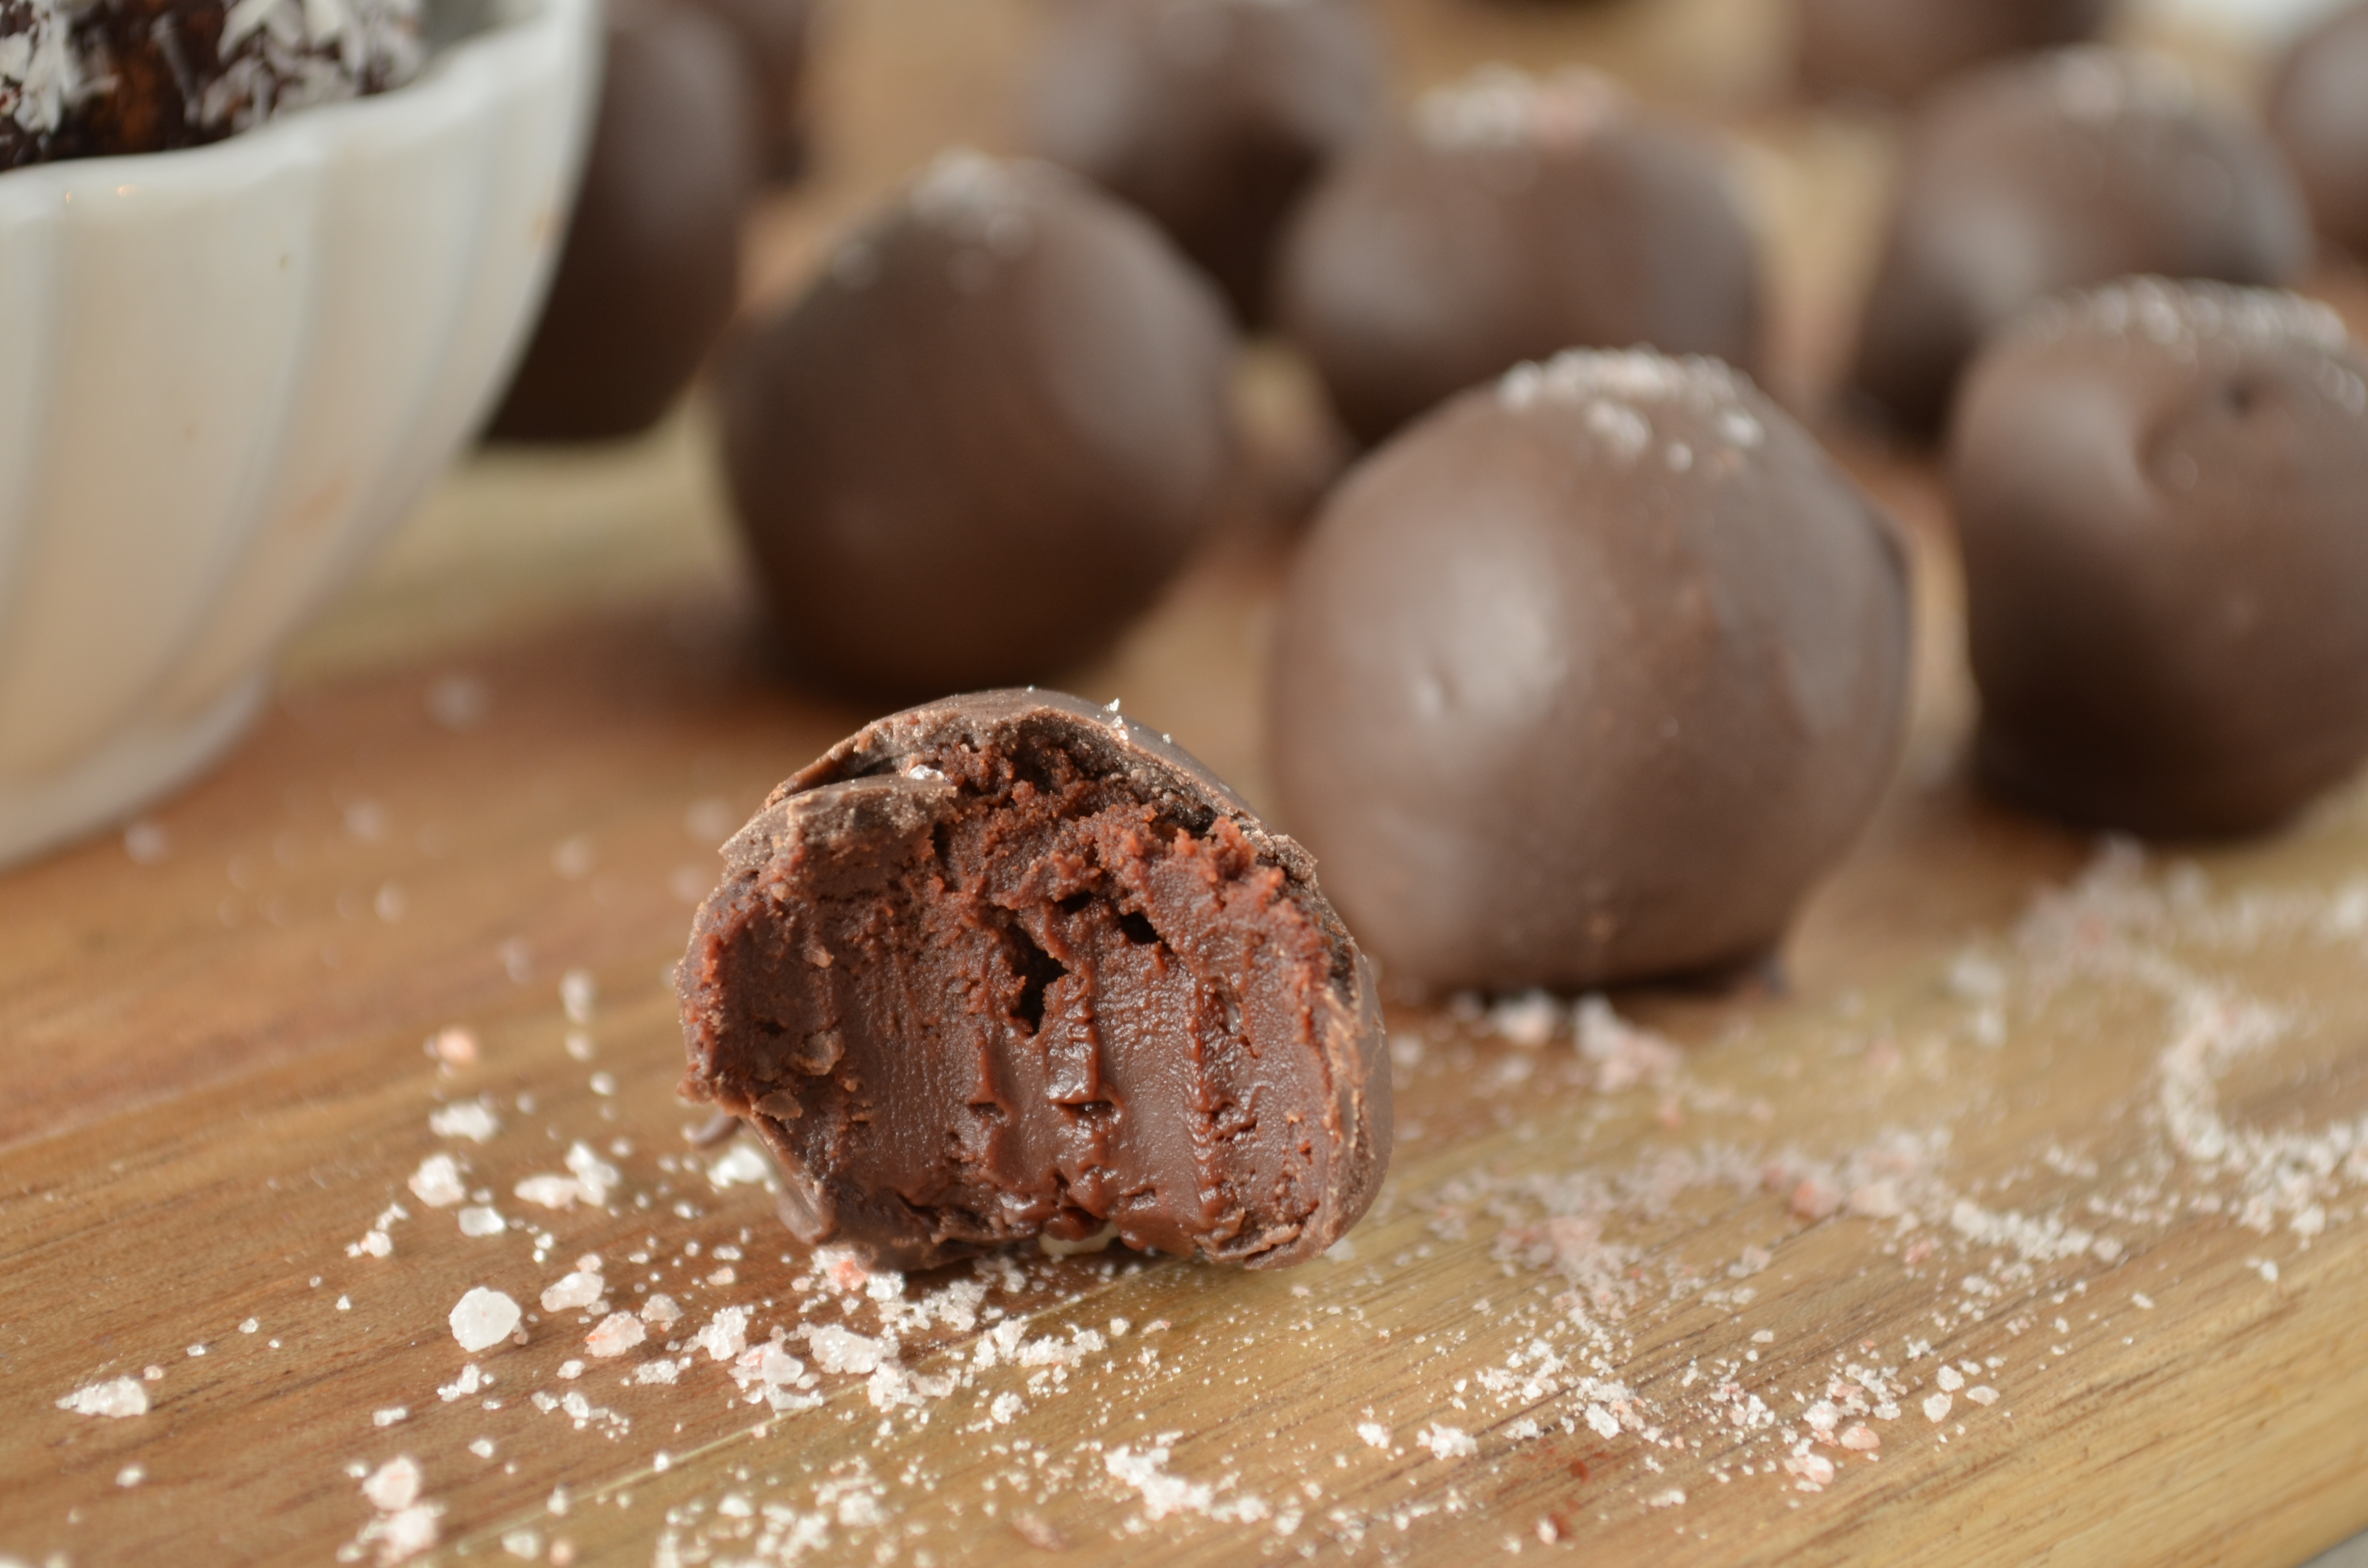
I started with the Cook’s Illustrated recipe, and from there, being me, I wanted to try out as many different toppings as possible. (My “more is more” mentality.) I rolled some of the truffles in cocoa powder, others in ground hazelnuts, a third batch in coconut, and finally dipped the rest in melted chocolate bark (my new best friend!) and topped them with a sprinkle of pink Himalayan sea salt.

Can you guess which were our favorites? That would be the chocolate-covered truffles, of course.
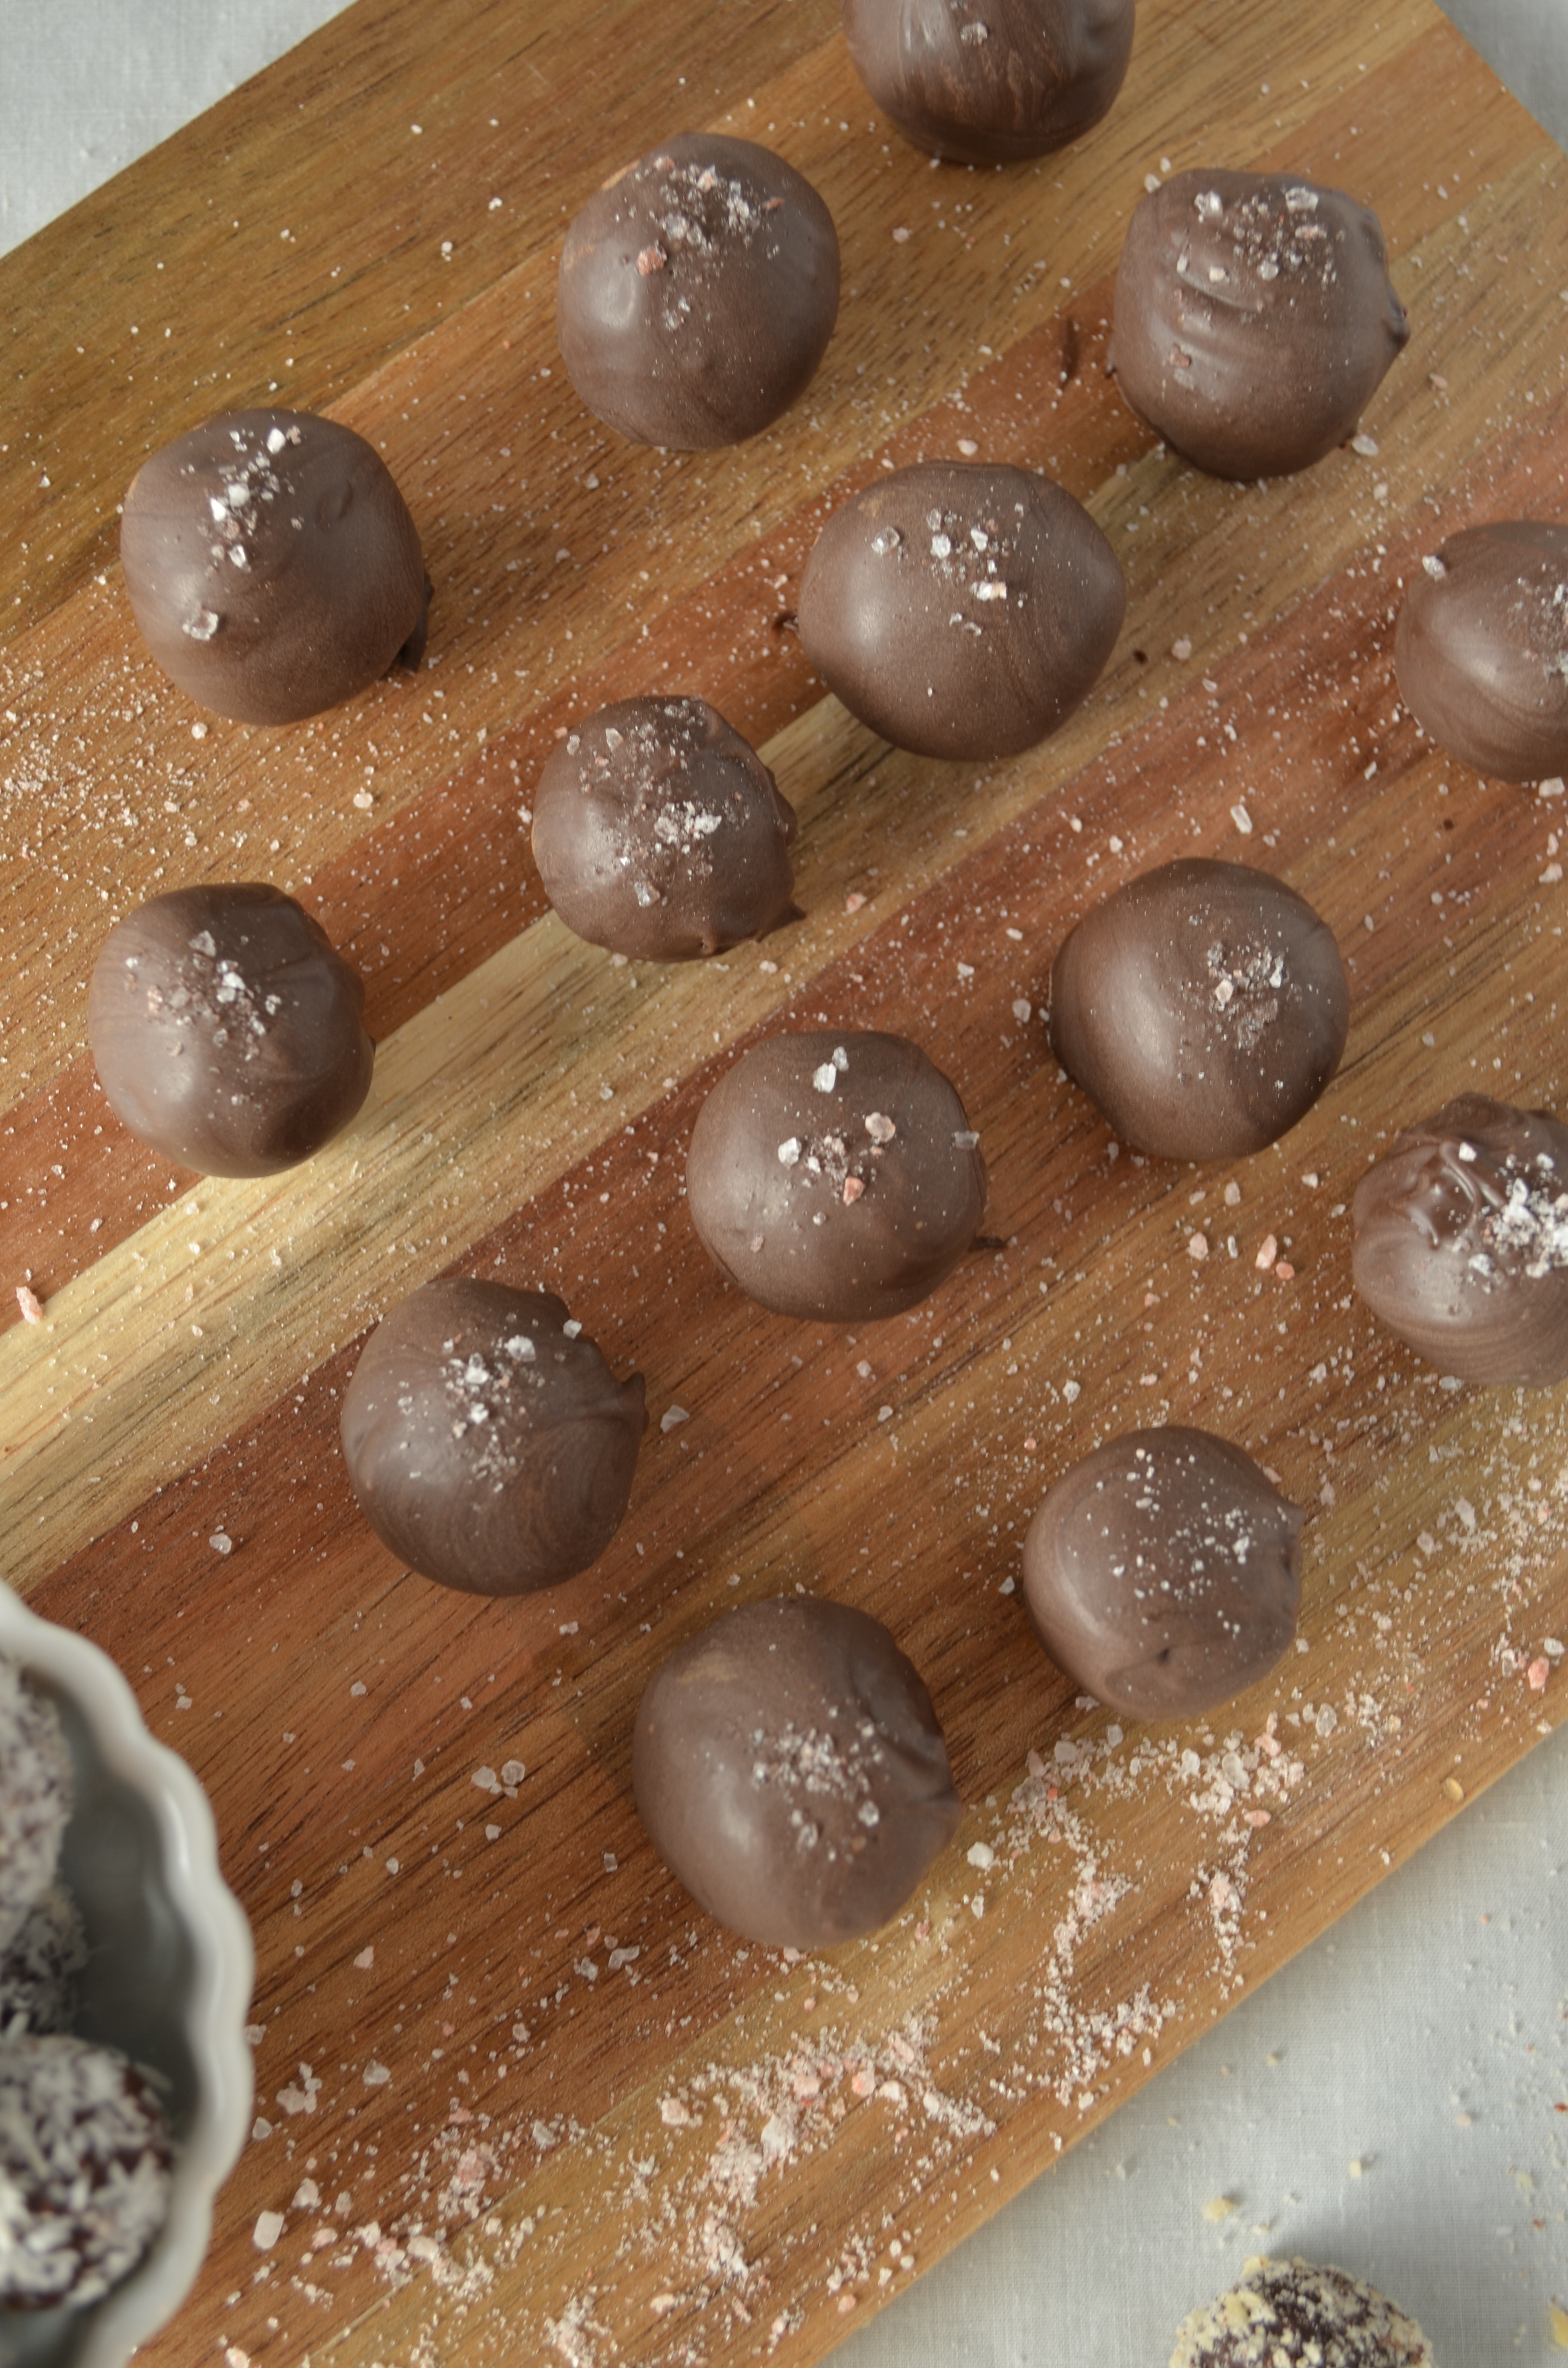
The sea salt does it for me every time, and the crunchy chocolate coating made them seem very professionally made. Yum! I’ll give the recipe for the chocolate-covered ones below. The rest were also delicious, though, and I highly encourage you to try whichever coating sounds best to you!
I know this is a Valentine’s Day post, and my blog should be exploding with red and pink sprinkles, napkins, hearts, and so on right now. But sometimes (and especially on Valentine’s Day), chocolate is the most beautiful color.
Silky Dark Chocolate Truffles
Makes 64 small truffles
Adapted from Cook’s Illustrated
Ingredients:
For the truffles:
6 oz bittersweet chocolate (I used Ghirardelli 60% cacao), roughly chopped
6 oz semi-sweet chocolate (I used Ghirardelli semi-sweet), roughly chopped
1/2 cup heavy cream
2 Tbsp light corn syrup
1/2 tsp vanilla extract
pinch kosher salt
1 1/2 Tbsp unsalted butter, cut into 8 pieces and softened
For the coating:
20 oz chocolate bark
sea salt for sprinkling
Instructions:
Take a look at my notes in the blog post above on the key techniques in this recipe.
Spray an 8-inch square baking dish with cooking spray. Line with 2 sheets of parchment paper, perpendicular to each other to form a cross, and spray the parchment paper with cooking spray.
Microwave chocolate in a heat-proof dish until melted and no chunks remain, stopping to stir every 30 seconds. Set aside.
Microwave cream (separately) until warm to the touch, 30-45 seconds. Stir corn syrup, vanilla, and salt into cream. Pour mixture over chocolate. Cover with plastic wrap and allow to sit for 3 minutes, then stir (with a spoon, not a whisk!) until thoroughly combined.
Stir in butter, one piece at a time, until thoroughly incorporated.
Spread the chocolate mixture into the prepared baking dish. Allow to sit (uncovered) at room temperature for 2 hours. Then cover and transfer to the fridge to cool for at least another 2 hours, or up to overnight. (I did overnight.)
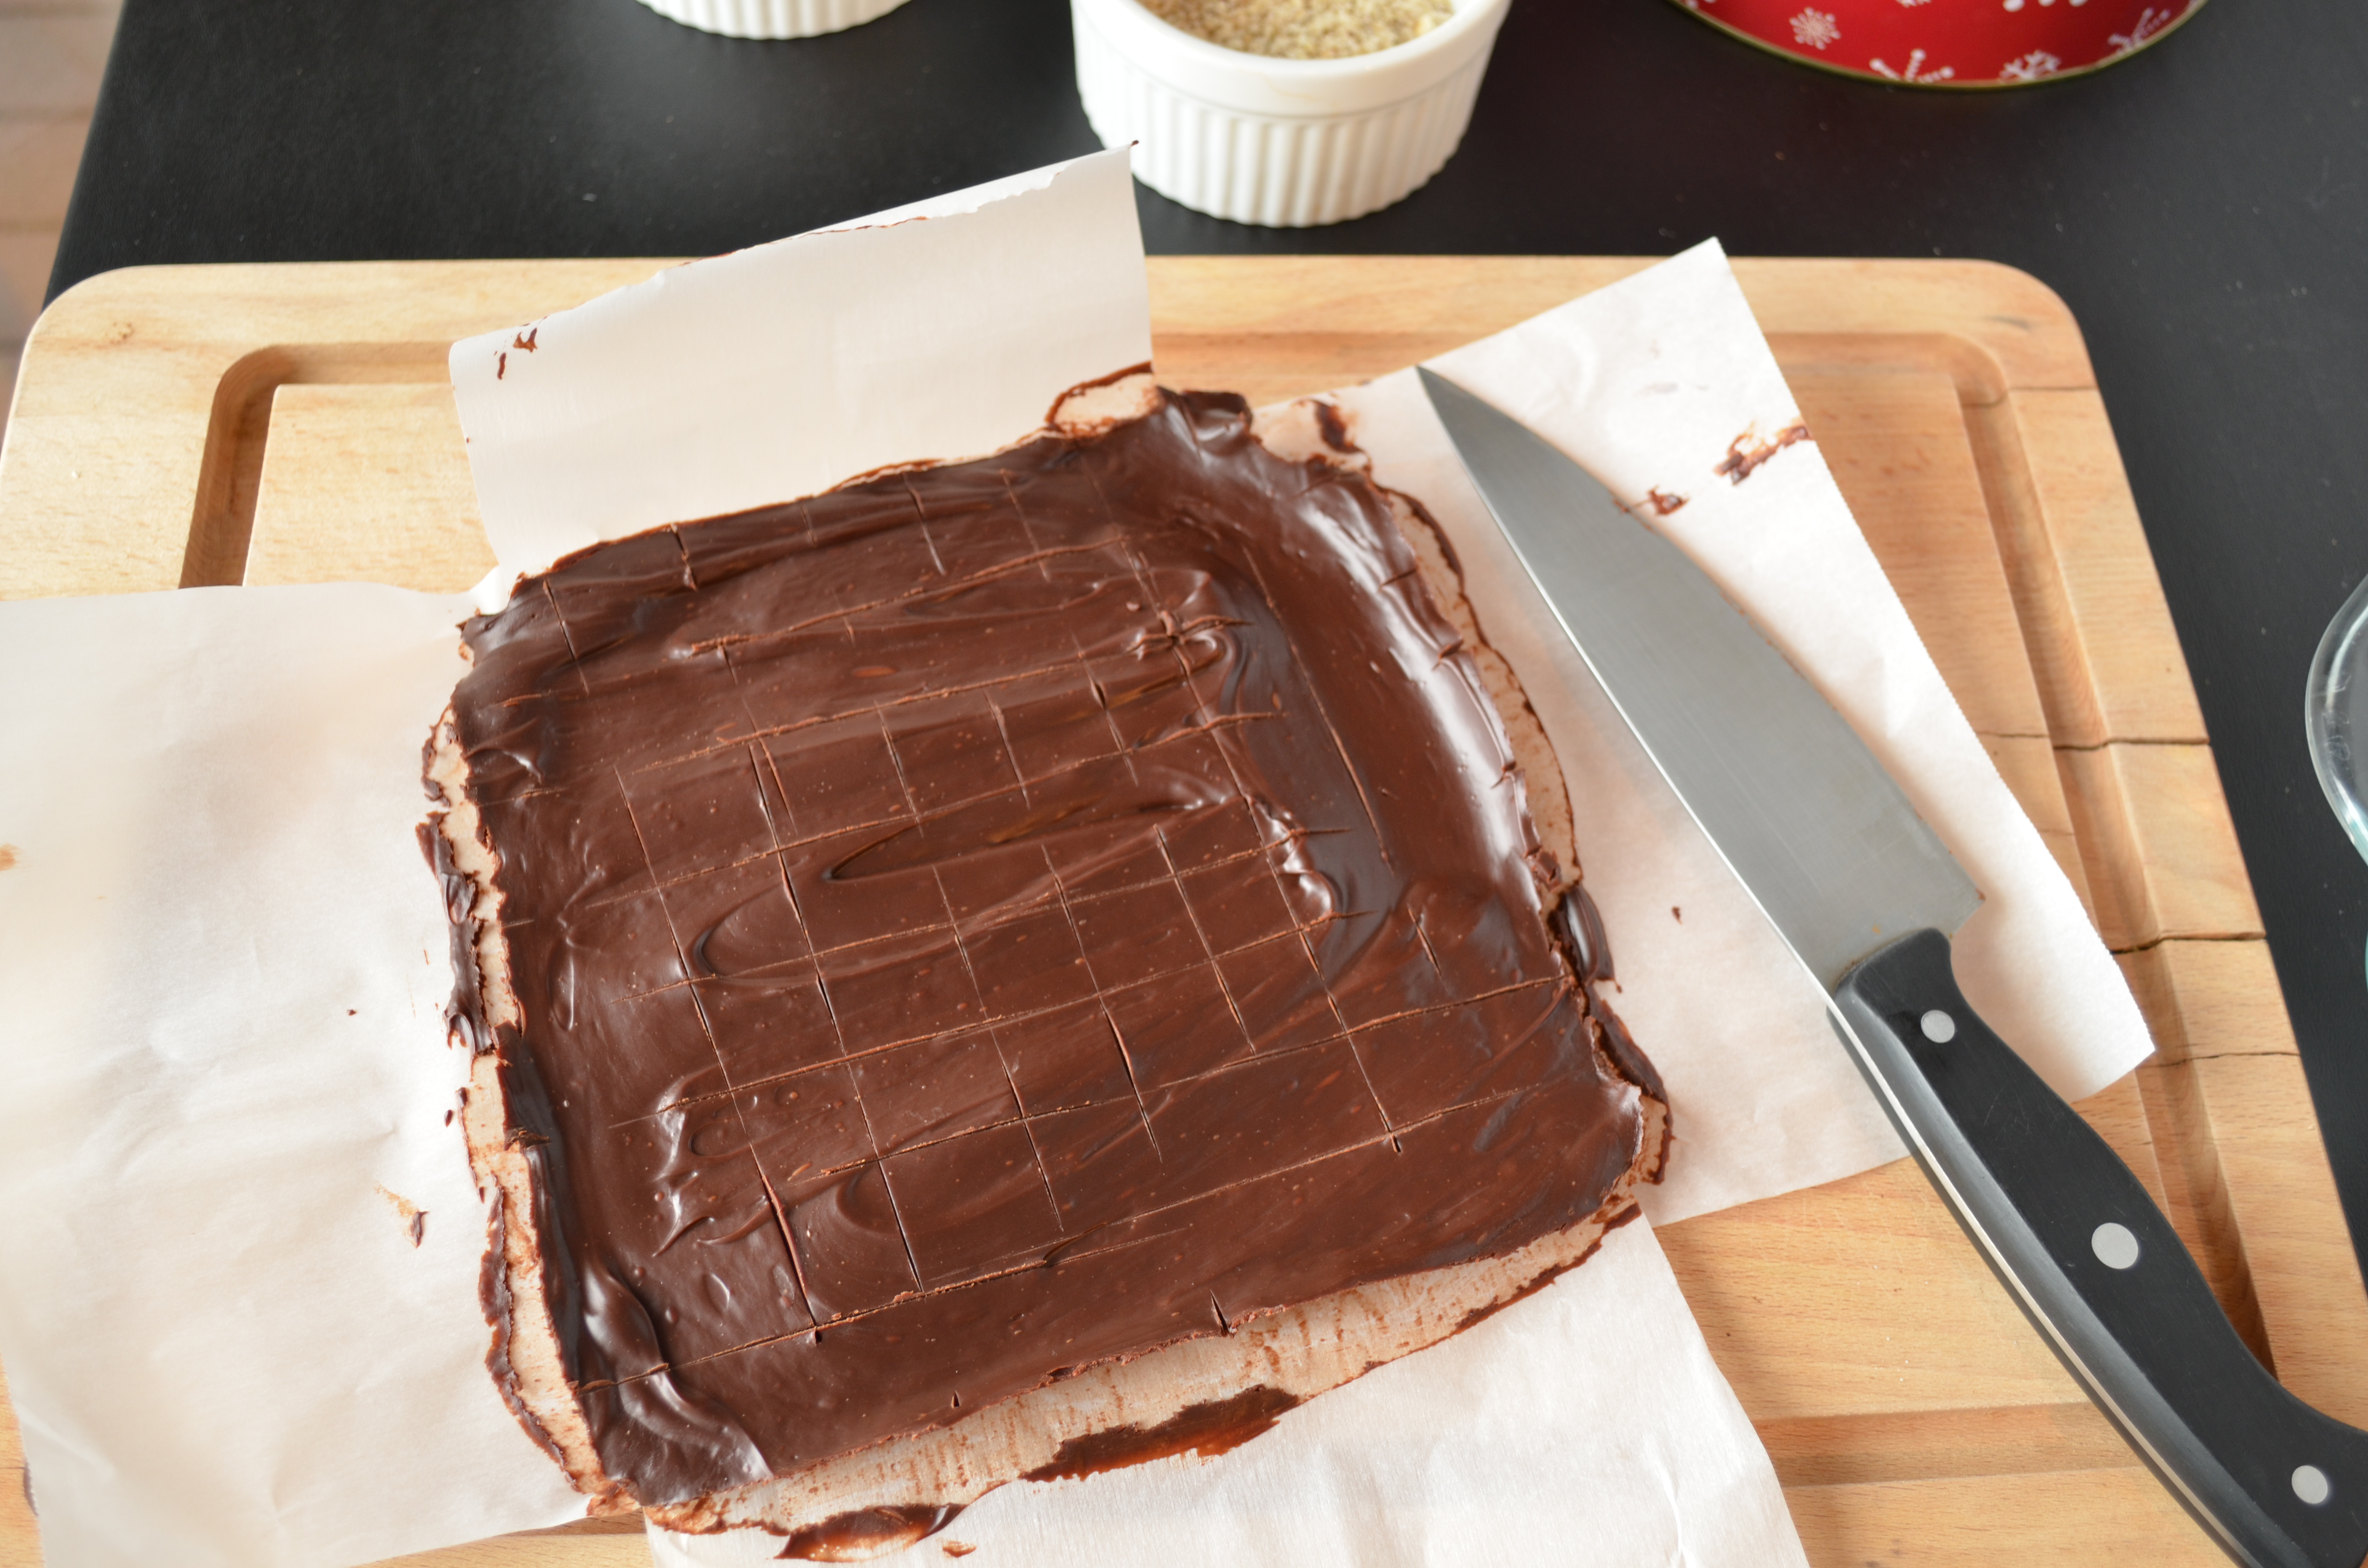
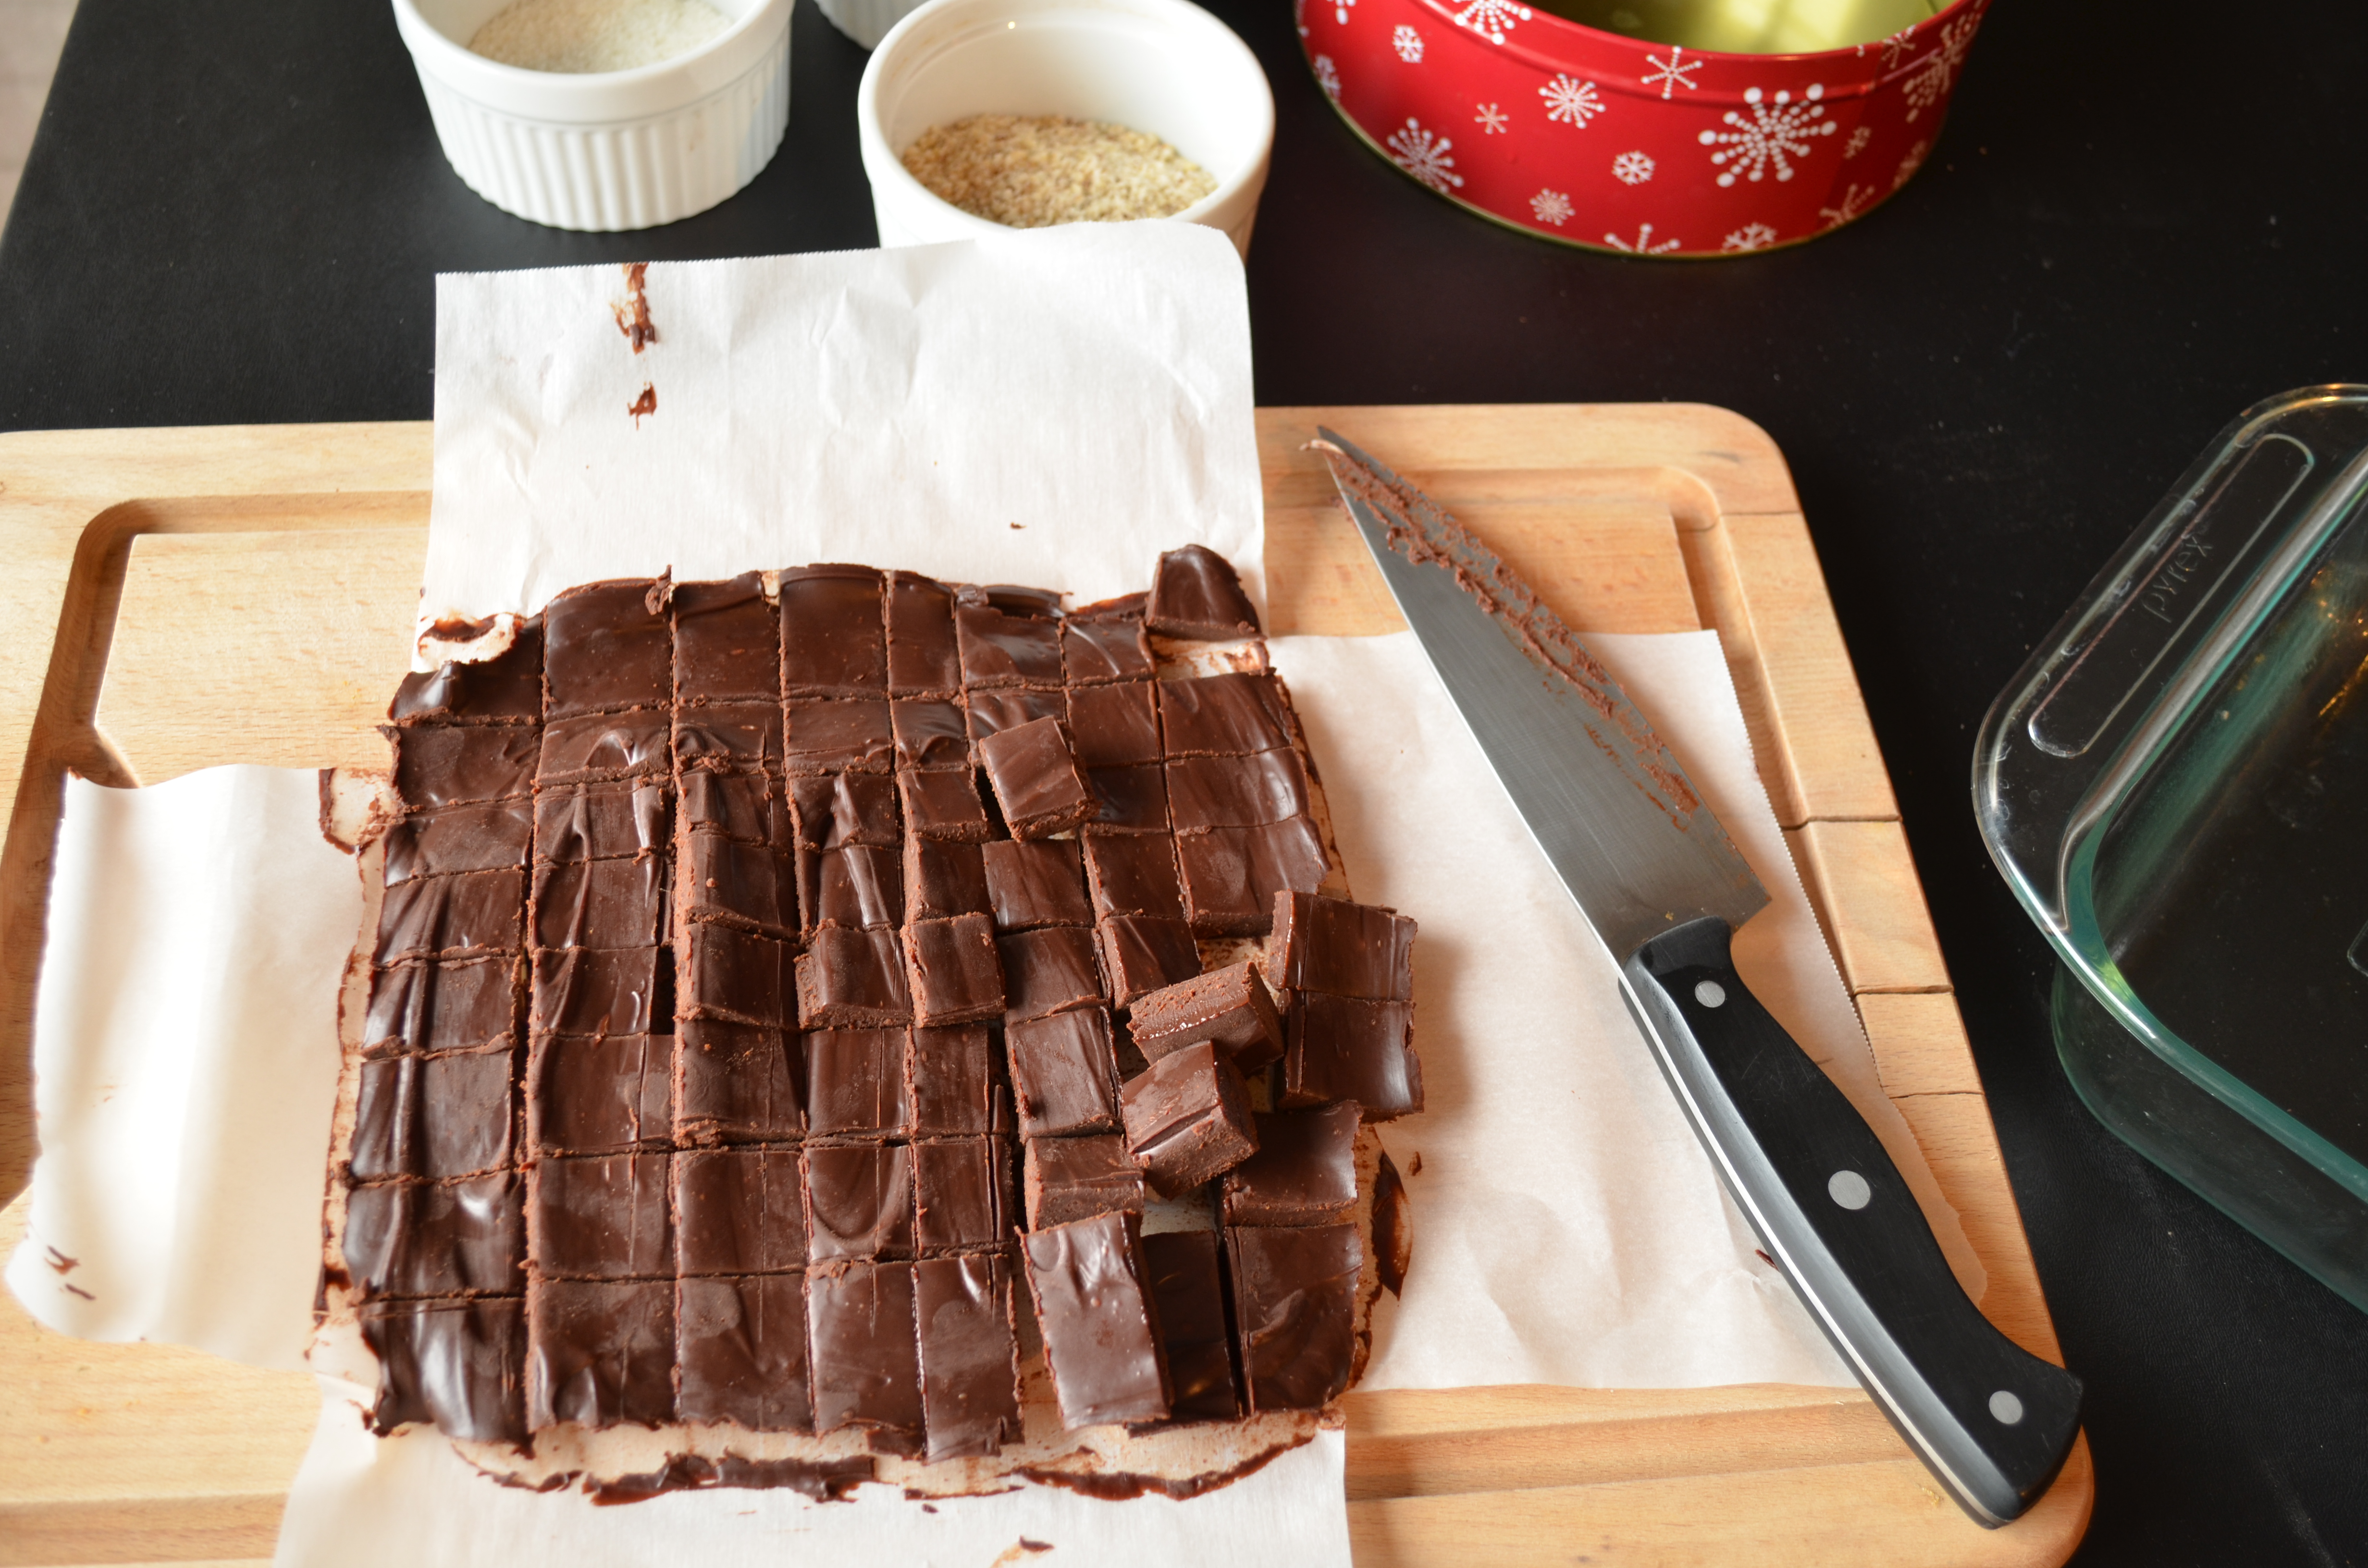
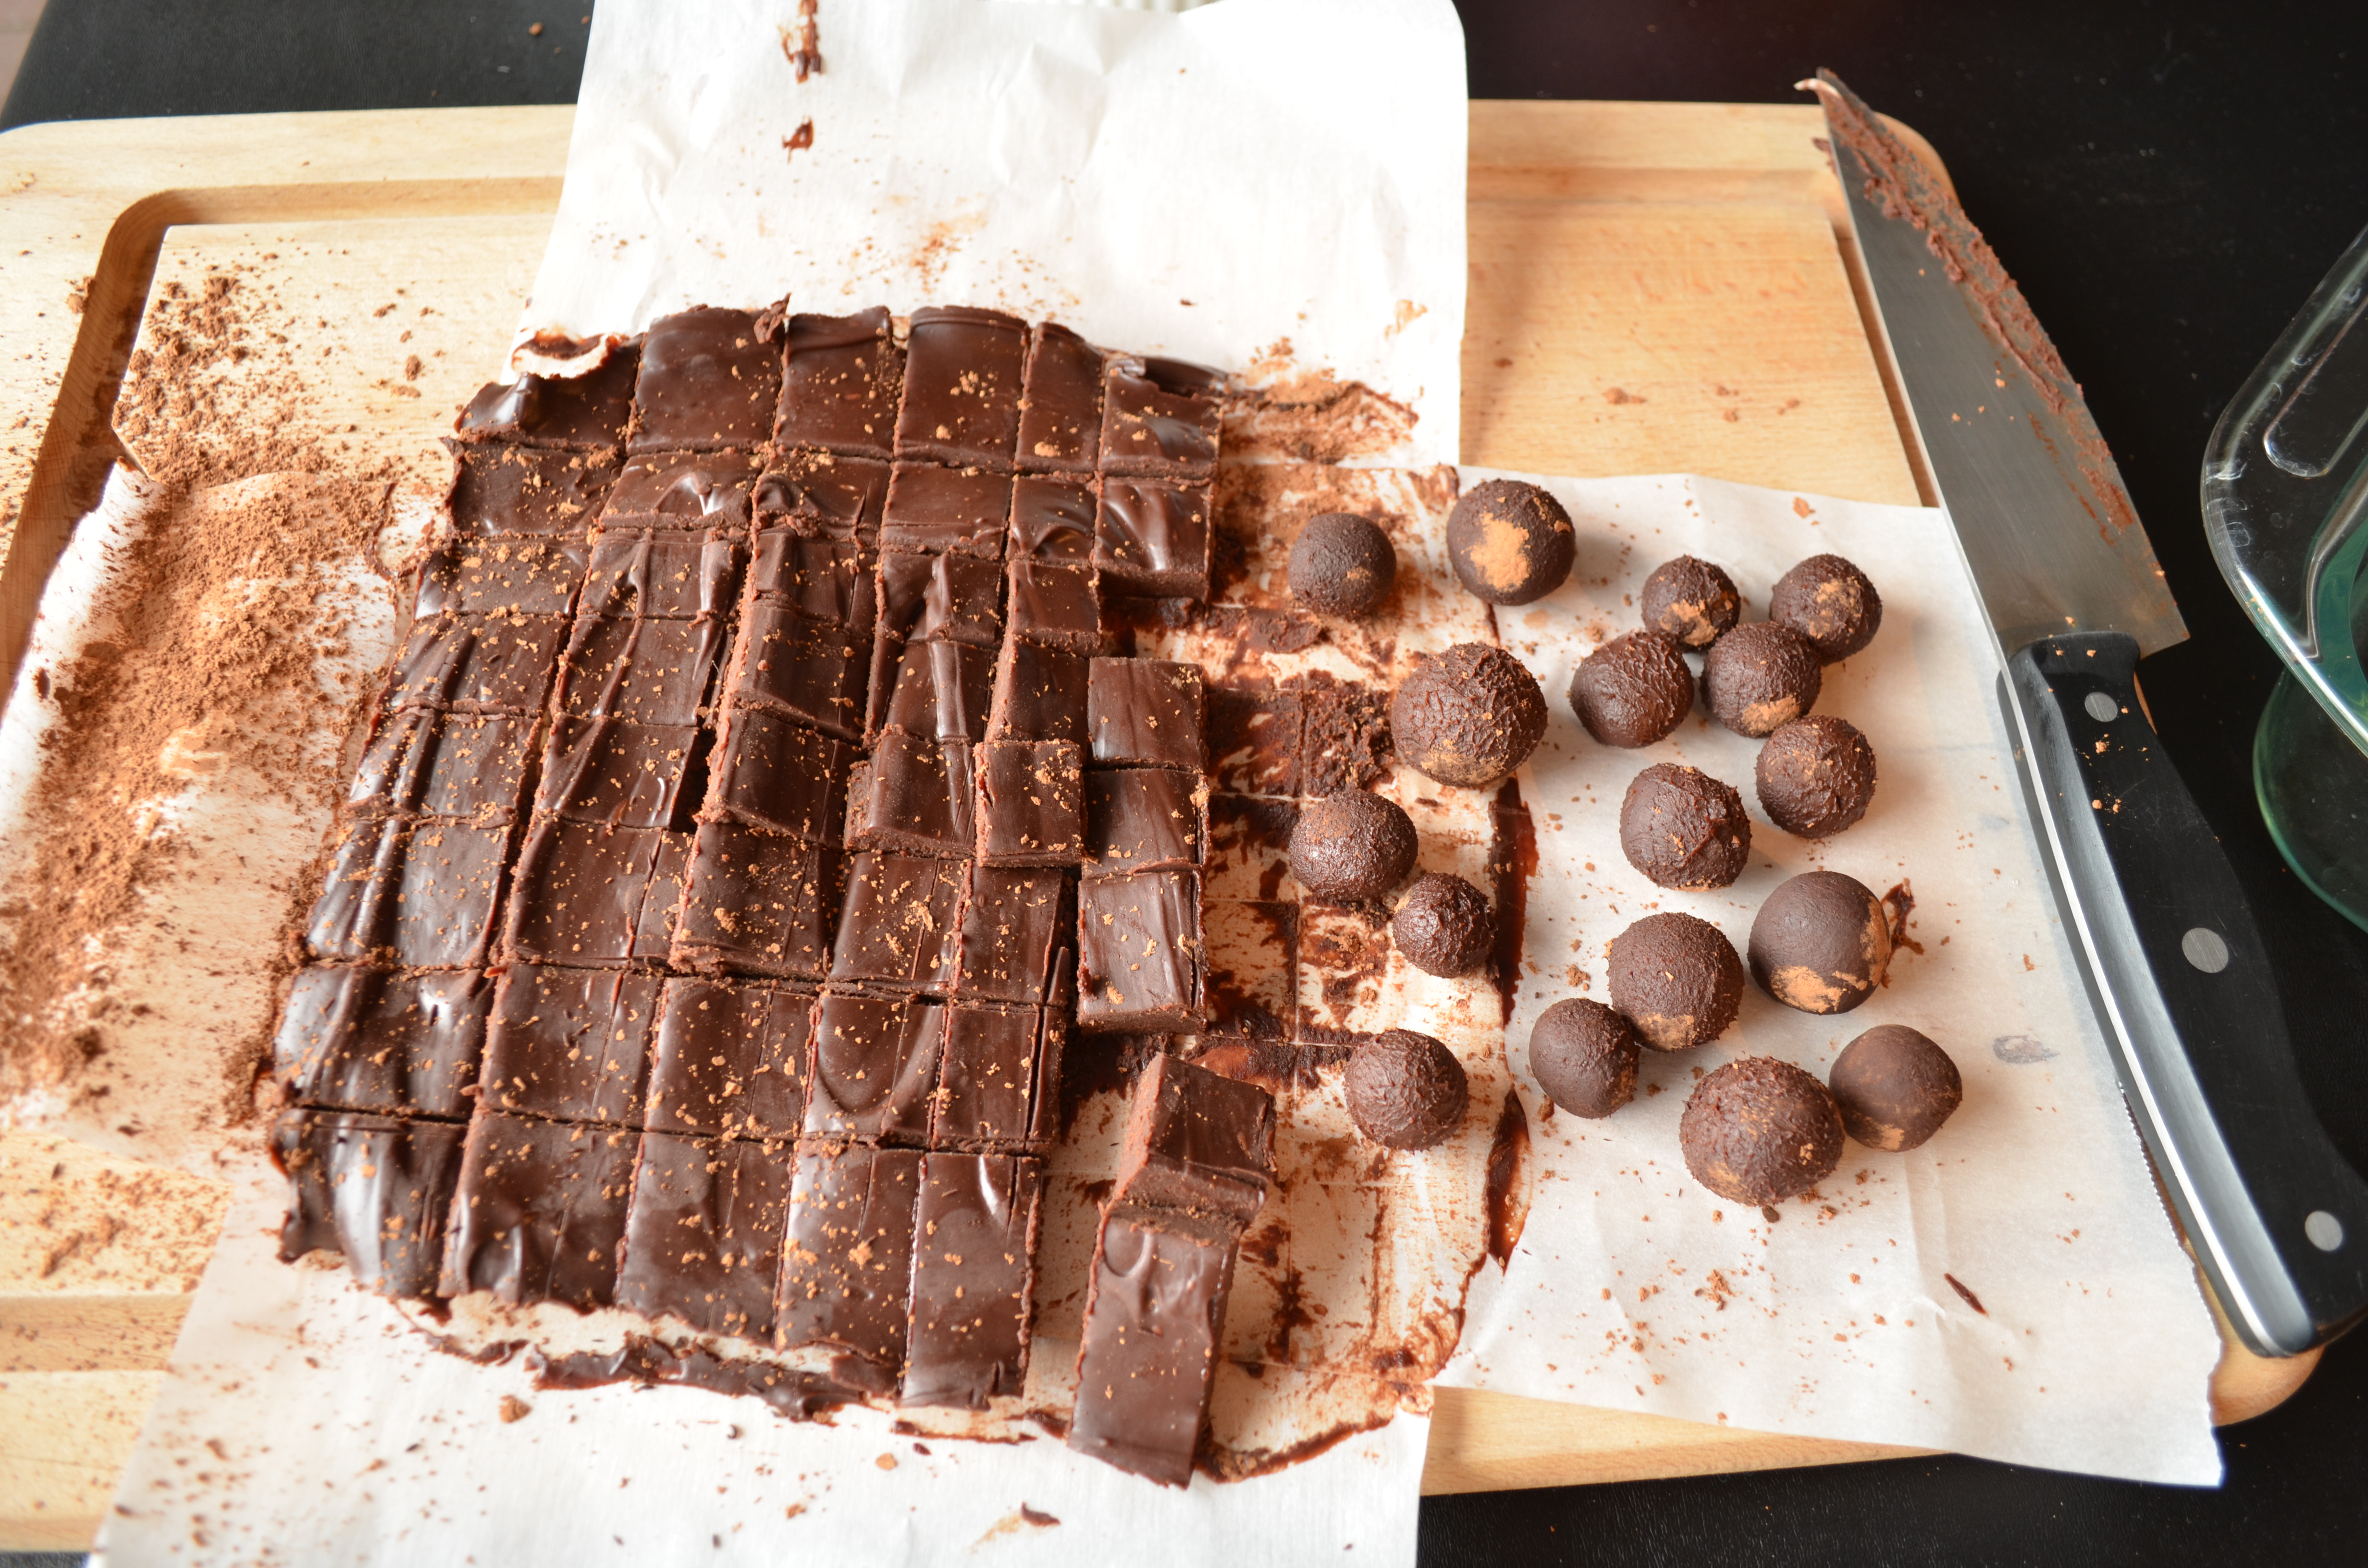
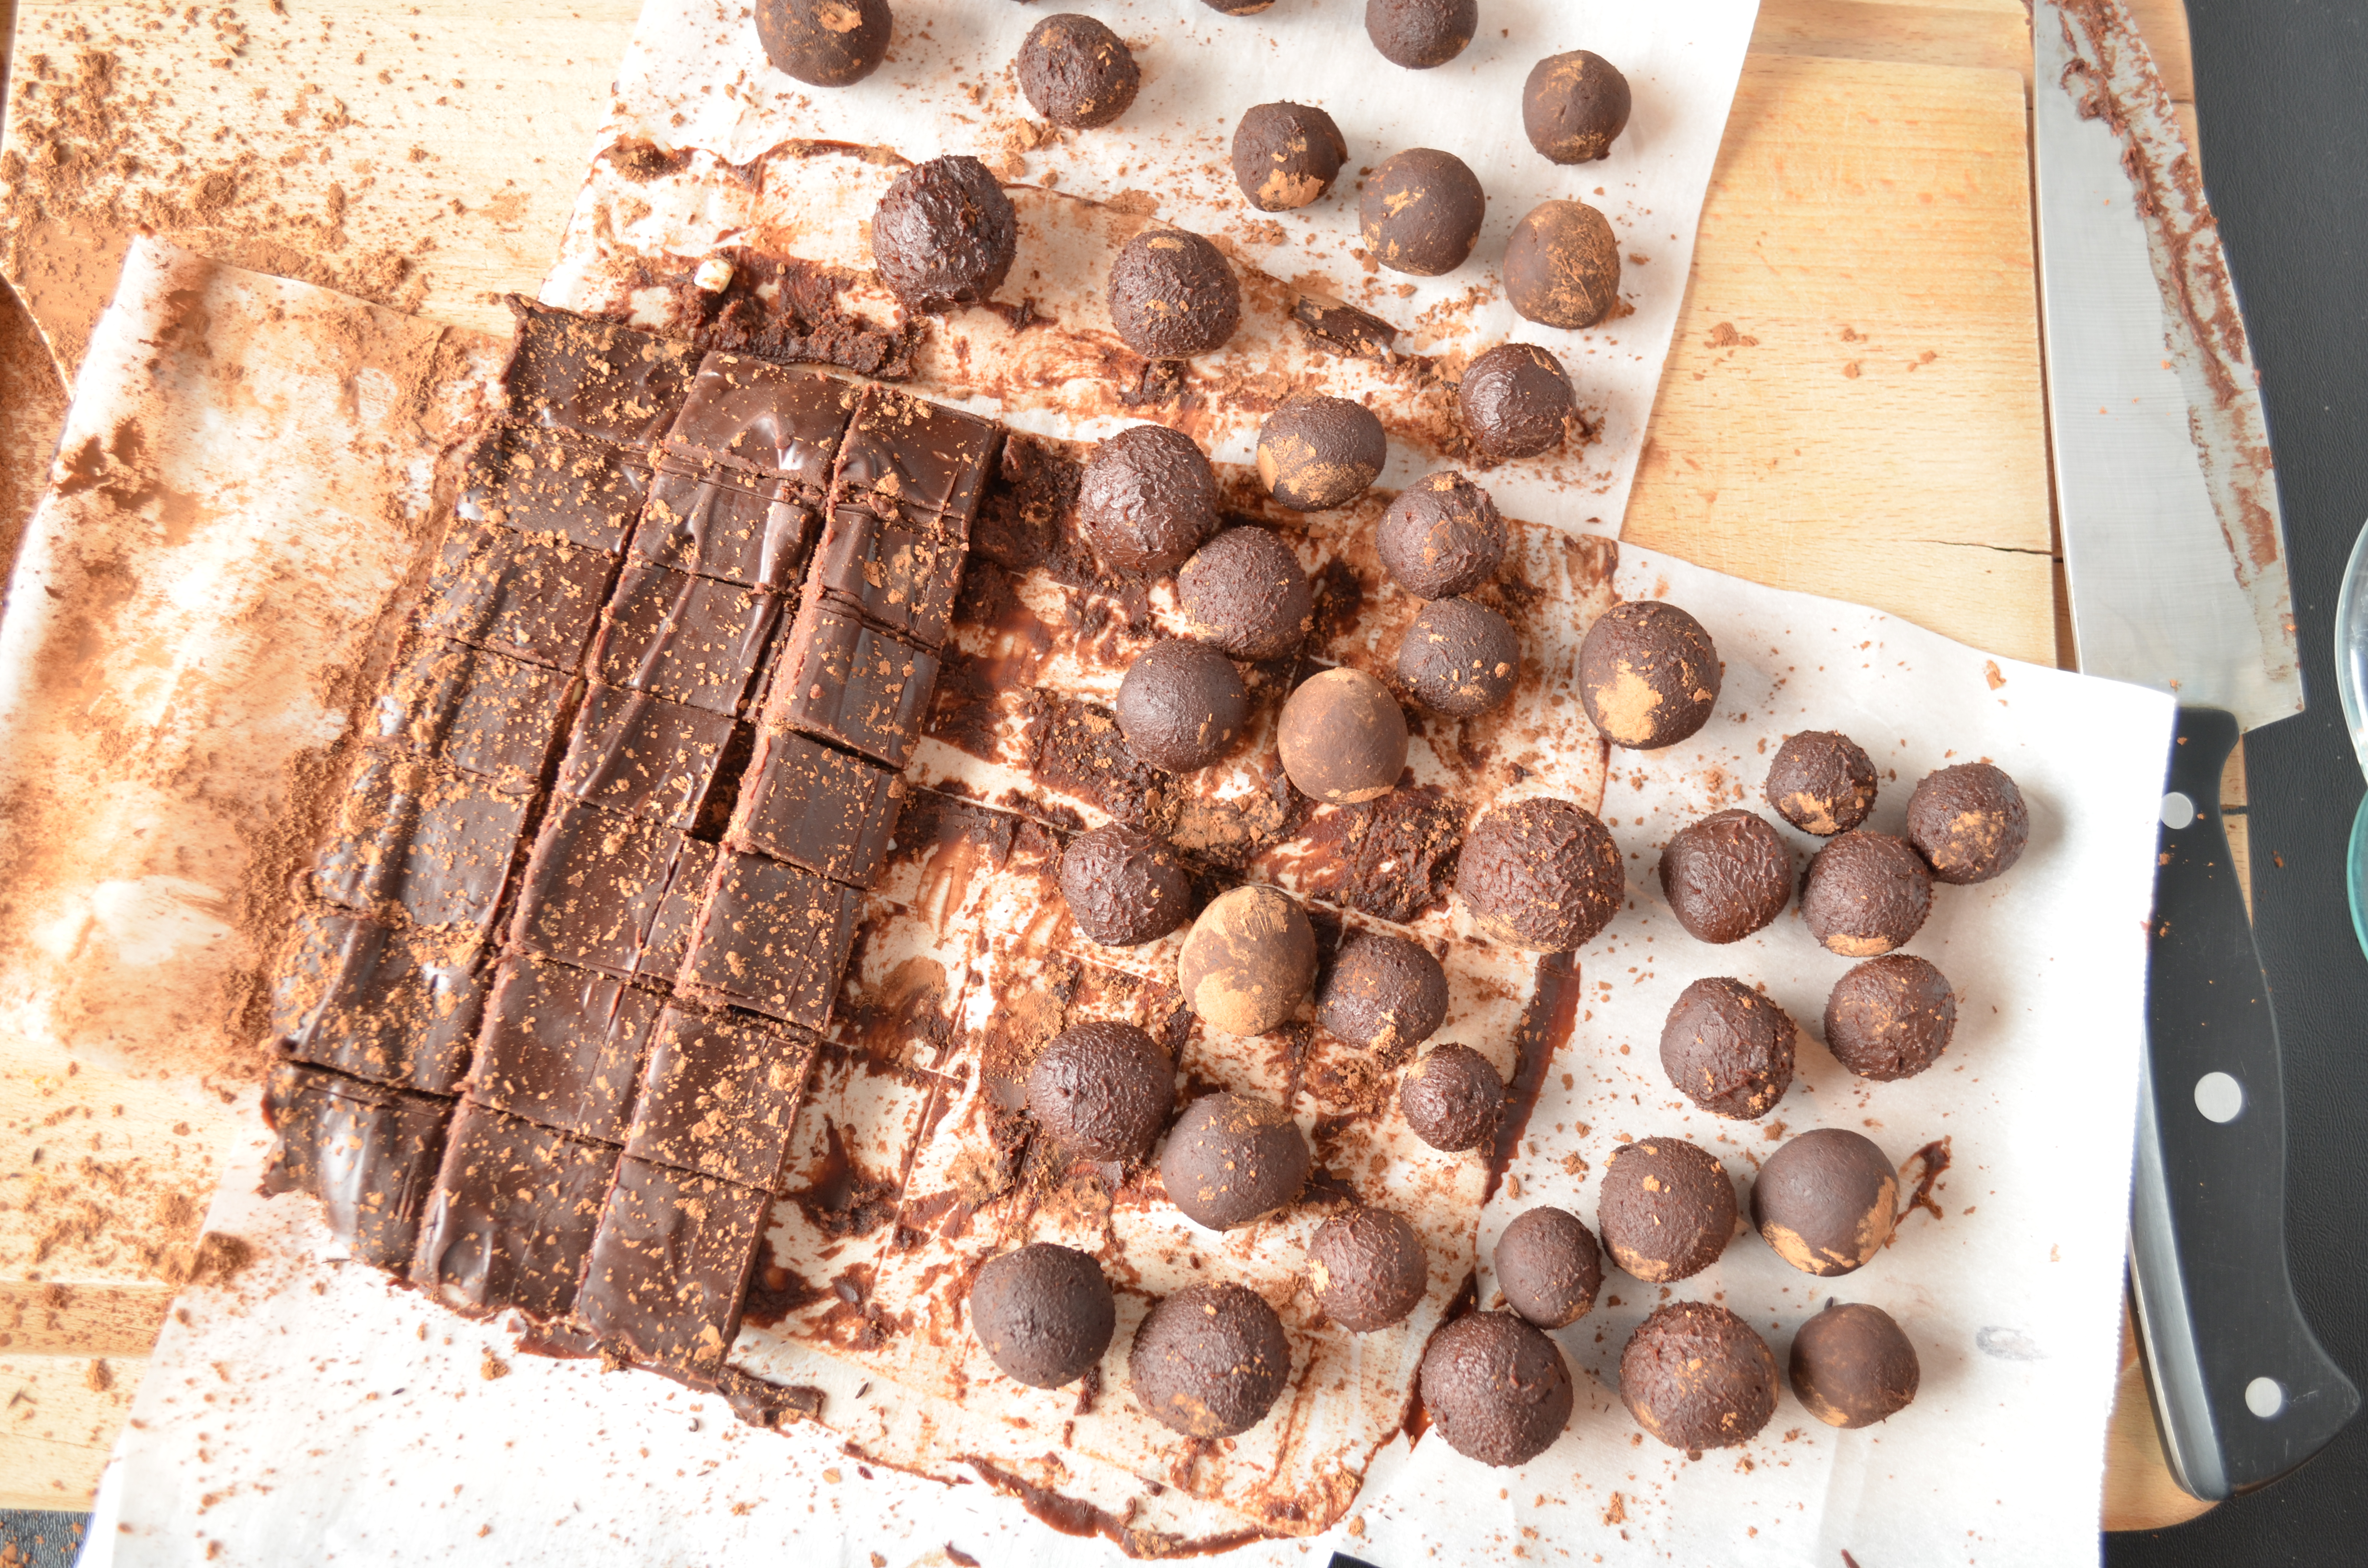
After truffles have cooled for the allotted amount of time, remove from the refrigerator. Using the parchment paper, pull the layer of chocolate out of the baking dish. Run a sharp knife under hot water, and cut the square of chocolate into 64 squares (8 rows by 8 rows). Coat palms lightly in cocoa powder and roll each square into a ball. You may find that about halfway through, the chocolate is too warm to roll into balls. In this case, refrigerate the remaining squares for 5-10 minutes, then continue.
Now you are ready to coat the truffles. If coating in sprinkles, nuts, cocoa powder, etc. instead of melted chocolate, simply roll each truffle in your hands for a few seconds to warm it and make the outside stickier, then roll in the desired coating. If coating in chocolate bark, microwave chocolate bark in 30-second increments, stirring in between, until melted. Roll each truffle around in the chocolate bark, using a fork, until thoroughly coated. Set on a plate or baking sheet and sprinkle with a pinch of sea salt. Drag a toothpick around the bottom of the truffle to cut off the chocolate “foot” that might develop as some of the chocolate coating slides down the truffle. This will make that easy to break off, leaving you with round truffles, rather than round truffles sitting in pools of hardened chocolate. Chocolate bark should harden within several minutes, at which point you should definitely sample one, and then return the rest to the refrigerator for another 2 hours.
These truffles are best stored in an airtight container in the refrigerator. Allow to sit at room temperature for 5 minutes or so before serving.
Enjoy, and happy Valentine’s Day (tomorrow)!
Time:
7 hours (1 hour active time)


OMG Yummmm!! If I wasn’t giving up sweets for the next 40 days, I’d be making these for my hubs. Although, I COULD make some to hand out as treats at work! :)
These look fantastic! So delectable and rich. Beautiful pictures :)
If I ask you to be my Valentine, will you ship me 500 of these?
I busted out laughing when I read you brought veggies to a V-Day party – this is so the same thing I would do…I’d probably get some eye rolling but at least there’d be some vitamins present ;) Your truffles look boooooooooonkers amazing!!! I’ve only made truffles a couple of times and I like your method of cutting squares and then rolling…looks like it turned out perfectly for you, so I’m all amped up to give it a go!
Oh man….Salty chocolate truffles. I’m in heaven. Actually make the hell, I need to get on the other side of my computer screen and dive head first into a plate of these!
These look SOO tasty! I love trufflse, the smooth creamy inside :) YUM. I prob wont have time to make any fun desserts for vday this year :(
I always thought truffles would be super hard to make, too. Now I guess I have no excuse for not trying!
Hmmm, those look incredible. So neat that you made them at home.
I reeeeally wanted to try my hand at truffles this year for V-Day, but I thought it’d be hard without a melon baller. You have just proved me wrong! These all look amazing.
Since I’m short on time, I bought some brownie mix to make Iowa Girl Eats’ ‘semi-homemade’ brownie truffles instead. Chocolate is chocolate, after all! But I’ll secretly be wishing I had made these :)
I was contemplating buying a melon baller before I found this recipe! I’ll have to check out the semi homemade brownie truffles… those can’t be bad!
My mouth is watering! Won’t be able to make them in time for Valentine’s Day – can’t wait for the weekend!
OMG these looks like heavennnnn!
Oh yum. I have a bad feeling that I would eat this entire batch before they even made it into truffle form! Happy Valentine’s Day :)
I certainly did my best to do that, too :) Happy Valentine’s Day!
Dark chocolate is a new found love of mine. I cannot believe that I never used to like it!
Oh truffles sound heavenly right about now. I agree, chocolate is the best color!