Coffee & Quinoa

  • Home
  • About
  • Recipes
  • Links
  • Contact
You are here: Home / Archives for Home / Dessert

Nutella Pizzelle Ice Cream Sandwiches

April 22, 2013 by Erica

Pizzelle Nutella Ice Cream Sandwiches

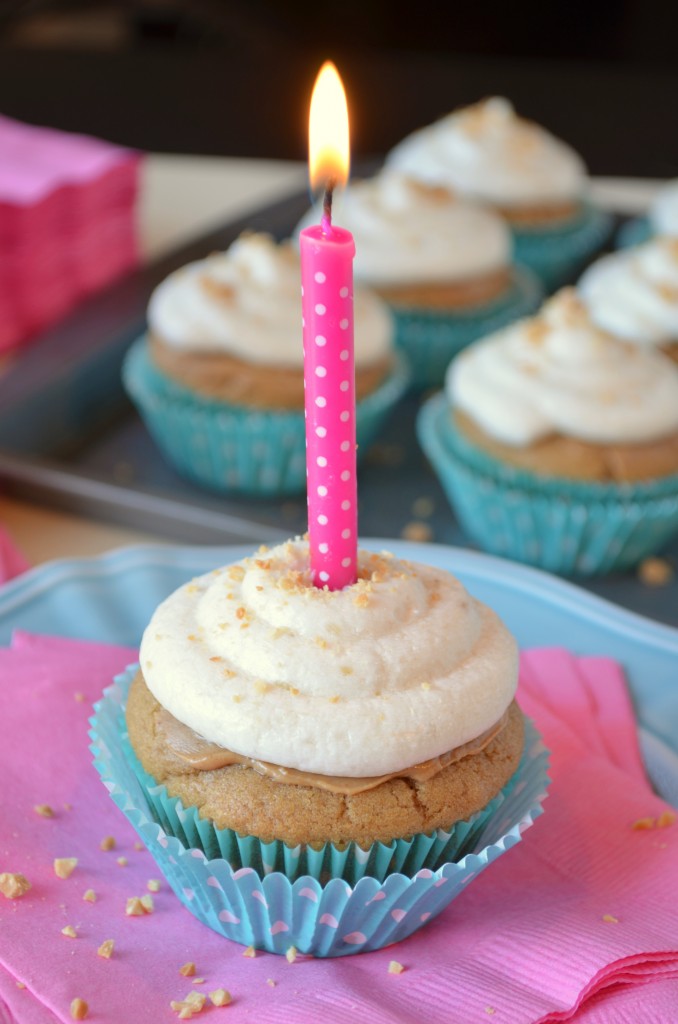
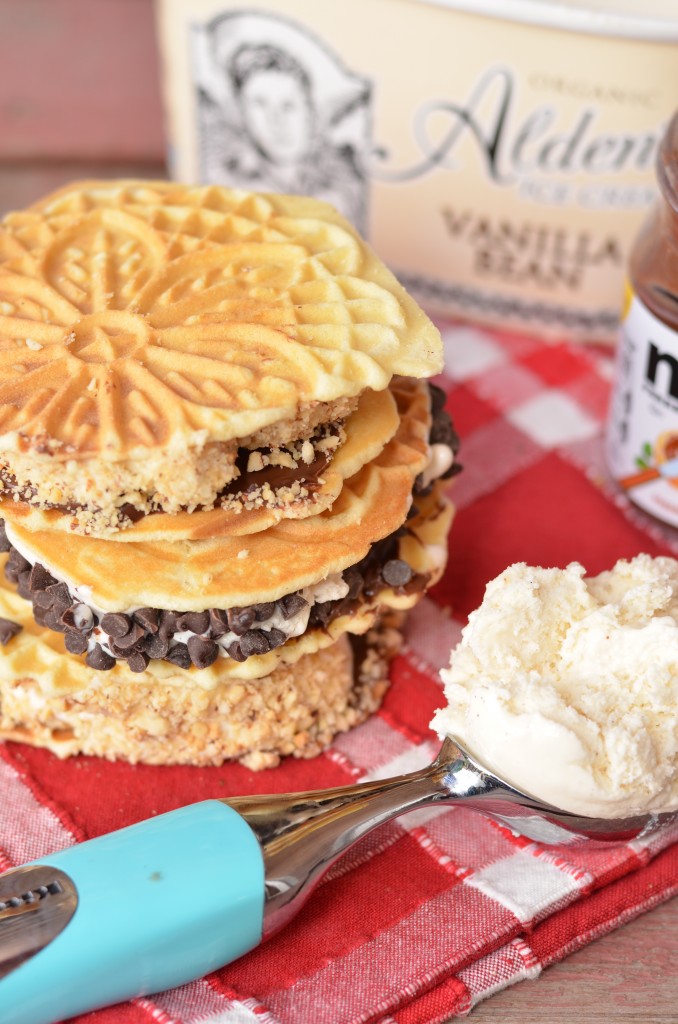
Do you know what pizzelle are?

Even harder question: Do you know how to pronounce “pizzelle”?

I thought I did… until the woman at the bakery where I bought these made it rhyme with “gazelle.” Pazelle. Huh. Or maybe she was rhyming it with “Gisele”? I’m not sure, but it really threw me for a loop. In my puzzling over the pronunciation, I hadn’t even considered that option. Some googling put me back on track, though, and I think I can now confidently say that an acceptable Americanized pronunciation is “Pete’s ellie.” And yes, all we’re going for is an acceptable Americanized pronunciation, so that you don’t stumble over the word, but can also use it in a sentence without pretentiously faking an Italian accent.

Pizzelle Nutella Ice Cream Sandwiches

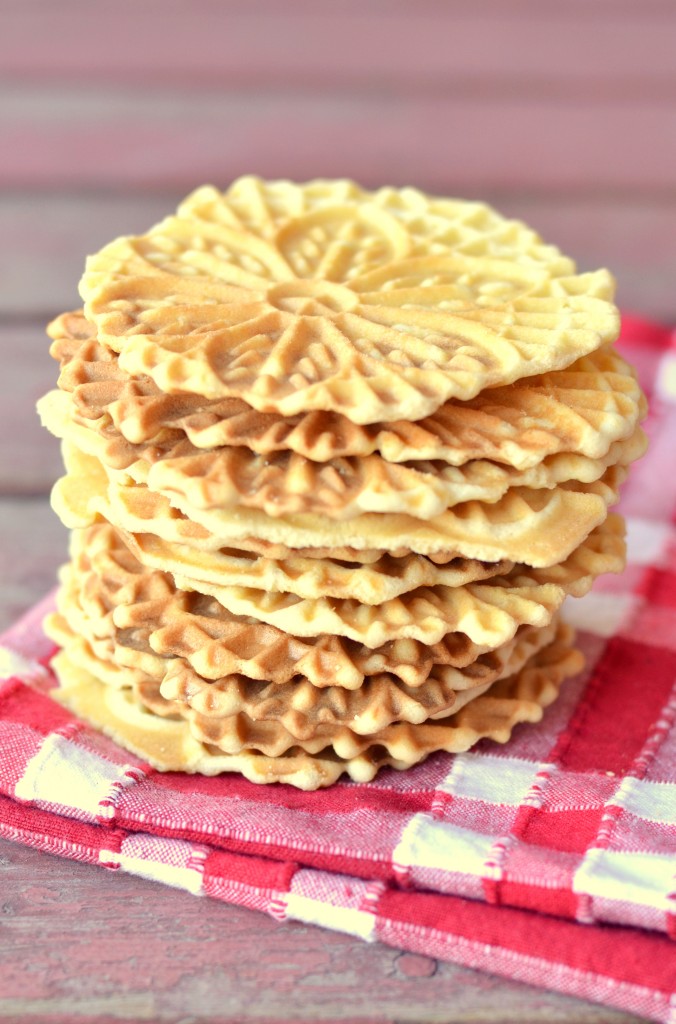
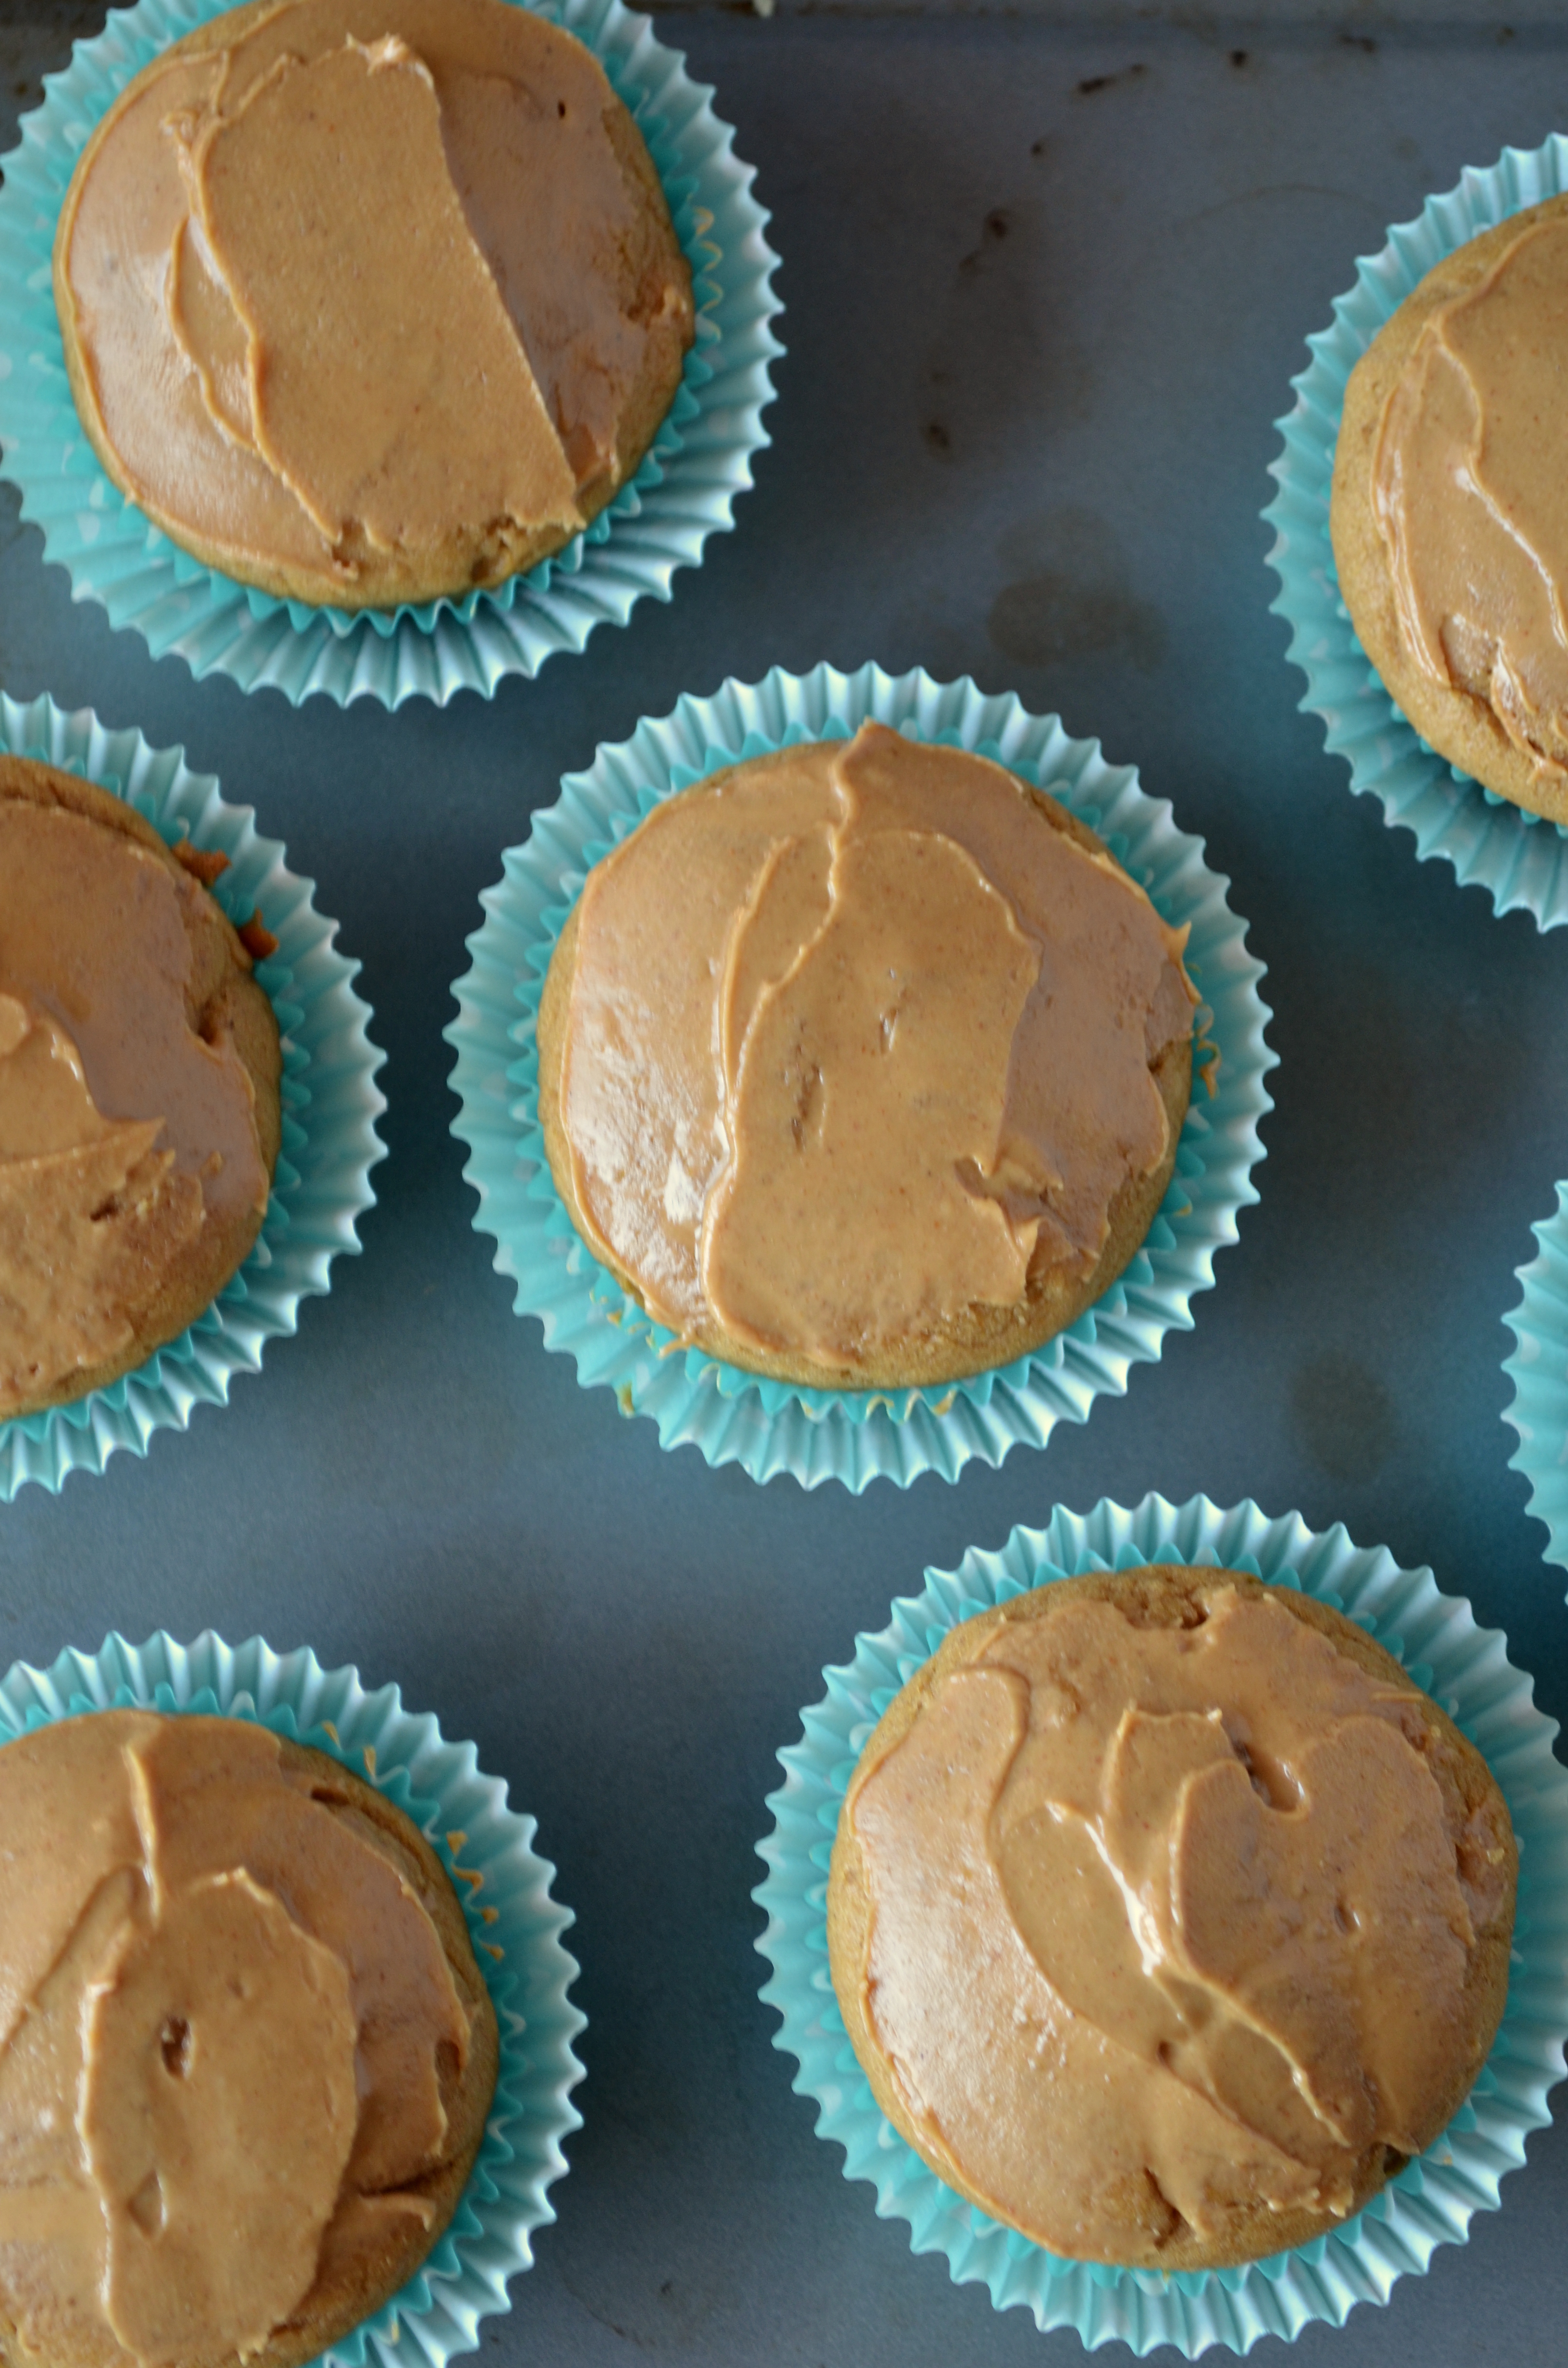
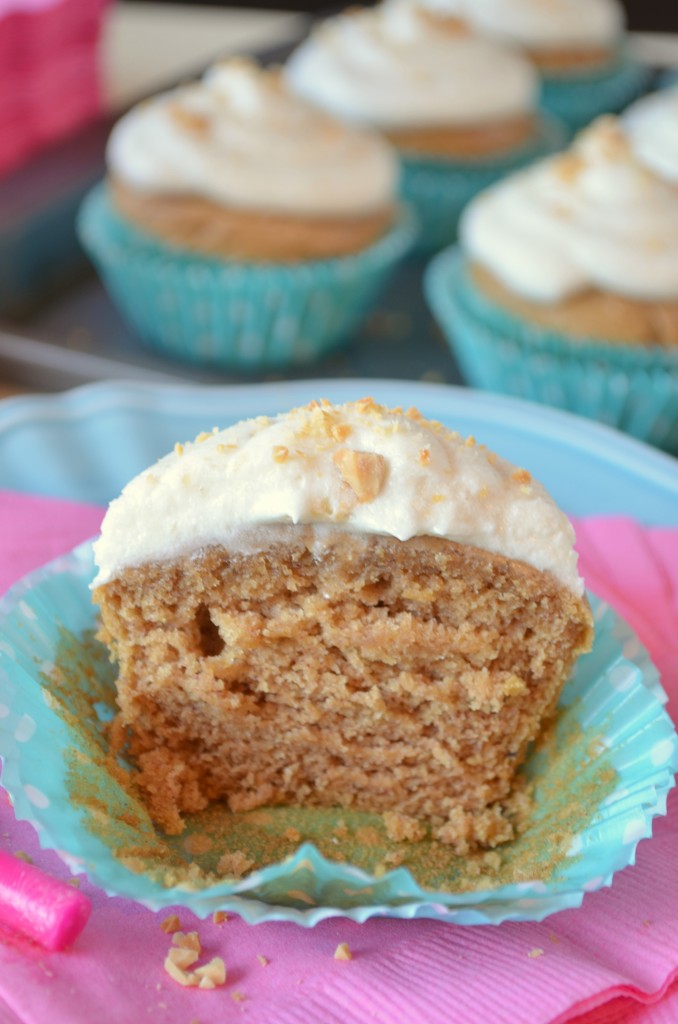
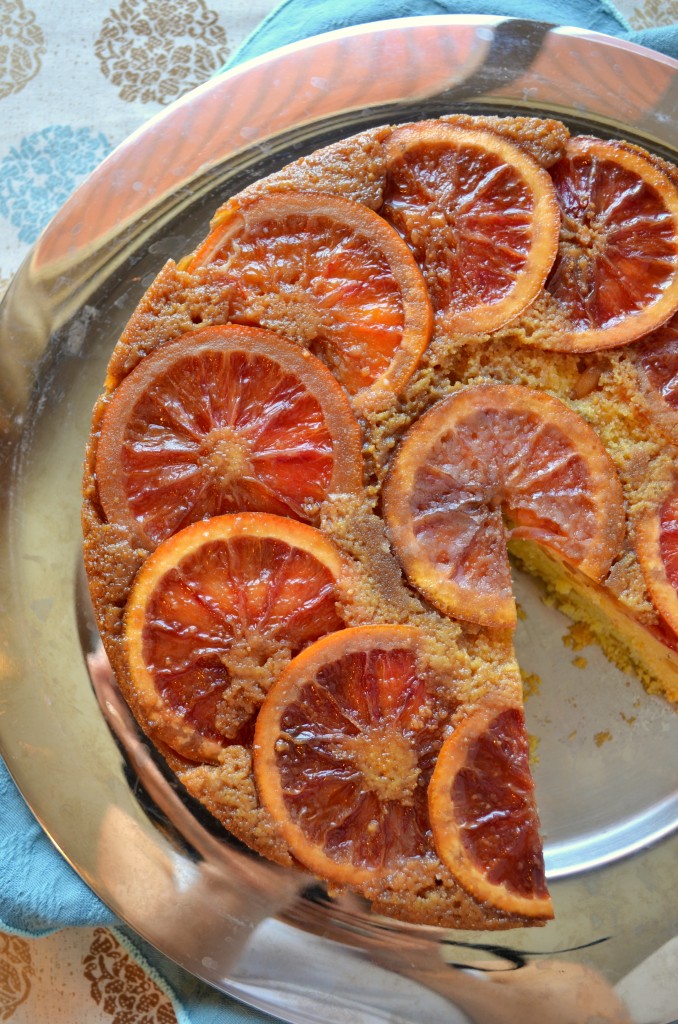
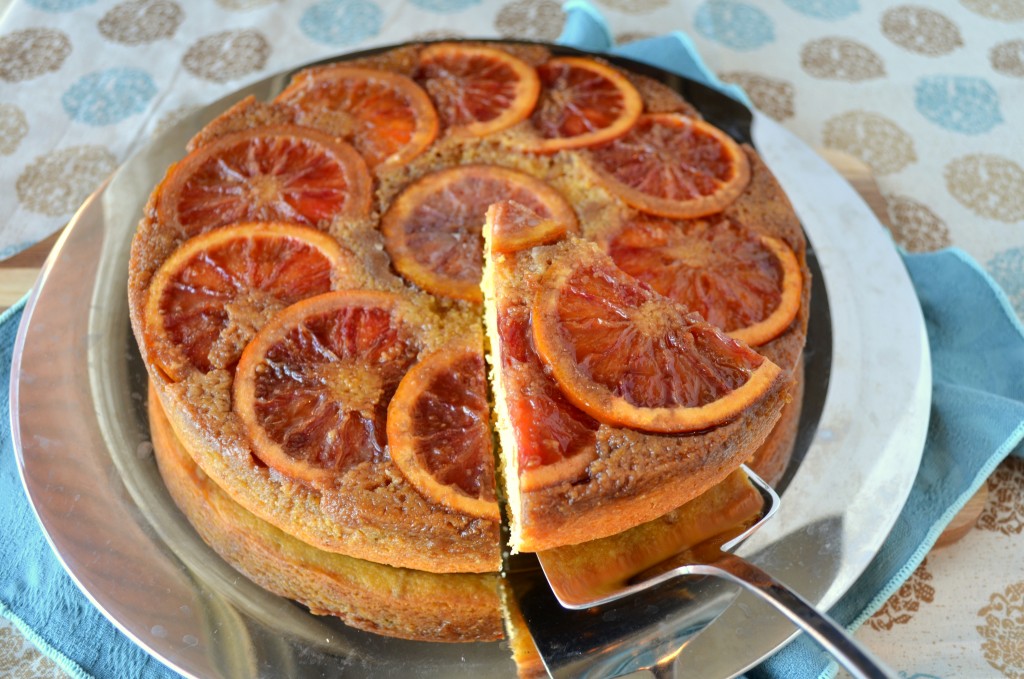
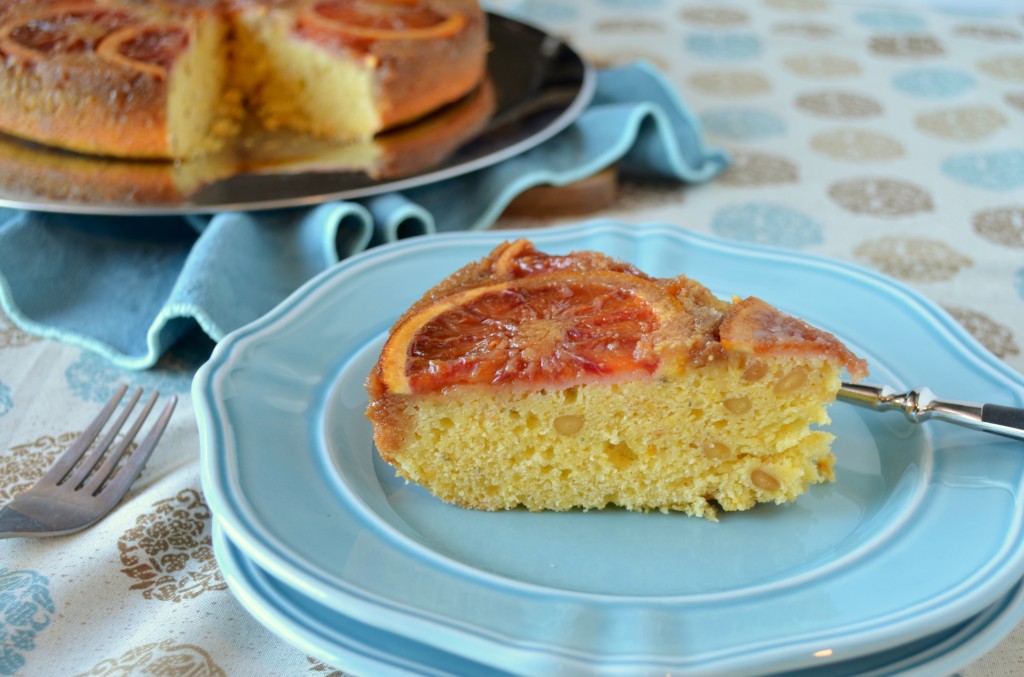
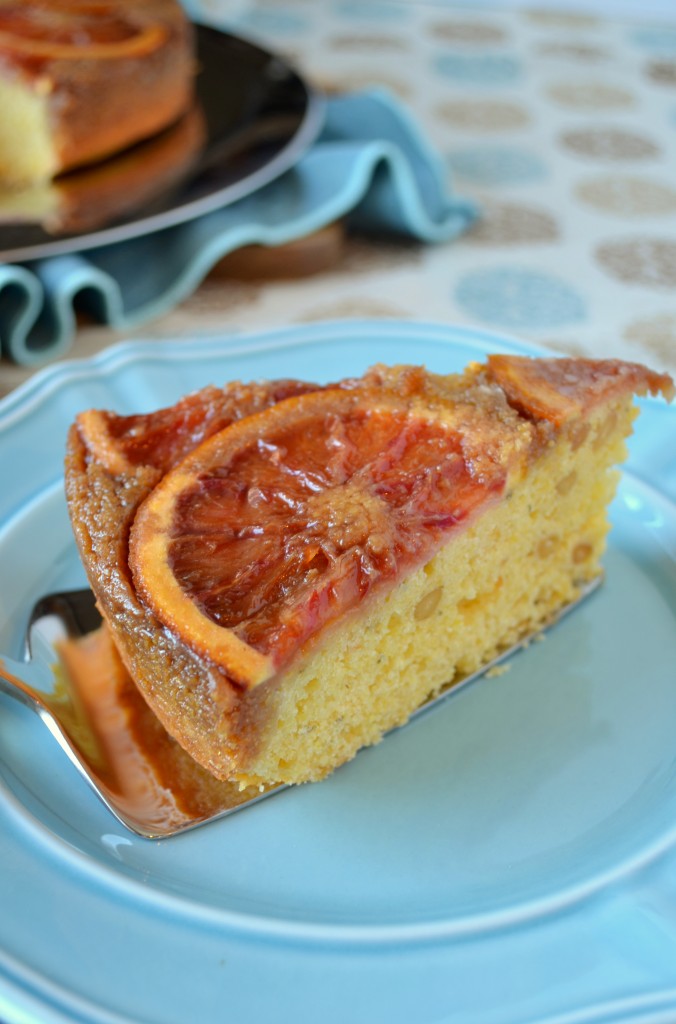
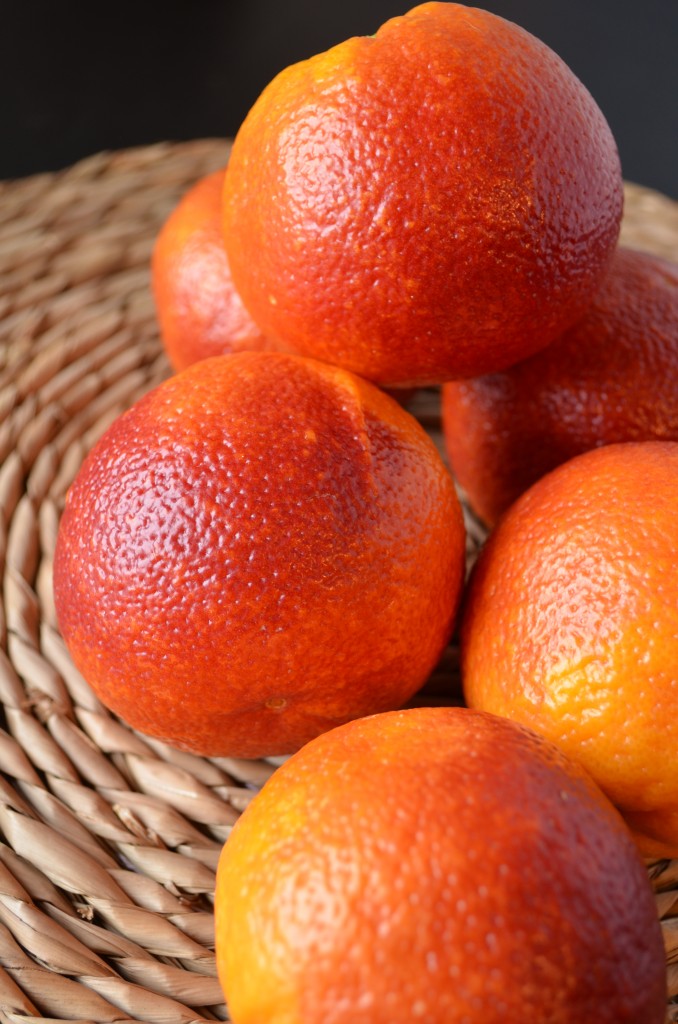
Anyway, let’s get back to the first question. What are the darn things? Well, they’re Italian cookies that look like thin waffles. They’re sweet, usually crunchy, and sometimes dusted with powdered sugar. The ones I bought were almond-flavored, but they are also commonly flavored with anise or citrus.

… 

Read More »

Filed Under: Dessert Tagged With: chocolate, cookies, dessert, ice cream, nutella

Peanut Butter Birthday Cupcakes with Banana Buttercream Frosting

March 21, 2013 by Erica

Peanut Butter Birthday Cupcakes with Banana Buttercream Frosting

Happy birthday to meeee!

I turn 26 today. Probably not the most exciting age, but still one I hope will bring good things.

Peanut Butter Birthday Cupcakes with Banana Buttercream Frosting

25 was a great year. It wasn’t full of huge changes or excitement, but I’d like to think I started spending more time on things I enjoy over the past year. I’m definitely feeling happy at the end of 25, so I can only hope 26 brings more of the same!

No big celebrations planned for 26. In case you don’t know, I kind of dread being the center of attention, so I sometimes find my birthday a bit embarrassing. Weird, I know. Last year Nate threw me a surprise party, which was amazing – I was SO surprised! – but I asked him pleeeease not to do that this year, because I just can’t handle it! My last surprise party before that was my 16th birthday, so hopefully I have another 10 years or so before the next one. On the 9 birthdays in between, I prefer just a romantic dinner with my sweetie!

Something else I think I’ll want on my birthday for the next 9 years? These cupcakes.

Peanut Butter Birthday Cupcakes with Banana Buttercream Frosting

Peanut butter cupcakes with a banana buttercream frosting. If that doesn’t make your heart skip a beat, I’m not sure what will.

I have been on a huuuuge peanut butter kick recently. Recently, like for the past year. Peanut butter dolloped on my oatmeal, spread on my fruit, melted over vanilla ice cream and a brownie (what?), and blended into my smoothies and salad dressings. And these cupcakes are pretty much my ultimate peanut butter lovin’ creation.

Peanut Butter Birthday Cupcakes with Banana Buttercream Frosting

As they should be; it took me THREE batches of cupcakes and FOUR batches of icing to perfect this combination. (Well, one of the batches of cupcakes was because I managed to double everything except the flour… details.)  These cupcakes aren’t fussy or anything, it’s just that I wanted to make sure I had the perfect cake+icing combo to celebrate my birthday. At one point I tried to use a peanut butter frosting with the peanut butter cupcakes. I thought it was delicious, but was informed by Nate that we might as well be eating peanut butter straight from the jar. I told him not to be silly… these are much healthier than straight PB! Kidding. But I’m glad I listened, because these cupcakes and this soft buttery banana icing are meant to be together.

And as a compromise, I snuck a little extra smear of peanut butter onto each cupcake before I iced them.

DSC_1312

Heaven!

But OMG the frosting. Let’s not forget to talk about it. It is buttery, banana-y bliss. I wasn’t too sure how a banana would fare in a frosting, but it turns out the answer is VERY WELL. As long as you use a ripe, fresh banana. First I tried using an overripe banana I had defrosted from my freezer (cause those are delicious in smoothies and banana bread), but it turns out that was the wrong choice. (Remember how I had to make four different frostings?) But use a fresh banana here and I promise you’ll want to bathe in this frosting. For real.

Also, I should mention that it seems to keep well. I was a little nervous about it turning brown as bananas tend to do while the cupcakes sat in my fridge for a few days, but that wasn’t the case. Just as purdy as on day one!

Peanut Butter Birthday Cupcakes with Banana Buttercream Frosting

Wishing I could reach into my computer and grab that little cupcake right now. It’s my birthday, so I can totally lick the frosting off, right?

Peanut Butter Birthday Cupcakes with Banana Buttercream Frosting

5.0 from 1 reviews
Peanut Butter Birthday Cupcakes with Banana Buttercream Frosting
 
Print
Hands-on time
25 mins
Cook time
50 mins
Total time
1 hour 15 mins
 
Author: Erica
Yields: 10-12 cupcakes
Ingredients
For the peanut butter cupcakes:
  • 1/4 cup (1/2 stick) unsalted butter, softened
  • 1/2 cup smooth peanut butter
  • 1/2 cup packed brown sugar
  • 1 egg
  • 2 tsp vanilla extract
  • 1 1/4 cup all-purpose flour
  • 1 tsp baking soda
  • 1/4 tsp kosher salt
  • 2/3 cup milk (I used plain unsweetened almond milk)
For the banana buttercream:
  • 1 ripe banana, mashed (not overripe!)
  • 1/2 cup (1 stick) unsalted butter, softened
  • 1 tsp lemon juice
  • 1/2 tsp vanilla extract
  • pinch of salt
  • 3 cups powdered sugar
To top (optional):
  • Peanut butter
  • Finely chopped toasted peanuts
Instructions
  1. Preheat oven to 350 and place liners in cupcake tins.
  2. In a large bowl, beat together the butter, peanut butter and brown sugar for several minutes until light and fluffy. Add egg and vanilla and beat until smooth.
  3. In a separate medium bowl, sift together the flour, baking soda, and salt. Add the dry ingredients to the peanut butter mixture, alternating with the almond milk, beating well after each addition.
  4. Spoon batter into lined cupcake tins, filling each about 2/3 full. Bake until a toothpick inserted in the center of a cupcake comes out with moist crumbs, 18-20 minutes. Remove and cool completely before frosting.
  5. While cupcakes cool, make frosting. With a hand mixer (or stand mixer if you have one!), cream together the banana, butter, lemon juice, vanilla and salt. Beat in the powdered sugar, 1 cup at a time, until you have a creamy and spreadable frosting.
  6. Once cupcakes are completely cool, spread each with a thin layer of peanut butter, about a 1/2 teaspoon (optional). Spread or pipe with icing and sprinkle immediately with crushed peanuts, if using.
  7. Enjoy!
Notes
Adapted from Eat, Live, Run and AllRecipes.com.
3.2.1753


Peanut Butter Birthday Cupcakes with Banana Buttercream Frosting

Filed Under: Cupcakes Tagged With: baking, banana, birthday, butter & eggs, dessert, peanut butter

St. Patrick’s Day Guinness Milkshakes

March 11, 2013 by Erica

Guinness Milkshakes

Celebrating St. Patrick’s Day has never been my forte, despite the fact that I am from Boston and partly Irish. I’m sure that’s blasphemy to some of you, so let me explain: I’ve never been a fan of Bailey’s, and green does NOT compliment my skin tone. To add to that, St. Patty’s weekend also often coincides with my birthday weekend, meaning that I’m expected to drink Bailey’s and wear green, and call it celebrating my birthday. No fair.

Luckily, no one in Utah cares about St. Patrick’s Day. Like literally no one. Also, my birthday’s not til next Thursday, so no shared weekend this year, phew. So I’m free to celebrate St. Patty’s as I choose, and I choose Guinness milkshakes!

DSC_0881

Does a beer milkshake seem weird to you? Lay those fears aside. I can’t speak for other types of beer in milkshakes (for example, IPA just doesn’t seem like it would taste very good with ice cream), but Guinness is DELICIOUS in these. Even though I’m not usually a Guinness fan. Its nutty and bitter flavors complement the sweet ice cream perfectly.

Speaking of the ice cream, I discovered something really inconvenient while making these milkshakes. And that is that I do in fact like vanilla ice cream. I REALLY like it. I’m not sure why I thought I didn’t for the past 25 years. It is yummyyyyyy and of the quart I bought to make these milkshakes, I’m ashamed to admit how much little of it is now left.

DSC_0886

You can also make these with chocolate (or maybe even coffee?) ice cream if vanilla isn’t your thing. I tried chocolate too (obviously) and although I ended up surprising myself by preferring the vanilla, the chocolate was certainly not bad.

So, no green food coloring around here for St. Patrick’s Day. No Bailey’s and no boiled dinners. Just a 2-ingredient dessert that even skeptics of Guinness and vanilla will love.

I will probably end up wearing green, though.

Guinness Milkshakes

5.0 from 1 reviews
St. Patrick's Day Guinness Milkshakes
 
Print
Hands-on time
5 mins
Total time
5 mins
 
Author: Erica
Yields: 1 serving
Ingredients
  • 1 cup vanilla or chocolate ice cream
  • 1 cup Guinness
Instructions
  1. Add ice cream and Guinness to a blender or food processor and blend until smooth.
  2. Enjoy!
3.2.1682


Filed Under: Dessert, Drinks Tagged With: beer, chocolate, ice cream, irish, milkshake, st patrick's day

Blood Orange, Rosemary and Pine Nut Upside Down Cake

March 1, 2013 by Erica

blood orange, rosemary & pine nut upside down cake

Nate is going out of town this weekend, and I plan on taking full advantage.

blood orange, rosemary & pine nut upside down cake

Starfishing in my bed. Drinking the whole pot of coffee. Parking in our one covered parking spot. And cooking all his least favorite foods.

Now, you can’t get much more easy-going than my partner in crime. He’s an adventurous eater, and happily eats anything I put in front of him. He never once complained during my 6 months of strictly vegan cooking – I think that pretty much says it all. But there are a few flavors he doesn’t prefer… and some of them happen to be my favorites.

blood orange, rosemary & pine nut upside down cake

That’s why I’ve had my weekend blog cooking menu ready since Monday. I won’t give it all away, but the general idea is this:

– Something with tahini.

– Something with horseradish.

– Something super spicy.

(Those are going to be different dishes, by the way. Not looking to make anything with so much horseradish that I cry.)

Anyway, I can’t wait. For the cooking, that is! I’ll miss Nate while he’s gone :)

But I’m getting ahead of myself… that tends to happen on Fridays when anticipation for the weekend is running high. In the meantime, I give you this glorious cake.

blood orange, rosemary & pine nut upside down cake

This was inspired by my mom, who has taken to emailing or texting me whenever she eats something that I need to try. (Thanks Mom!) A while back, she emailed me a picture of a blood orange upside down cake she’d made, saying that she loved the idea of it, but didn’t think the recipe she’d followed had ended up looking or tasting as good as expected. She was sure I could do better! I wasn’t as sure… but I too loved the idea, and really, any excuse to cut into one of these beautiful blood oranges is enough to tempt me. Challenge accepted.

Blood Orange, Rosemary & Pine Nut Upside Down Cake | coffeeandquinoa.com

Mom said the recipe she used wasn’t flavorful enough. Luckily, I had long ago bookmarked a rosemary, pine nut and orange cornmeal cake to try at some point. This seemed like the perfect opportunity! And so this lovely cake was born.

blood orange, rosemary & pine nut upside down cake

If blood oranges aren’t available where you are, by all means use regular navel oranges. Opt for ones with thin peels, if you can, since you’ll be putting orange slices, peels and all, on the bottom of this cake. The peels do add a touch of bitterness, so you can cut them off before slicing if you’d like, but I do think the look with them on just can’t be beat. So pretty!

Blood Orange, Rosemary & Pine Nut Upside Down Cake | coffeeandquinoa.com

And if you’d prefer to use the oranges just as a garnish, you don’t have to eat them. I kind of like peeling them off and eating them first :) But be warned: you may want a sharp knife to cut this cake. Otherwise you run the risk of dragging the oranges all over like you’re eating a slice of pepperoni pizza. Just sayin’.

This cake is sure to impress, on both looks and flavor. The rosemary, pine nut, and orange combo in the base of the cake is delicious, and then topped with more oranges, butter and brown sugar? Don’t mind if I do.

blood orange, rosemary & pine nut upside down cake

5.0 from 1 reviews
Blood Orange, Rosemary and Pine Nut Upside Down Cake
 
Print
Hands-on time
20 mins
Cook time
3 hours 40 mins
Total time
4 hours
 
Author: Erica
Yields: 8-12 pieces
Ingredients
  • 1 stick plus 3 Tbsp unsalted butter, divided
  • 2/3 cup dark brown sugar
  • 2 blood oranges, sliced 1/4-inch thick, including peel (I recommend buying a few extra oranges in case you're a messy slicer like me!)
  • 1 1/2 cups all-purpose flour
  • 3/4 cup finely ground yellow cornmeal
  • 1 tsp baking powder
  • 1/4 tsp kosher salt
  • 1/3 cup pine nuts, lightly toasted and coarsely chopped
  • 1 Tbsp finely chopped fresh rosemary
  • 1 Tbsp finely grated blood orange zest
  • 2/3 cup full fat Greek yogurt (I used Chobani)
  • 4 large eggs
  • 1 1/3 cups granulated sugar
Instructions
  1. Preheat oven to 350 and position a rack in the center of the oven. Spray a 9-inch round cake pan and line bottom with parchment paper.
  2. Melt 3 Tbsp butter in the microwave. Stir in brown sugar until melted. Spread in the bottom of the cake pan.
  3. Arrange orange slices in an overlapping circle on top of the brown sugar mixture, with a few slices in the middle.
  4. Sift the flour into a medium-sized mixing bowl. Add the cornmeal, baking powder, salt, pine nuts, rosemary, and orange zest and stir to combine.
  5. Add the Greek yogurt to a large mixing bowl. Add the eggs one at a time, whisking thoroughly between each addition. Whisk in the sugar.
  6. Using a wooden spoon, fold the dry ingredients into the wet ingredients in two batches, mixing until homogeneous. Melt the remaining stick of butter and mix in.
  7. Pour the batter over the orange slices in the cake pan. Bake 40-45 minutes, until edges of cake are golden brown and a toothpick inserted in the center comes out with moist crumbs.
  8. Run a knife around the edges of the cake. Cool completely on a wire rack. Once completely cool, invert onto serving dish and peel parchment paper away, if necessary.
  9. Serve and enjoy!
Notes
Adapted from FineCooking.com. Cake will keep for several days in the fridge. Bring to room temperature before serving.
3.2.1682


Filed Under: Cakes Tagged With: baking, butter & eggs, cake, cornmeal, orange, rosemary

Silky Dark Chocolate Truffles

February 13, 2013 by Erica

DSC_0327

A few years ago, I brought raw vegetables to a Valentine’s Day chocolate party. True story.

I’m not sure what I was thinking at the time… probably that I was too busy to bake something, and that there would already be a lot of chocolate there, anyway. As it turns out, I was right about all the other chocolate, and so the veggies  went over pretty well. But I certainly wasn’t going to win any awards for that dish. And even if I had baked something, all the desserts paled in comparison to the homemade truffles served by my friend Ellen, the hostess.

DSC_0296

My truffles here actually aren’t anything like the ones Ellen made that night, but that was the first time I’d heard of homemade truffles. Everyone kept asking Ellen how she made them, and she insisted it was easy! But I, for one, didn’t believe her.

Well, as it turns out, truffles are easy to make! But not all truffle recipes are created equal.

Silky Dark Chocolate Truffles | coffeeandquinoa.com

I found this out the hard way last year near Valentine’s Day, when I tried my hand at truffle-making for the first time. (That was pre-blog!) My truffles did not turn out that well. (I won’t link to the recipe I was using!) They tasted pretty good – umm, I challenge you to create a bad-tasting truffle – but the texture was grainy and for the life of me, I couldn’t get them round. So they turned out to be little piles of grainy chocolate with sprinkles on top. I mean, we ate them, obviously, but… meh.

So I was very pleased last week when I happened across the Cook’s Illustrated technique for making smooth, creamy truffles. Their method uses the following key steps:

– Microwave the chocolate before adding the cream so that you can stir the cream in, rather than whisking it in, which adds air bubbles and can cause a gritty texture.

– Add corn syrup and butter to smooth the texture of the chocolate.

– Cool the chocolate down gradually (for 2 hours at room temp, then in the fridge for 2 hours) to avoid grainy crystals.

Yes please! Problem solved.

Silky Dark Chocolate Truffles | coffeeandquinoa.com Silky Dark Chocolate Truffles | coffeeandquinoa.com Silky Dark Chocolate Truffles | coffeeandquinoa.com Silky Dark Chocolate Truffles | coffeeandquinoa.com

 Silky Dark Chocolate Truffles | coffeeandquinoa.com

DSC_0284

I started with the Cook’s Illustrated recipe, and from there, being me, I wanted to try out as many different toppings as possible. (My “more is more” mentality.) I rolled some of the truffles in cocoa powder, others in ground hazelnuts, a third batch in coconut, and finally dipped the rest in melted chocolate bark (my new best friend!) and topped them with a sprinkle of pink Himalayan sea salt.

DSC_0280

Can you guess which were our favorites? That would be the chocolate-covered truffles, of course.

DSC_0302

The sea salt does it for me every time, and the crunchy chocolate coating made them seem very professionally made. Yum! I’ll give the recipe for the chocolate-covered ones below. The rest were also delicious, though, and I highly encourage you to try whichever coating sounds best to you!

I know this is a Valentine’s Day post, and my blog should be exploding with red and pink sprinkles, napkins, hearts, and so on right now. But sometimes (and especially on Valentine’s Day), chocolate is the most beautiful color.

DSC_0328

Silky Dark Chocolate Truffles

Makes 64 small truffles

Adapted from Cook’s Illustrated

Ingredients:

For the truffles:

6 oz bittersweet chocolate (I used Ghirardelli 60% cacao), roughly chopped

6 oz semi-sweet chocolate (I used Ghirardelli semi-sweet), roughly chopped

1/2 cup heavy cream

2 Tbsp light corn syrup

1/2 tsp vanilla extract

pinch kosher salt

1 1/2 Tbsp unsalted butter, cut into 8 pieces and softened

For the coating:

20 oz chocolate bark

sea salt for sprinkling

Instructions:

Take a look at my notes in the blog post above on the key techniques in this recipe.

Spray an 8-inch square baking dish with cooking spray. Line with 2 sheets of parchment paper, perpendicular to each other to form a cross, and spray the parchment paper with cooking spray.

Microwave chocolate in a heat-proof dish until melted and no chunks remain, stopping to stir every 30 seconds. Set aside.

Microwave cream (separately) until warm to the touch, 30-45 seconds. Stir corn syrup, vanilla, and salt into cream. Pour mixture over chocolate. Cover with plastic wrap and allow to sit for 3 minutes, then stir (with a spoon, not a whisk!) until thoroughly combined.

Stir in butter, one piece at a time, until thoroughly incorporated.

Spread the chocolate mixture into the prepared baking dish. Allow to sit (uncovered) at room temperature for 2 hours. Then cover and transfer to the fridge to cool for at least another 2 hours, or up to overnight. (I did overnight.)

After truffles have cooled for the allotted amount of time, remove from the refrigerator. Using the parchment paper, pull the layer of chocolate out of the baking dish. Run a sharp knife under hot water, and cut the square of chocolate into 64 squares (8 rows by 8 rows). Coat palms lightly in cocoa powder and roll each square into a ball. You may find that about halfway through, the chocolate is too warm to roll into balls. In this case, refrigerate the remaining squares for 5-10 minutes, then continue.

Now you are ready to coat the truffles. If coating in sprinkles, nuts, cocoa powder, etc. instead of melted chocolate, simply roll each truffle in your hands for a few seconds to warm it and make the outside stickier, then roll in the desired coating. If coating in chocolate bark, microwave chocolate bark in 30-second increments, stirring in between, until melted. Roll each truffle around in the chocolate bark, using a fork, until thoroughly coated. Set on a plate or baking sheet and sprinkle with a pinch of sea salt. Drag a toothpick around the bottom of the truffle to cut off the chocolate “foot” that might develop as some of the chocolate coating slides down the truffle. This will make that easy to break off, leaving you with round truffles, rather than round truffles sitting in pools of hardened chocolate. Chocolate bark should harden within several minutes, at which point you should definitely sample one, and then return the rest to the refrigerator for another 2 hours.

These truffles are best stored in an airtight container in the refrigerator. Allow to sit at room temperature for 5 minutes or so before serving.

Enjoy, and happy Valentine’s Day (tomorrow)!

Time:

7 hours (1 hour active time)

Related Posts Plugin for WordPress, Blogger...

Filed Under: Candy Tagged With: chocolate, truffles, valentine's day

  • « Previous Page
  • 1
  • …
  • 8
  • 9
  • 10
  • 11
  • 12
  • 13
  • Next Page »

Welcome

Hi, I'm Erica! I'm a lover of all types of food, although I’m mostly vegetarian these days. I like salad, but I LOVE chocolate. This blog is a place where I try to balance the two.
Read More…

  • 
  • 
  • 
  • 
  • 

Subscribe via email

Get new posts delivered straight to your inbox!

Recipes by Category

Christmas Cookies I'm Drooling Over
Yogurt Panna Cotta with Balsamic Blueberries
Better Than Tagalongs (or Peanut Butter Patties) } coffeeandquinoa.com
pear frangipane tart
Pumpkin Maple Pecan Bourbon Ice Cream (Vegan)

Archives

my foodgawker gallery
my healthy aperture gallery
View my Tasty Kitchen Profile

Connect

Hi, I'm Erica! I'm a lover of all types of food, although I’m mostly vegetarian these days. I like salad, but I LOVE chocolate. This blog is a place where I try to balance the two.

My Ultimate Avocado Toast | coffeeandquinoa.com
Herbed Tomato Soup with Cornbread Croutons | coffeeandquinoa.com
Our Wedding - Part Two | coffeeandquinoa.com
Blueberry Kale Stem Smoothie | coffeeandquinoa.com
Shredded Kale and Brussels Sprout Salad | coffeeandquinoa.com
Our Wedding 9.20.14 | coffeeandquinoa.com
  • 
  • 
  • 
  • 
  • 

Copyright © 2026 · Coffee & Quinoa · Site Design by Heather Mackan · Built on GenesisWP