Coffee & Quinoa

  • Home
  • About
  • Recipes
  • Links
  • Contact
You are here: Home / Archives for Home

Mushroom & Mascarpone Crostini

December 19, 2012 by Erica

mushroom & mascarpone crostini

I’m slightly obsessed with crostini. Is that normal?

I think so. Anyway, I assume that everyone you celebrate the holidays with will be obsessed with crostini, too, so you might as well serve them these.

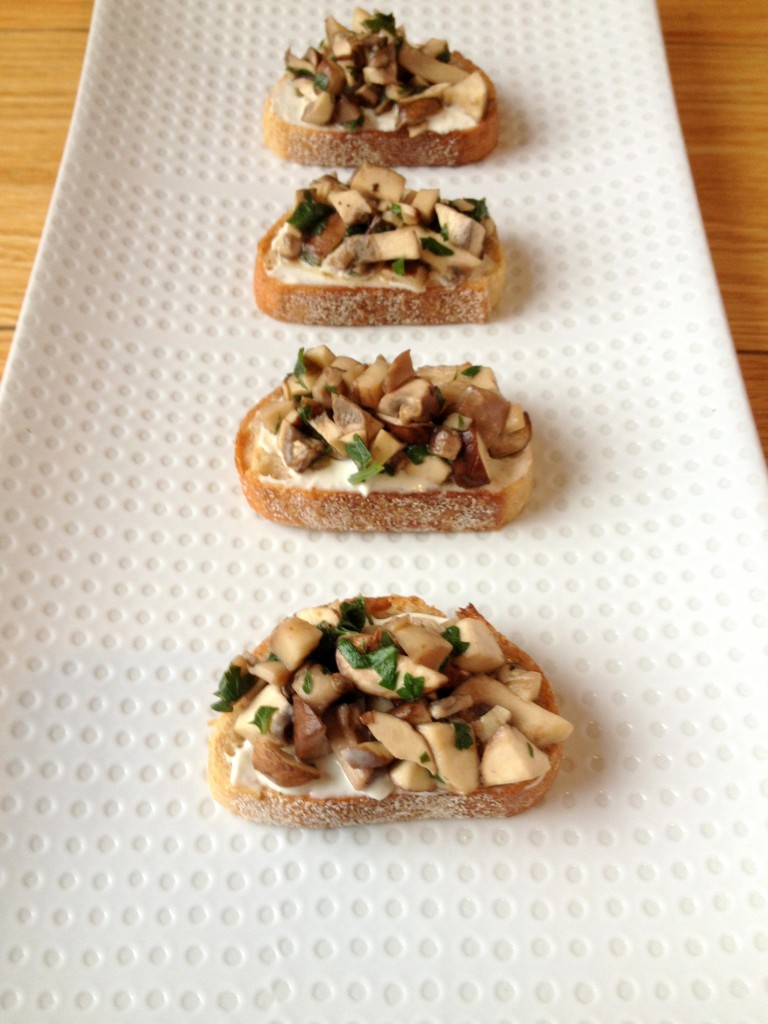
Little toasts hot out of the oven, smeared with mascarpone, and topped with a savory mushroom mix. They might not be as festive-looking as those other Christmas crostini, but they can hold their own in the flavor department. The mascarpone gets a little melty and mixes with the juice dripping off the mushrooms… oh man, they are so good.

mushroom & mascarpone crostini

If you make these for friends or family, prepare to have zero leftovers. You may want to make a few extra. For Santa, maybe? He might be sick of cookies by the time he gets to your house, and prefer some hot melty mascarpone and mushrooms. I know I would. (But then I’ll have the cookies too, please.)

mushroom & mascarpone crostini

Mushroom & Mascarpone Crostini

Adapted from Small Bites by Jennifer Joyce

Makes about 24 crostini

Ingredients:

1 baguette, sliced (about 24 slices)

1/3 cup olive oil

1/3 cup mascarpone cheese

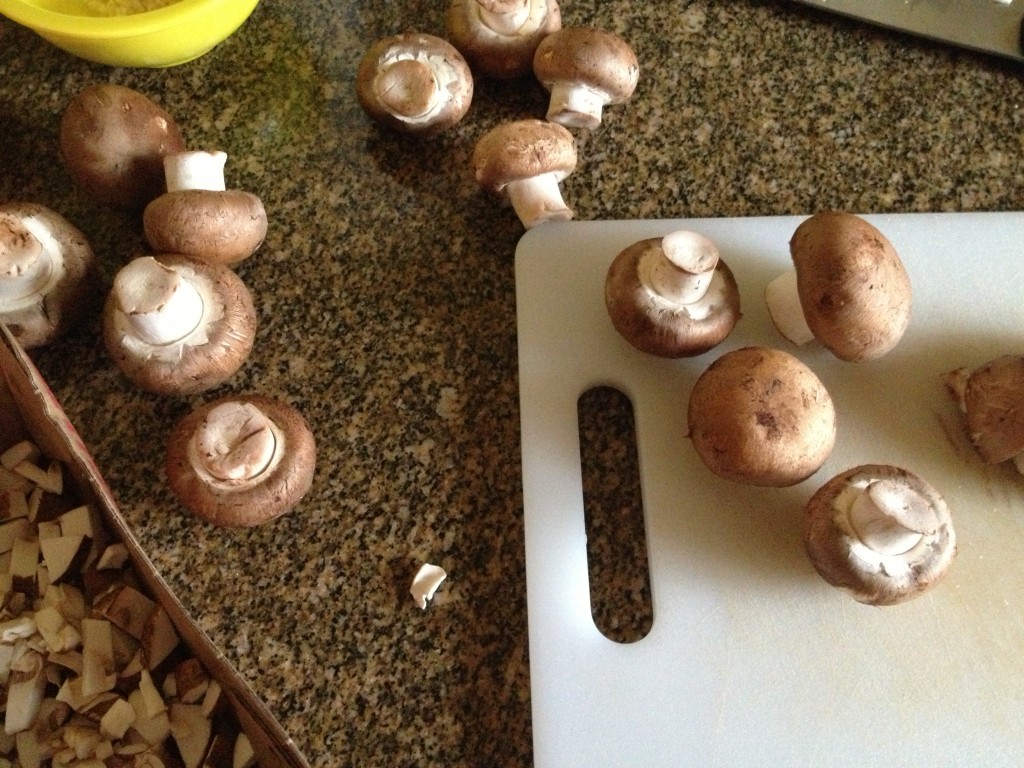
1 lb baby bella mushrooms, diced (stems included)

2 cloves garlic, minced

1 Tbsp sherry vinegar

small handful parsley, chopped

salt and pepper to taste

Instructions:

Preheat oven to 400 degrees. Spread baguette slices out on a baking sheet and lightly brush one side with olive oil. Toast at 400 for 6 minutes. (You may be tempted to toast them longer, but resist, or they will become too crunchy!)

Over medium heat, saute the garlic with a drizzle of olive oil until fragrant, about a minute. Add the diced mushrooms and sherry vinegar, and saute until mushrooms are soft. Stir in the chopped parsley and add salt and pepper to taste. Remove from heat.

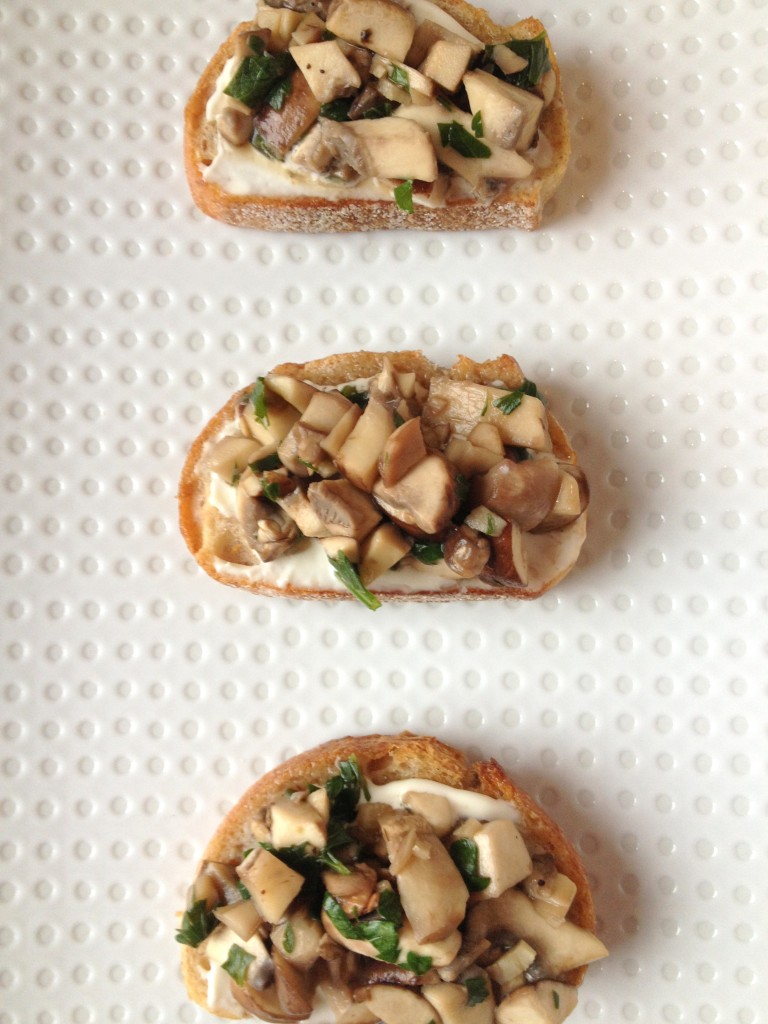
Spread a thin layer of mascarpone on each toast and top with a spoonful of the mushroom mixture. Serve hot!

Time:

20 minutes

Filed Under: Appetizers, Vegetarian Tagged With: appetizers, christmas, mushrooms

Christmas Couscous

December 18, 2012 by Erica

christmas couscous | coffee & quinoa

Second installment in this week’s series of “maybe you don’t have your Christmas dinner planned yet” posts: Christmas couscous.

How pretty and festive is this?!

christmas couscous | coffee & quinoa

This couscous is all my mom’s doing. She has served it as a Christmas side dish a few times now, and it’s my faaaaavorite. It’s all about the colors.

Beets and onion are cooked in with Israeli couscous, turning everything bright pinkish red. Pretty colors + only one pot = win.

Not only does this dish look festive, but Israeli couscous is kind of appropriate to Christmas if you think about it… right? Bethlehem couscous?

christmas couscous | coffee & quinoa

(I just made that up right now. Let’s forget it and focus on the pretty food.)

This also makes a delicious non-holiday meal as pictured – served with sweet potato and sauteed spinach. Now that’s my favorite. And good thing. Because did I mention that Nate is away all week? Guess what I’m eating for lunch every day.

christmas couscous | coffee & quinoa

Miiiiine… all mine.

Christmas Couscous

Serves 4-6

Ingredients:

1-2 Tbsp olive oil
1 clove garlic, minced
1/2 onion, diced (yellow or red will work)
1 pound beets (about 2 medium-sized or 3 baby beets), peeled and chopped into 1/2-inch pieces
1 cup Israeli couscous
1 1/4 cups water
1/4 tsp kosher salt + more to taste
pepper to taste

Instructions:

Add the olive oil to a small-ish pot over medium heat. Saute the garlic and onion until soft but not brown. Add the beets and saute for about 3 minutes. (This ensures that they’ll be done at the same time as the couscous.)

Stir in the couscous, water and salt. Simmer for 8-10 minutes, until the couscous is fluffy and the beets are tender. Add pepper and additional salt to taste.

Serve hot!

Time:

20-25 minutes

Filed Under: Side Dishes, Vegan, Vegetarian Tagged With: beets, christmas, couscous

White Chocolate Leaf Cake

December 17, 2012 by Erica

white chocolate leaves | coffee & quinoa

I once bought a cookbook just because a cake like this was on the cover.

I think I was waiting for the bus. Next thing I knew, I had spent $25 on a cookbook. Oops.

I’ve since lost that cookbook during one of my moves. I don’t even remember the title or the author. It didn’t really matter – the cookbook, including the cake recipe that went along with the picture, turned out to be nothing special. Those beautiful white chocolate leaves, on the other hand, were something special. So special that I think they belong on your Christmas dessert this year. If you’re in charge of the sweets, you can’t do much better than a gorgeous cake that is so simple to decorate.

white chocolate leaves | coffee & quinoa

These chocolate leaves look like they involve some serious work, but they actually take only 10 or 15 minutes. Below is a step-by-step tutorial.

This weekend I made these leaves to go on a hazelnut brown butter cake from Smitten Kitchen with this vegan chocolate ganache. I baked mini cakes in 1-cup ramekins (1/2 cup of batter in each), and used 2 layers for each little tower. I highly recommend the hazelnut brown butter/chocolate ganache combo, with some extra ganache and chopped hazelnuts in between layers! (One thing to note about the ganache, though: it starts to turn a darker brown pretty quickly, so you would do best to decorate the cake within 2 hours of eating. If that’s not possible, use a different ganache recipe.) If you’re a white chocolate lover, a cake covered in white chocolate ganache, topped with these, and dusted with powdered sugar would be to die for.

White Chocolate Leaves

Makes leaves to cover a 9″ round cake

You will need:

several stems of lemon leaves
small pastry brush
4-6 oz white chocolate

Instructions:

First, get some lemon leaves from your local florist.

white chocolate leaves | coffee & quinoa

It’s helpful to call ahead, because you’ll sometimes get blank stares when you ask for them! Many florists have customers that buy lemon leaves for working with chocolate, but many others will have no idea why you want them. In any case, they’re cheap – I paid $2.67 for 4 stems. I tend to favor the small leaves, especially if I’m not covering an entire cake with them. You can ask the florist to try to pick out some stems with small leaves for you.

Pluck off the leaves you want to use and lay them face down on a flat surface. To top a 9-inch cake, you will probably want 20-25 leaves.

Melt the white chocolate in a small dish in the microwave, 30 seconds at a time. Stir in between. May I suggest that you have another 4-6 oz of white chocolate chips ready as a back-up? White chocolate burns very easily… I probably burn it 50% of the time I use it! So stirring every 30 seconds is important.

white chocolate leaves | coffee & quinoa

white chocolate leaves | coffee & quinoa

Now your chocolate is melted. Using the pastry brush, carefully brush the chocolate onto the back of each leaf. This way, when you peel the leaves off, the front of your chocolate will be indented.

The chocolate is heavy and a little more difficult to work with than you would think. It’s OK (in fact preferable) to give every leaf a thick coat. Don’t worry if it looks lumpy – you’re not going to see that part anyway. Just try to make smooth edges, because those will be visible from the front. If your chocolate starts to cool down too much and becomes too difficult to paint, warming it up for 15 seconds should make things easier.

As you finish each leaf, place them in a bowl to harden. You could also use a plate or baking sheet, but I like to use a bowl so that the leaves curl up a bit. They look more natural and elegant this way than if they are all flattened out.

white chocolate leaves | coffee & quinoa

Once you’re finished, place the bowl in the fridge or freezer to harden. This should only take a few minutes, but you can also leave them in the fridge overnight.

When you’re ready to decorate your cake, remove the bowl from the fridge. Place one leaf at a time on your palm for a few seconds to warm it up. Then carefully peel the leaf away. It should come off very easily. If it sticks at all, warm the leaf up with your hand for a few more seconds.

white chocolate leaves | coffee & quinoa

Now decorate your cake, touching the leaves as little as possible, as the white chocolate melts easily. If you’re decorating a whole cake, you can place the leaves in concentric circles and scatter some hazelnut halves or raspberries in the center. If you’re topping smaller cakes, you can place just a few on each cake.

white chocolate leaves | coffee & quinoa

So pretty. Definitely a special occasion dessert!

Enjoy :)

Filed Under: Cakes, Techniques Tagged With: butter & eggs, chocolate, christmas

Gingerbread Spiced Popcorn

December 14, 2012 by Erica

gingerbread spiced popcorn

You’re going to think I’m a crazy person in about 2 seconds.

I’m about to tell you to put popcorn kernels in a paper bag and stick it in your microwave. Crazy, right? I know. I think so too.

In case you’re wondering, yes, this was a Pinterest find. Like so many things I enthusiastically pin, I didn’t try this out for months. But then the other night I wanted some popcorn, and I’m still kind of scared of making it in a pot with oil… it just doesn’t sound foolproof enough for this girl, who is prone to burning things to the bottom of her pots. Plus washing a large, oily and possibly scorched pot is like the last thing I want to do.

gingerbread spiced popcorn

So I tried this, expecting it to be a waste of popcorn kernels and the 100 brown paper bags that I had to buy because apparently they are not sold in smaller quantities. But then I started hearing the first magical popping sounds. Mr. Orville Redenbacher (or whoever first made microwave popcorn into a business) was a con man, because you can literally make it in a brown paper bag.

Basically, you do just that – pour 1/4 cup of popcorn kernels into a brown paper bag, fold the bag over, and microwave it. Even without any oil, it pops just like microwave popcorn does. And then, because it has no oil, obviously you can smother it in butter, brown sugar and spices and eat a whole bowl full of it.

This recipe makes less than your standard bag of microwave popcorn, because lunch bags don’t expand with those nice rounded sides the way microwave popcorn bags do. Let’s just say I tried a larger amount, and ended up with popcorn kernels flying loose around my microwave!

I added some gingerbread spices to this popcorn for a holiday twist. I will definitely be making some different versions of it in the future!

gingerbread spiced popcorn

Gingerbread Spiced Popcorn

Method from Squawkfox

Ingredients:

1/4 cup unpopped kernels
1 Tbsp butter or Earth Balance, melted
1/4 tsp salt
1 tsp brown sugar
1 tsp ground ginger
½ tsp cinnamon
¼ tsp allspice
pinch ground cloves

Instructions:

Pour popcorn kernels into a brown paper lunch bag. Fold the top over several times and place in microwave. Microwave on high for 3 minutes, but stay close by to listen to the popping. Remove from microwave as soon as popping slows to 1-2 seconds in between pops, which is usually between 2:30-2:40 for me. Leaving it in the whole 3 minutes will probably burn it, depending on your microwave.

While popcorn is popping, mix together the salt, sugar and spices in a small bowl. You may have to break up the brown sugar with the back of the spoon to incorporate it into the spices.

Pour popped popcorn into a large bowl. Drizzle melted butter over and toss with hands. Sprinkle spice mixture over the top, tossing several times to coat. You can use as little or as much of the spice mixture as you like – I like to use it all.

Enjoy!

Makes 6 cups popped

Time: 5-10 minutes

Filed Under: Snack, Techniques Tagged With: christmas, popcorn

Massaman Curry with Tofu

December 13, 2012 by Erica

massaman curry

Do you have a favorite takeout place?

Mine is a Thai restaurant a few minutes away. Their curries and noodles are amazing. And almost as good as the food is the ritual of ordering takeout. I call (usually when leaving yoga) and the same guy answers the phone every time. Seriously, this guy must work 80 hours a week. I have his script down pat. I know exactly how much it’s going to cost ($12.89) and when it will be ready (10-15 minutes). I could order from there in my sleep. One time they were randomly closed on a Tuesday and my call went straight to voicemail. It really threw me for a loop. I called back at least 3 times before I could acknowledge that I wasn’t going to be able to place my routine takeout order.

This Massaman curry is actually NOT my usual Thai order (that would be drunken stirfry with tofu). But I was introduced to it recently and loved it so much that I changed my usual order the other night to this. It cost $13.49, not $12.89, so that was a sad little departure from the norm, but at least it was still ready in 10-15 minutes.

massaman curry

I’ve never had a Massaman curry other than the one from my favorite Thai place, so I tried to replicate the flavor of theirs as closely as possible. It’s not your typical curry in that it’s actually very mild. It’s also peanut-y, creamy, and coconut-y – yet packed with vegetables?? So many good things.

Speaking of the vegetables in this recipe, they’re just a suggestion really. The takeout I get has tofu, potatoes and carrots only, but more veggies and less tofu seemed like a good idea to me. I’ve also tried broccoli in here, but found that it didn’t reheat well. Feel free to use your favorite veggies (or just whatever you have in the fridge!).

Massaman Curry with Tofu
 
Print
Hands-on time
15 mins
Cook time
35 mins
Total time
50 mins
 
This vegan version of a Massaman curry is mild yet flavorful and packed with vegetables. You'll never order Thai takeout again.
Author: Erica
Yields: 6-8
Ingredients
  • brown rice for serving
  • 2 Tbsp coconut oil
  • 2 Tbsp Massaman curry paste
  • 1 yellow onion, diced
  • 2 cloves garlic, minced
  • 1 knob of ginger (about ¾ inch), peeled and minced or grated
  • 2 cans light coconut milk
  • 3 Tbsp brown sugar
  • 1/2 Tbsp tamarind paste
  • 1/3 cup peanut butter
  • juice of 1 lime
  • ½ Tbsp low-sodium tamari or soy sauce
  • 1 ½ lbs potatoes, chopped into ½ inch chunks, peels left on (I used Yukon gold)
  • 1 large carrot, peeled and chopped
  • 1-2 small zucchini, sliced into half-coins
  • 5 oz mushrooms, sliced
  • 2 vine-ripened tomatoes, cut into wedges
  • 1 can baby corn, drained and chopped
  • 8 oz firm or extra firm tofu, cubed
  • roasted peanuts for topping
Instructions
  1. Cook rice according to these instructions.
  2. Heat coconut oil in a large deep pan over medium heat. Add the curry paste and mash into oil until combined and hot.
  3. Stir onion, garlic and ginger into the curry mixture. Saute for a few minutes until very fragrant and slightly softened.
  4. Whisk in the coconut milk. Add the brown sugar, tamarind paste, peanut butter, lime juice, and tamari and whisk to incorporate.
  5. Add potatoes and carrots. Cover and bring to a simmer. Simmer for about 20 minutes (depending on the size of your potato chunks), until potatoes are tender.
  6. Add zucchini, mushrooms, and any other veggies you might be using that need to cook for a few minutes. Simmer for 2-3 minutes.
  7. Finally, stir in the tomato wedges, baby corn, and tofu. Remove from heat and let sit for a minute or two until tofu is heated through.
  8. Serve over rice and top with roasted peanuts.
Notes
Adapted from The Gluten Free Vegan.
3.2.2089


Related Posts Plugin for WordPress, Blogger...

Filed Under: Main Dishes, Vegan, Vegetarian Tagged With: curry, thai

  • « Previous Page
  • 1
  • …
  • 50
  • 51
  • 52
  • 53
  • 54
  • …
  • 58
  • Next Page »

Welcome

Hi, I'm Erica! I'm a lover of all types of food, although I’m mostly vegetarian these days. I like salad, but I LOVE chocolate. This blog is a place where I try to balance the two.
Read More…

  • 
  • 
  • 
  • 
  • 

Subscribe via email

Get new posts delivered straight to your inbox!

Recipes by Category

Whole Wheat Pumpkin Spice Mug Cake
Chocolate Walnut Quinoa Cookies
Butternut Squash Ricotta Cheesecake | coffeeandquinoa.com
Whole Pear Parfait with Goat Cheese and Chocolate
Pomegranate Chili Sorbet

Archives

my foodgawker gallery
my healthy aperture gallery
View my Tasty Kitchen Profile

Connect

Hi, I'm Erica! I'm a lover of all types of food, although I’m mostly vegetarian these days. I like salad, but I LOVE chocolate. This blog is a place where I try to balance the two.

My Ultimate Avocado Toast | coffeeandquinoa.com
Herbed Tomato Soup with Cornbread Croutons | coffeeandquinoa.com
Our Wedding - Part Two | coffeeandquinoa.com
Blueberry Kale Stem Smoothie | coffeeandquinoa.com
Shredded Kale and Brussels Sprout Salad | coffeeandquinoa.com
Our Wedding 9.20.14 | coffeeandquinoa.com
  • 
  • 
  • 
  • 
  • 

Copyright © 2025 · Coffee & Quinoa · Site Design by Heather Mackan · Built on GenesisWP