Coffee & Quinoa

  • Home
  • About
  • Recipes
  • Links
  • Contact
You are here: Home / Archives for Erica

Vegetarian Matzo Ball Soup for Passover

March 27, 2013 by Erica

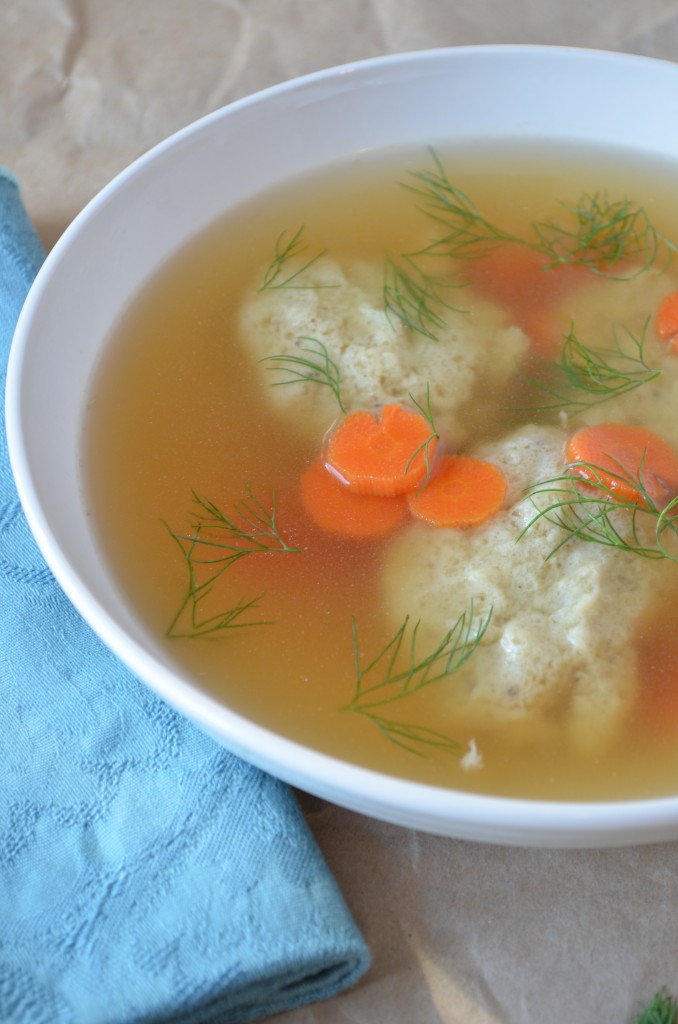
Vegetarian Matzo Ball Soup

I may not be Jewish, but I still love a good matzo ball soup.

I think of it as the ultimate comfort food. Like chicken noodle soup, but no mushy bits of noodles floating around in it – just fluffy pillows of matzo ball bliss.

I have childhood memories of being comforted by matzo ball soup, specifically when I had a terrible cold on a drive down to my grandma’s house in New York. We stopped at Rein’s Deli in Connecticut and after slurping up a steaming bowl of matzo ball soup, I finally felt human again. It’s really amazing what soup can do.
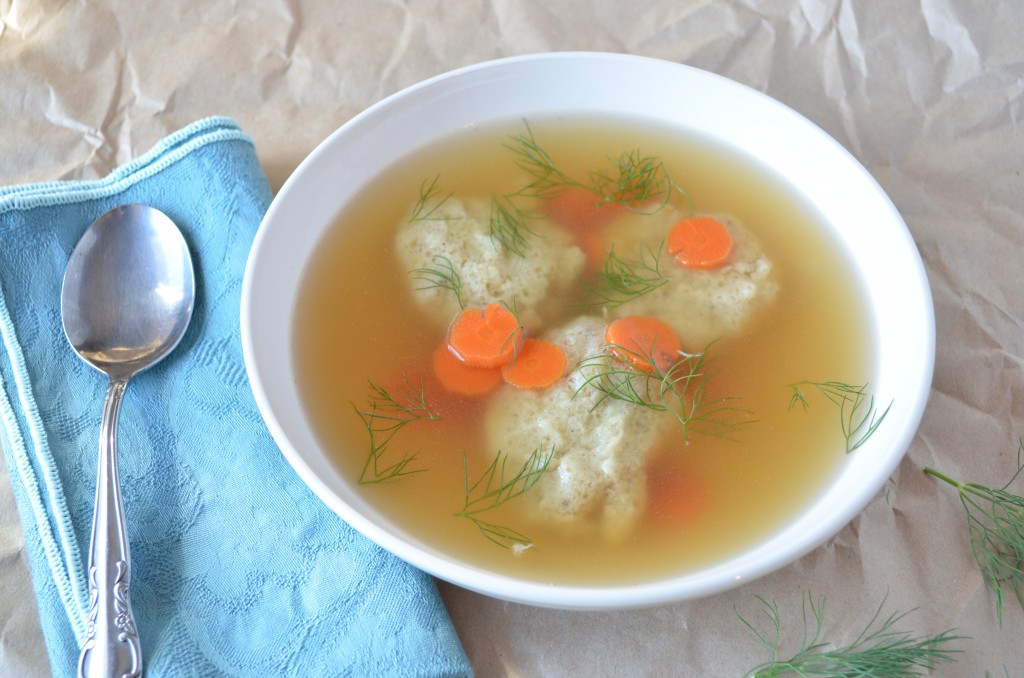
Vegetarian Matzo Ball Soup

You may or may not be aware that the Jewish holiday of Passover started on Monday night, a.k.a. the only time of year that you can find matzo in Salt Lake City (and even then it was a struggle involving three grocery stores and a near breakdown in Whole Foods). Growing up outside of Boston, I had lots of Jewish friends and Passover food was always a special treat. Like any Gentile kid, I loved eating the matzo that my Jewish friends brought to school during Passover but were too perennially sick of to actually eat for lunch. Clearly I took the grocery store availability of matzo for granted! I never thought of my suburban hometown as an especially diverse place, so the state of Utah did not score any points during my mad matzo hunt this past weekend.

Although I no longer live within striking distance of Rein’s Deli, my craving for matzo ball soup is as strong as ever. And it is soooo easy to make you won’t believe it – a little matzo meal and you’re in business. I personally plan on stocking up so I can make this year round!
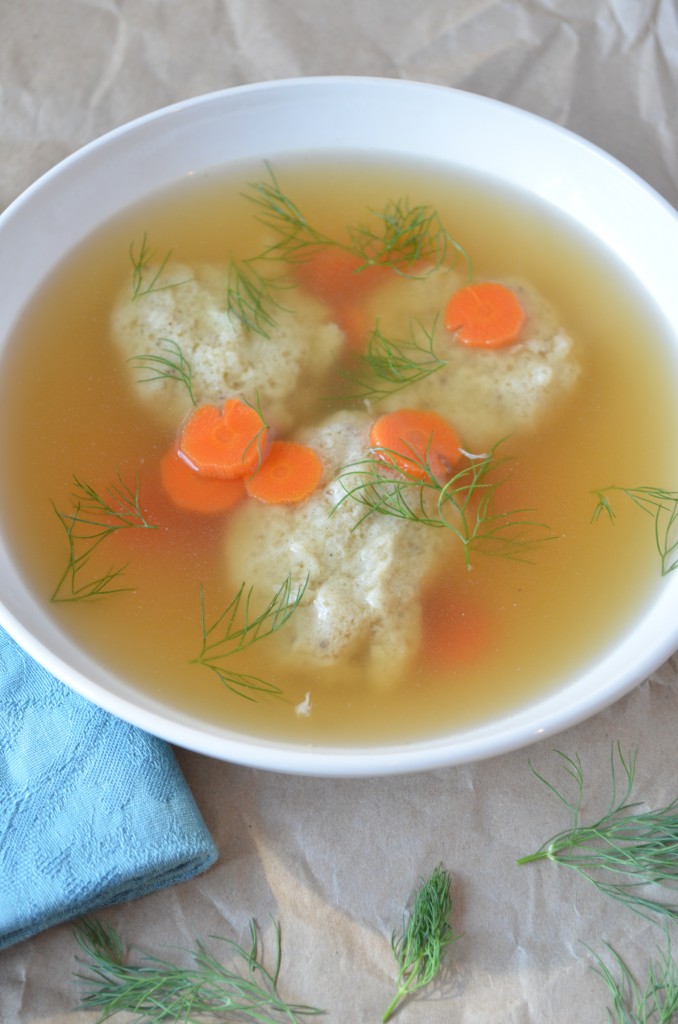
Vegetarian Matzo Ball Soup

So let’s put that vegetable stock from yesterday to good use. If you can’t find matzo meal, just pulse a few pieces of matzo in a food processor until powdery. I have to emphasize that the finer you can grind up the matzo, the better the matzo balls will come out. I found out firsthand that a coarse crumb really will not do – you want a powder, which will take a few minutes in the food processor. And whatever you do, don’t skip the dill!
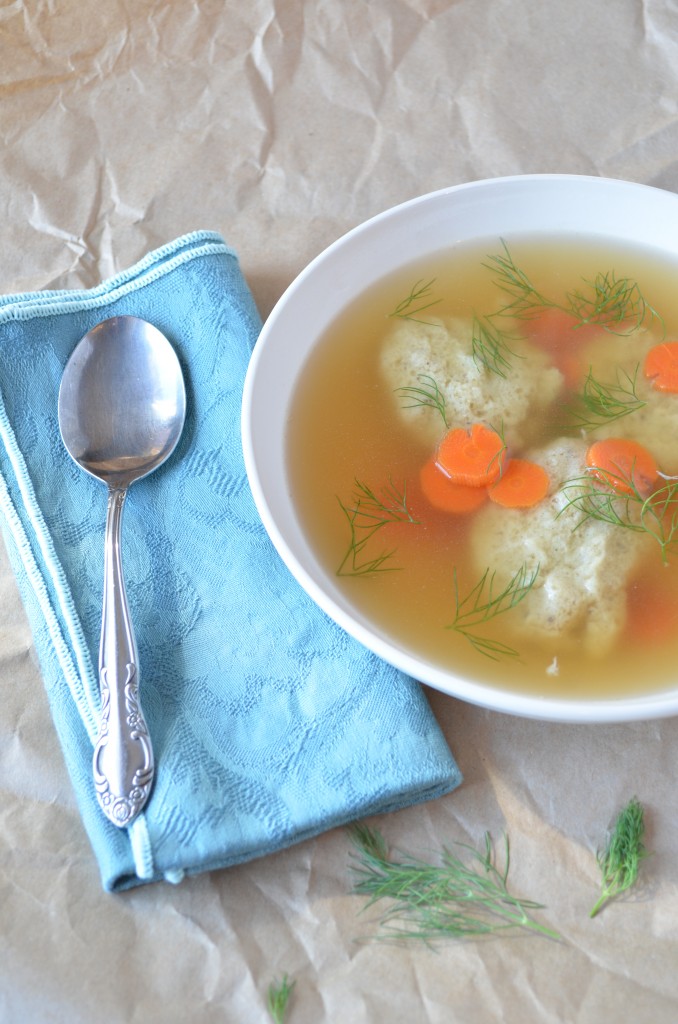
Vegetarian Matzo Ball Soup

5.0 from 1 reviews
Vegetarian Matzo Ball Soup for Passover
 
Print
Hands-on time
10 mins
Cook time
60 mins
Total time
1 hour 10 mins
 
Author: Erica
Yields: 8-12 matzo balls, enough for 3-4 people
Ingredients
For the matzo balls:
  • 2 eggs, lightly beaten
  • 1/2 cup matzo meal (or matzo ground to a powder in a food processor)
  • 2 Tbsp vegetable oil
  • 1 tsp kosher salt (reduce to 1/2 tsp if using salted matzo)
  • 1/4 tsp ground black pepper
  • 2 Tbsp seltzer
For the soup:
  • 2 to 3 quarts vegetable stock
  • 2 carrots, peeled and thinly sliced
  • several sprigs fresh dill
Instructions
  1. In a small bowl, mix all matzo ball ingredients together. Cover and refrigerate for half an hour.
  2. Bring a large pot of salted water to a boil. Reduce heat. Wet hands and form matzo balls by dropping a small spoonful of batter onto your palm and rolling it into a loose ball. Drop into water one by one. Cover and simmer gently for 30-40 minutes. The matzo balls will grow considerably in size.
  3. With about 10 minutes left on the matzo balls, bring your vegetable stock to a boil in a medium-sized pot and add the sliced carrot. If the stock is unsalted, salt to taste at this point. Once the matzo balls are finished, ladle them into bowls. Ladle broth and carrots over the top and garnish with a few pieces of dill. Serve immediately.
  4. Enjoy!
Notes
Matzo balls can be stored for up to 48 hours in the refrigerator. To store, cool to room temperature, place in a single layer in an airtight container, and cover with room temperature cooking liquid. Store broth separately. Adapted from Smitten Kitchen.
3.2.1753


Filed Under: Soups, Vegetarian Tagged With: matzo, passover, soup, vegetarian

Simple Roasted Vegetable Stock

March 26, 2013 by Erica

Simple Roasted Vegetable Stock

A few months ago, I had a failed veggie stock experiment. It was my first attempt and I’m not sure what went wrong; I think I used too many greens and too few carrots and onions. And maybe too much water? Regardless, it was very disheartening, as I’ve never had a problem making meat-based stocks. It convinced me for a while that vegetable stock should be left to the pros, and I’ve been buying it from Whole Foods ever since.

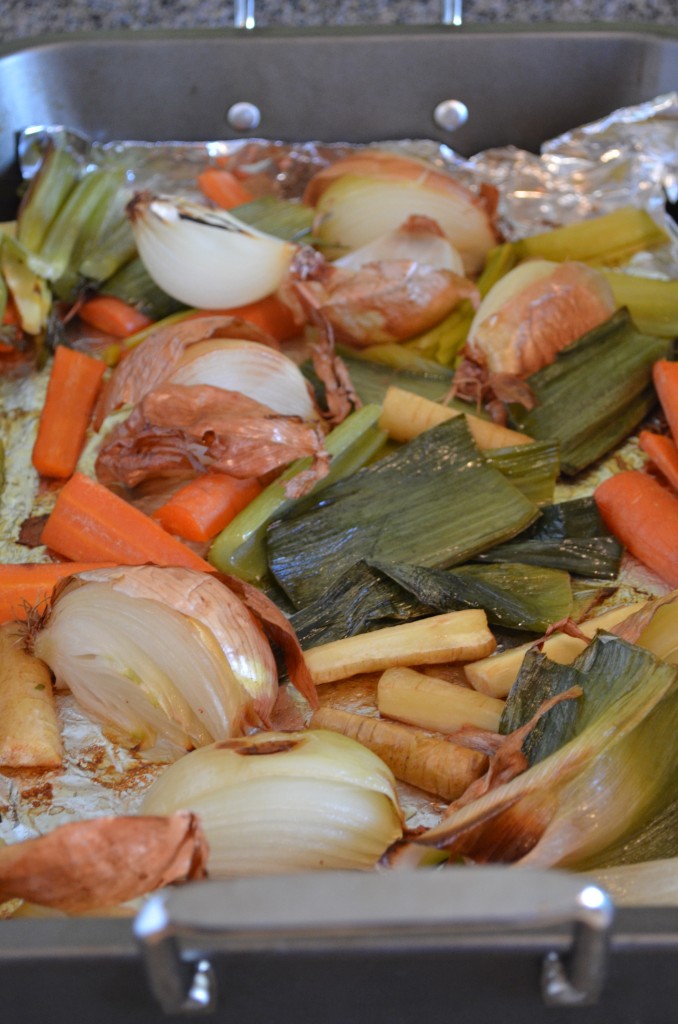
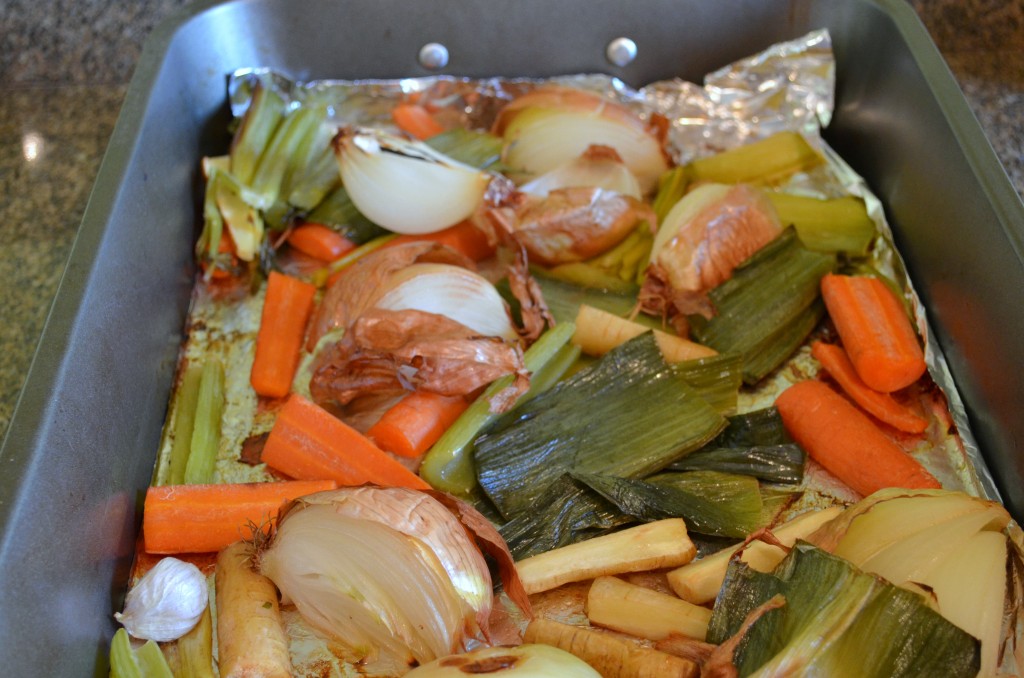
Recently, though, I wanted to make a soup that just uses a simple broth for the base (recipe coming tomorrow!), and I felt like I couldn’t cop out and use store-bought stuff. If I’m going to use store-bought broth, I at least want it to be hidden, you know? So I gave the ol’ veggie stock another shot, and this time I roasted the vegetables to make sure they would be flavorful enough. Success! If veggie stock should be left to the pros, well, consider me one of them… and you can be, too.

Simple Roasted Vegetable Stock

Making your own stock really isn’t as scary as it sounds, and it’s also cheaper than buying it. And I should point out that it’s much quicker than making chicken stock. Unlike meat-based stocks, simmering vegetable stock for longer does not give it more flavor, so an hour is all you need. And as a bonus, you’ll feel like Martha Stewart as your kitchen fills with the scent of your homemade stock bubbling on the stove. For some reason, this always makes me feel like I really have my life together. Ego boost in a soup pot? Sure, I’ll take it!

Get crackin’ on this homemade vegetable stock so you can be prepared for the soup recipe coming tomorrow!

Simple Roasted Vegetable Stock

Simple Roasted Vegetable Stock
 
Print
Hands-on time
5 mins
Cook time
1 hour 45 mins
Total time
1 hour 50 mins
 
Author: Erica
Yields: 3-4 quarts
Ingredients
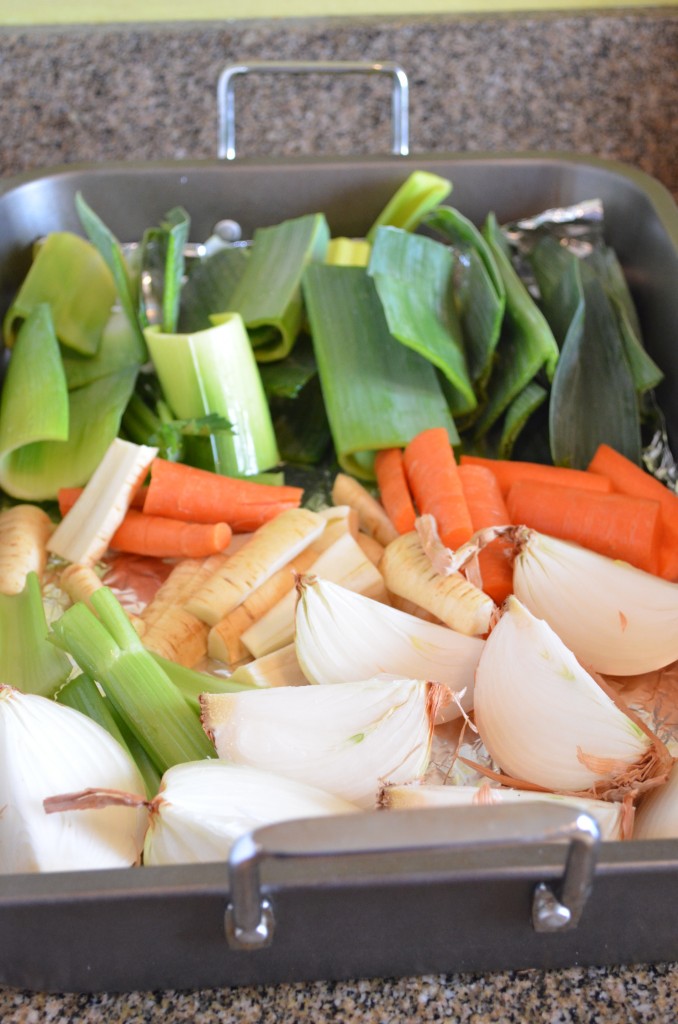
  • 2 carrots, rinsed and roughly chopped
  • 2 parsnips, rinsed and roughly chopped
  • 2 stalks celery, rinsed and roughly chopped
  • greens of 1 leek, thoroughly cleaned and roughly chopped
  • 2 yellow onions, skins left on, quartered
  • 3 garlic cloves, peels left on
  • 2 Tbsp olive oil (more or less)
  • 1 small bunch parsley
  • 4-5 sprigs of thyme
  • 1 tsp black peppercorns
  • 2 bay leaves
Instructions
  1. Preheat oven to 400. Place vegetables (carrots through garlic) in a roasting pan. Drizzle with olive oil (I probably used about 2 Tbsp but you can use more or less) and toss to coat. Roast for 45 minutes, stirring about every 10-15 minutes to ensure that nothing burns. If you notice that any of the vegetables are starting to char before the time is up, remove them and continue cooking the rest. Some caramelization is fine, but not charring! The leek greens are especially prone to burn.
  2. Remove from oven and place the vegetables in a large pot with the parsley, thyme, peppercorns, and bay leaves. Cover with cold water. (The more water you use, the less concentrated the flavor of your stock will be.) Bring to a boil and simmer for an hour. (A few minutes more or less is fine.)
  3. Strain into storage containers. If not using in the next day or two, freeze until ready to use.
3.2.1753


Filed Under: Soups, Techniques, Vegan, Vegetarian Tagged With: broth, soup, stock

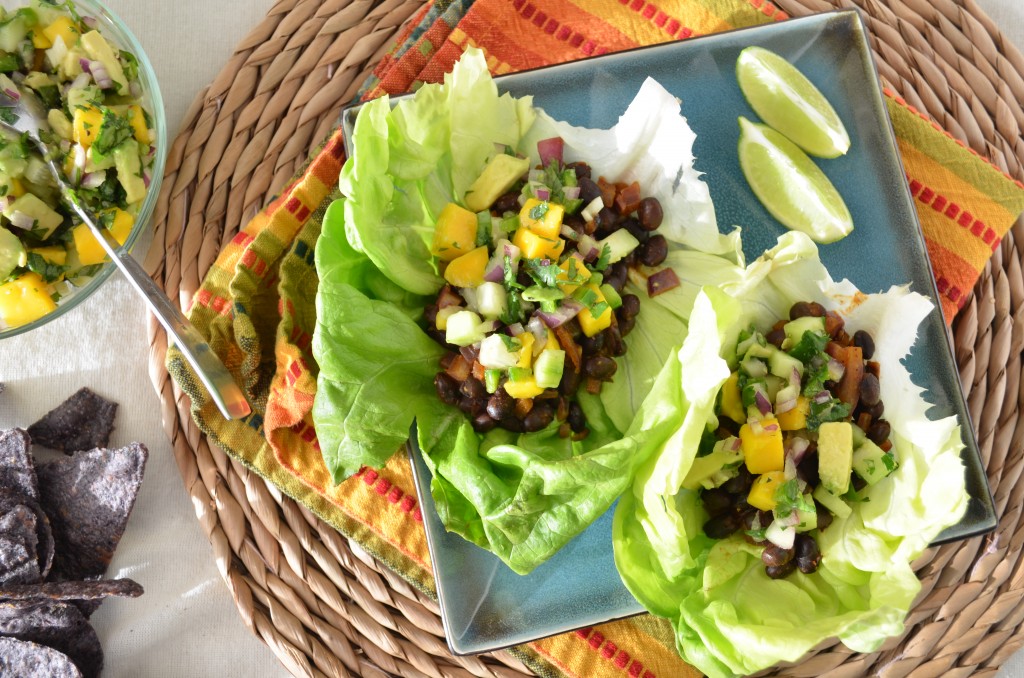
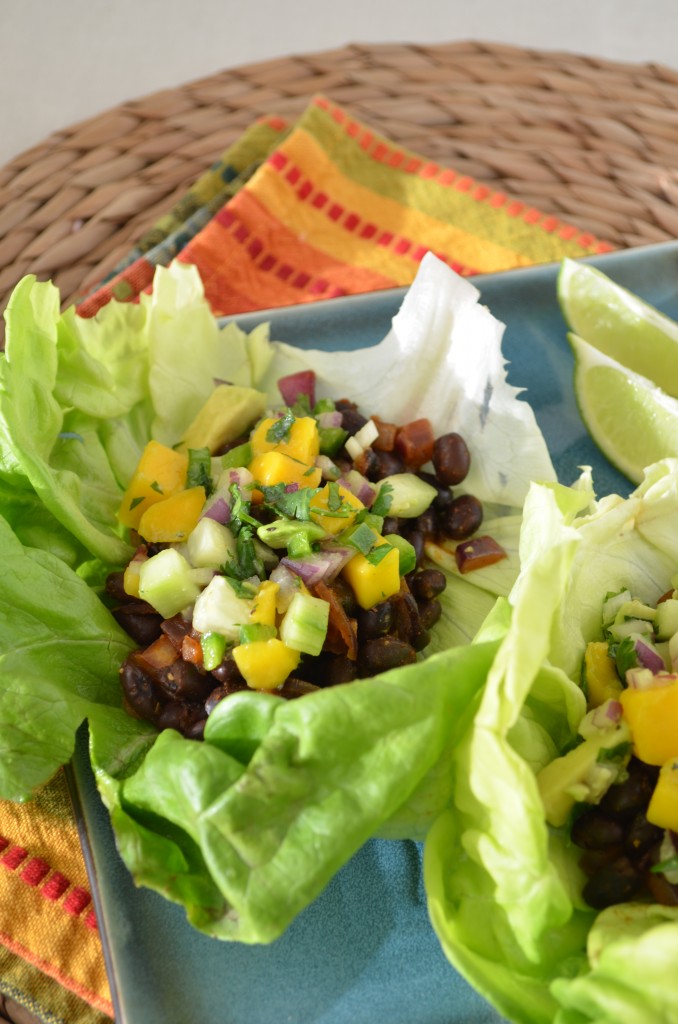
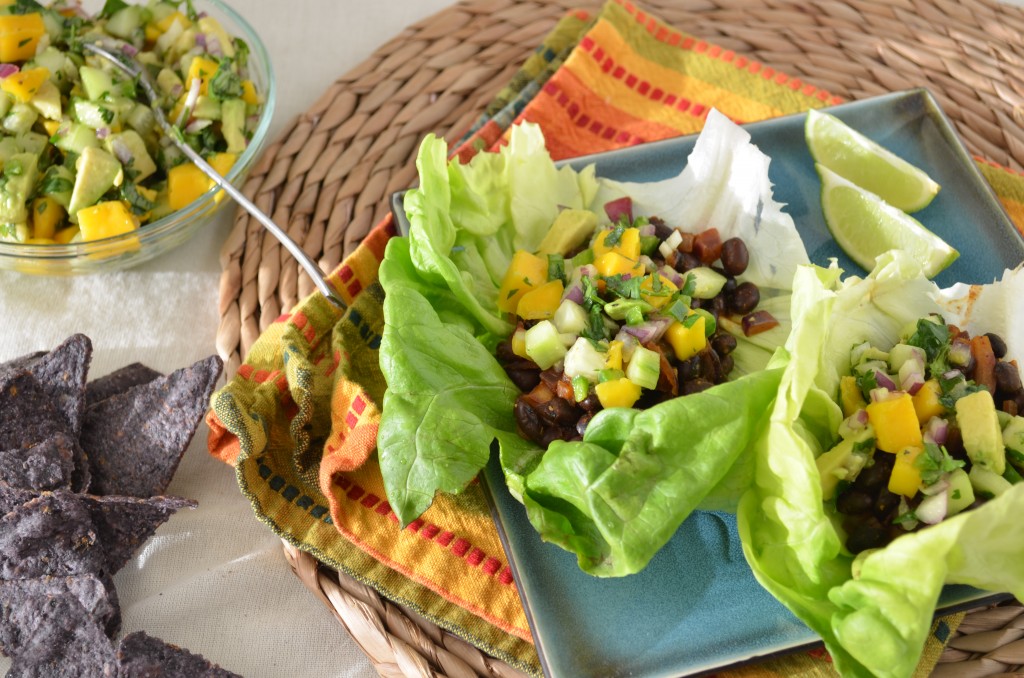
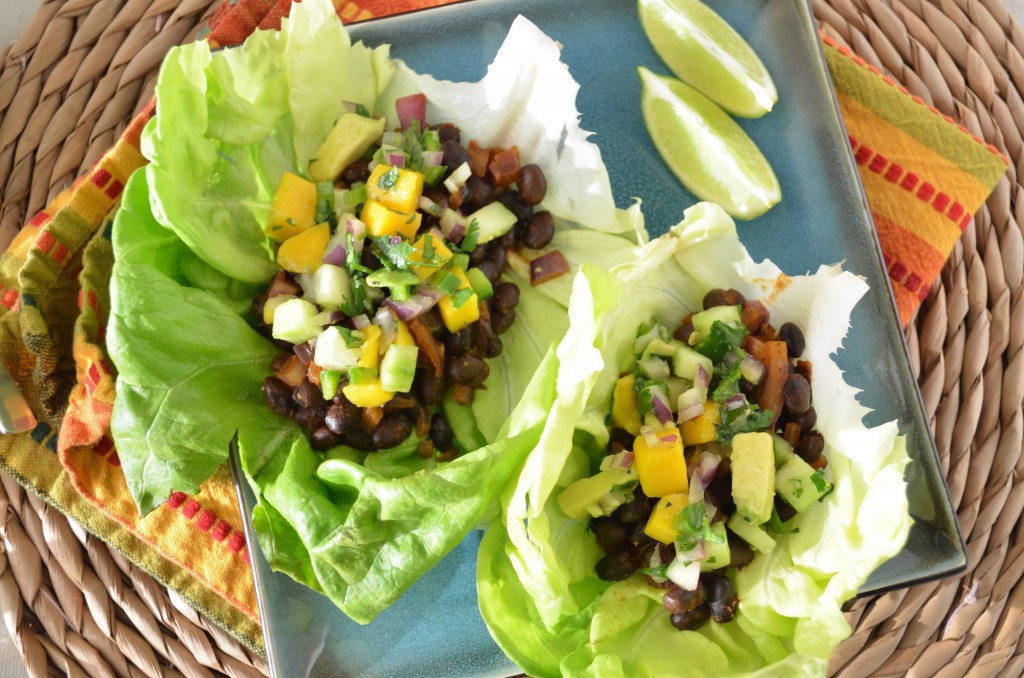
Black Bean Lettuce Wrap Tacos with Mango Avocado Salsa

March 25, 2013 by Erica

Black Bean Lettuce Wrap Tacos with Mango Avocado Salsa

Hi there! How is Monday morning treatin’ ya?

We had quite the weekend. Between entertaining friends who stayed with us all week, my birthday on Thursday, a friend’s housewarming party on Friday, my company’s annual party on Saturday, and 20 inches of fresh powder in the mountains (that Nate took advantage of but I did not), we were pretty much out of commission by the time Sunday morning rolled around. These days I have to admit I don’t usually go out on both Friday and Saturday nights (and definitely not wearing monstrous heels), so this weekend was a reminder that I’m not as young as I used to be… and that sleeping in is necessary sometimes.

Black Bean Lettuce Wrap Tacos with Mango Avocado Salsa

As a side note, I still can’t feel one of my toes after wearing those heels all night. Maybe I’ll forget about this and bring them the next time I go to Vegas… but until then, I’m pushing them to the back of my closet. Flats are the way to go!

Black Bean Lettuce Wrap Tacos with Mango Avocado Salsa

Anyway, after a busy weekend, I seldom feel like slaving over a hot stove all day Sunday. I much prefer going to yoga and then tossing together a quick meal like this, that involves just a little chopping and a few minutes of cooking time.

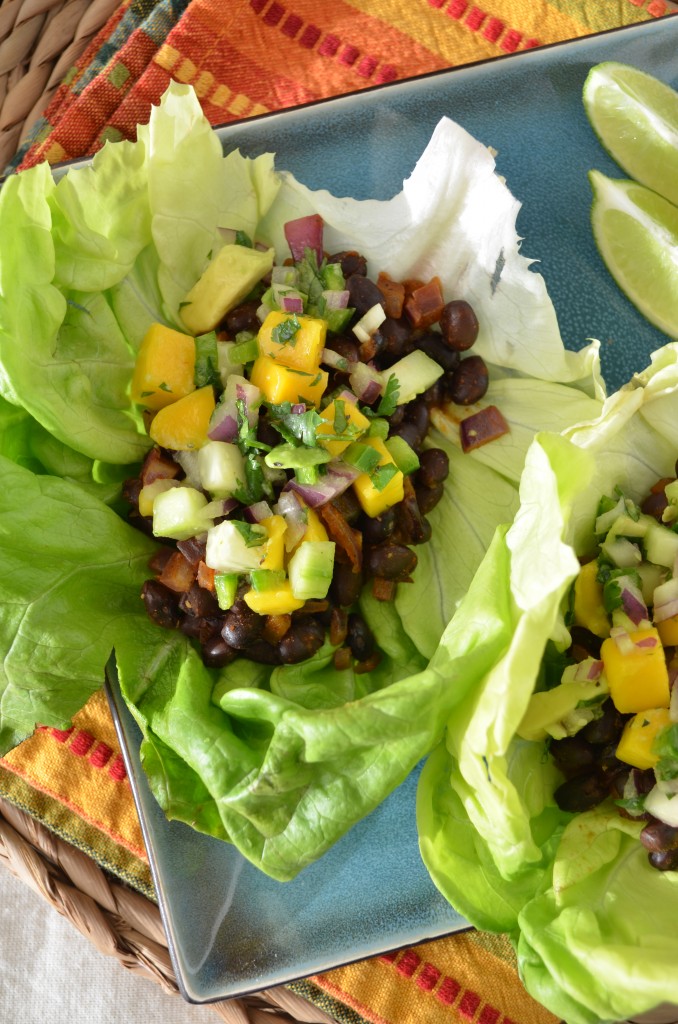
We loved these tacos because they’re so fresh and light. Nothing is as refreshing as homemade salsa, and using lettuce leaves instead of taco shells lightens up the meal. No sense in cancelling out all those chaturangas I just did!

Black Bean Lettuce Wrap Tacos with Mango Avocado Salsa

I based these off my chickpea tacos, using beans, onions, garlic, and the same spice mix. I know the ingredient list looks long, but honestly you just need a few fresh ingredients for the salsa, and the rest you most likely have in your pantry. I swear these come together quickly! If you’d rather use guacamole or regular salsa + cheese + sour cream, etc., go for it! But fruit salsa is allllways a good idea.

Black Bean Lettuce Wrap Tacos with Mango Avocado Salsa

5.0 from 5 reviews
Black Bean Lettuce Wrap Tacos with Mango Avocado Salsa
 
Print
Hands-on time
15 mins
Cook time
10 mins
Total time
25 mins
 
These lightened-up tacos feature spiced black beans and homemade mango-avocado salsa wrapped in fresh lettuce. Quick to prepare and bursting with flavor!
Author: Erica
Yields: 6 tacos
Ingredients
For the tacos:
  • 1 tsp olive oil
  • 1 clove garlic, minced
  • 1/2 onion, finely diced (yellow or red)
  • 14 oz can black beans, drained and rinsed (or about 1 1/2 cups cooked)
  • 6 leaves bibb or iceberg lettuce
For the taco seasoning (or use 1/2 packet of your favorite taco seasoning):
  • 1/2 Tbsp chili powder
  • 1/2 tsp smoked paprika
  • 1/2 tsp cumin
  • 1/4 tsp oregano
  • 1/4 tsp kosher salt
  • 1/4 tsp ground black pepper
  • 1/4 tsp cornstarch
  • 1/8 tsp cayenne pepper
  • 1/4 cup water
For the mango avocado salsa:
  • 1 mango, peeled and diced
  • 1 avocado, peeled and diced
  • 1/2 cucumber, peeled and diced
  • 1/2 jalapeno, seeds removed and minced
  • 1/4 red onion, diced
  • 1 Tbsp lime juice
  • 1/3 cup chopped cilantro leaves
  • salt and pepper to taste
Instructions
  1. First prepare the salsa. Combine all ingredients in a bowl and mix well. Add salt and pepper to taste. Set aside.
  2. In a small bowl, combine all taco seasoning ingredients. The tacos come together quickly, so I like to do this before anything goes on the stove.
  3. Add olive oil to a large pan over medium heat. Once shimmering, add garlic and onion and saute until soft, 4-5 minutes.
  4. Pour in black beans and taco seasoning and stir to coat. Saute, stirring occasionally, until beans are heated through and some of the water is evaporated, 2-3 minutes.
  5. Serve with lettuce leaves to be used as taco shells and mango avocado salsa.
  6. Enjoy!
Notes
Adapted from my Chickpea Taco recipe and FoodNetwork.com.
3.2.1753


Filed Under: Tacos & Wraps, Vegan, Vegetarian Tagged With: avocado, beans, mango, mexican, salsa, tacos, vegan, vegetarian

Double Rainbow Layered Salad with Lemon Ginger Dressing

March 22, 2013 by Erica

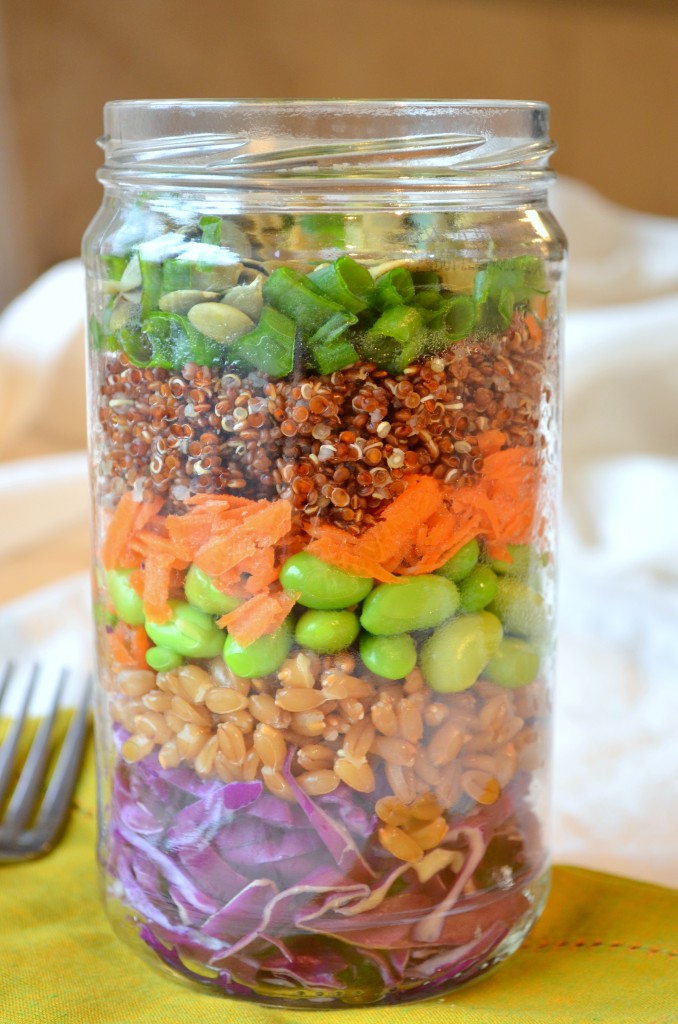
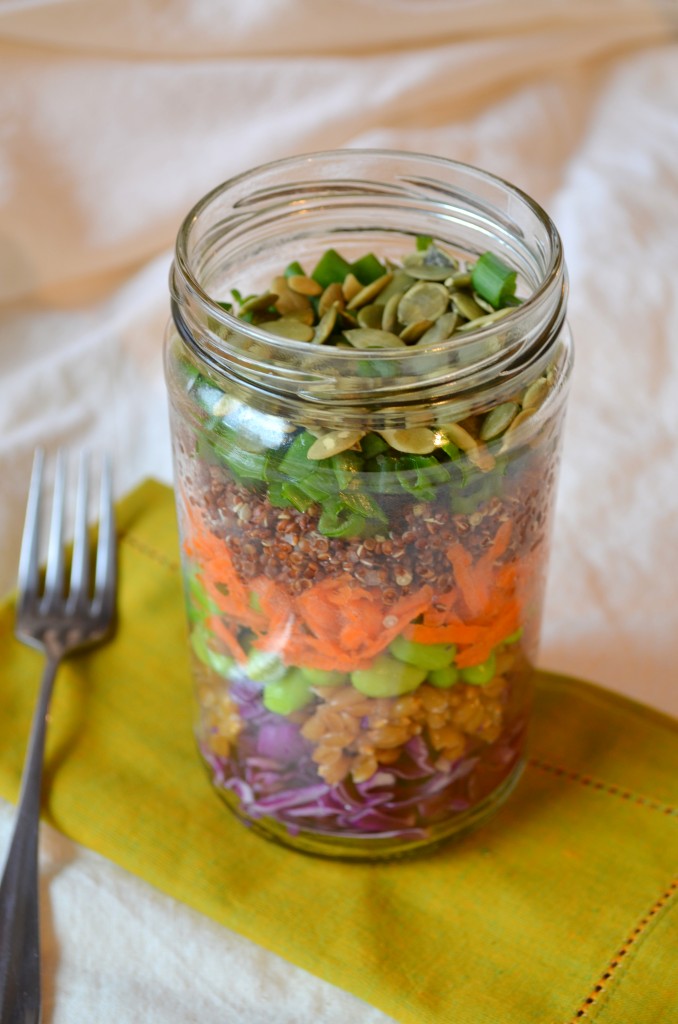
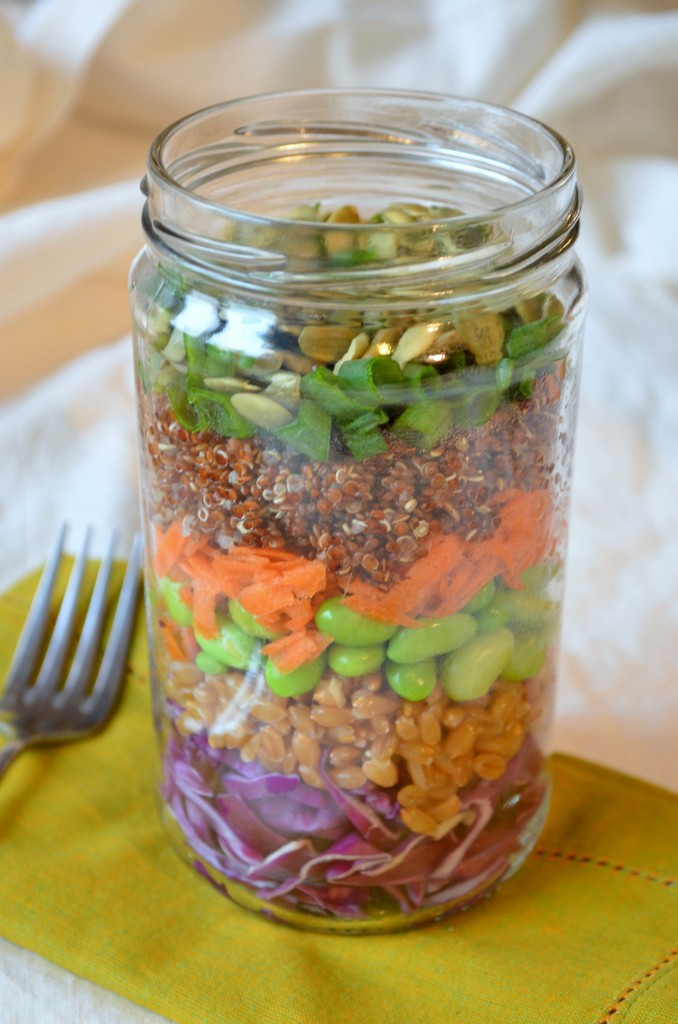
Double Rainbow Layered Salad with Lemon Ginger Dressing

Thank you for all your sweet birthday wishes yesterday! It means so much. I had a great birthday, and I even got to eat one of the cupcakes leftover from yesterday’s blog post. I love it when the leftovers stick around that long!

Sometimes, like yesterday, I like to eat a cupcake… or two. And sometimes, especially after two weeks of experimenting with cupcake recipes, I like to eat a salad.

Then, because I ate a salad, I can totally justify a cupcake. I love the way that works.

So here is this week’s salad, which might be one of my all-time favorites. And that’s a good thing, because I have a lot of cupcakes to make up for earn!

Double Rainbow Layered Salad

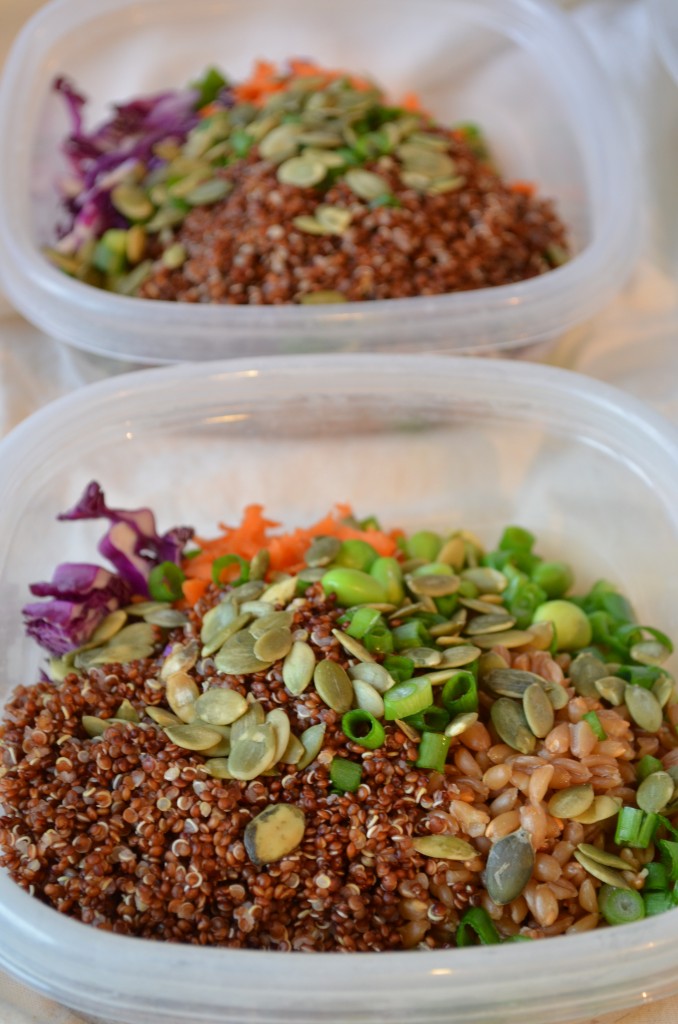
This salad is a combination of all my favorite salad-y things. Red cabbage, which is randomly (but truly) one of my favorite foods. Quinoa and spelt, which are not only some more of my favorite foods, but make this salad much heartier than it would otherwise be. And then edamame, carrots, green onions, and pepitas for more protein, sweetness, flavor and crunch. Not to mention the the light and lemony dressing, which adds the perfect zing.

What could be better than all your favorite healthy foods stacked together in a cute and portable jar?

Not much, I’ll tell you that. In fact, when you taste it, you just might start yelling, OH MY GOD, DOUBLE RAINBOW!

Sorry for that reference. I know it’s so 2010. I just couldn’t resist.

This salad makes the absolute best leftovers (as long as you keep the dressing separate), which is key in my life. I’ve been eating it for lunch all week!

Double Rainbow Layered Salad with Lemon Ginger Dressing

All the ingredients are very sturdy, which also means the salad is super crunchy. (Spelt and red cabbage will do that.) So I may have even liked it best on day 3 or 4, when it was a bit easier on the jaw. (To make it less crunchy, you can put the red cabbage in a strainer and pour a pot of boiling water over it. This will soften it up a bit, but I didn’t bother.)

Enjoy this salad and have a fantastic weekend!

Double Rainbow Layered Salad with Lemon Ginger Dressing

5.0 from 1 reviews
Double Rainbow Layered Salad with Lemon Ginger Dressing
 
Print
Hands-on time
10 mins
Cook time
50 mins
Total time
1 hour
 
Author: Erica
Yields: 5-6 servings
Ingredients
For the salad:
  • 1 cup uncooked spelt berries
  • 1 cup uncooked quinoa
  • 4 cups shredded red cabbage
  • 2 cups grated carrot (about 2 large carrots)
  • 2 cups shelled cooked edamame, defrosted if frozen
  • 6 green onions, sliced
  • ½ cup pepitas
For the dressing:
  • ½ cup lemon juice (about 2 lemons)
  • heaping Tbsp chopped fresh ginger
  • 1 tsp honey
  • 2 Tbsp olive oil
  • 2-4 Tbsp water
  • salt and pepper to taste
Instructions
  1. In separate small pots, bring spelt berries and quinoa to a boil with 1 1/2 cups water each. Simmer until tender but still chewy, 50-60 minutes for the spelt berries and about 15 minutes for the quinoa. Drain excess water and set aside to cool. This can be done ahead of time.
  2. While grains cook, prepare the salad dressing. Blend all ingredients together with an immersion blend (or regular blender).
  3. To assemble salad, layer ingredients in single-serving jars or clear bowls. You can also layer the entire salad in a large clear bowl, or just toss all ingredients together. Serve alongside dressing. Will keep for up to a week in the fridge (with dressing separate).
Notes
Inspired by Oh She Glows.
3.2.1753


Filed Under: Salads, Vegan, Vegetarian Tagged With: cabbage, dressing, ginger, green stuff, lemon, quinoa, salad, vegan, vegetarian, whole grain

Peanut Butter Birthday Cupcakes with Banana Buttercream Frosting

March 21, 2013 by Erica

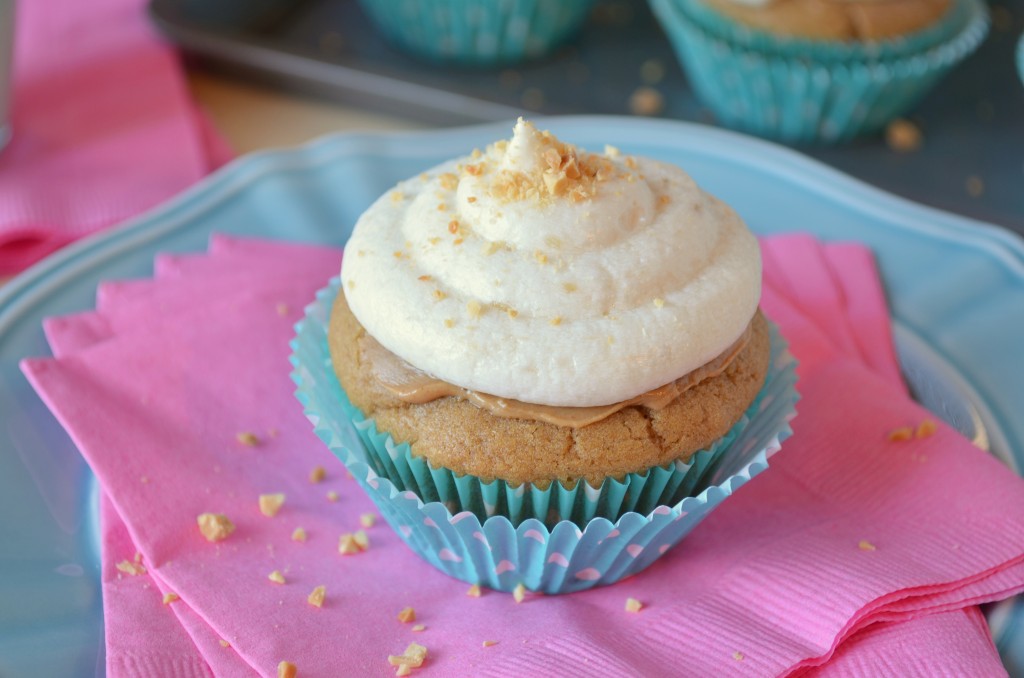
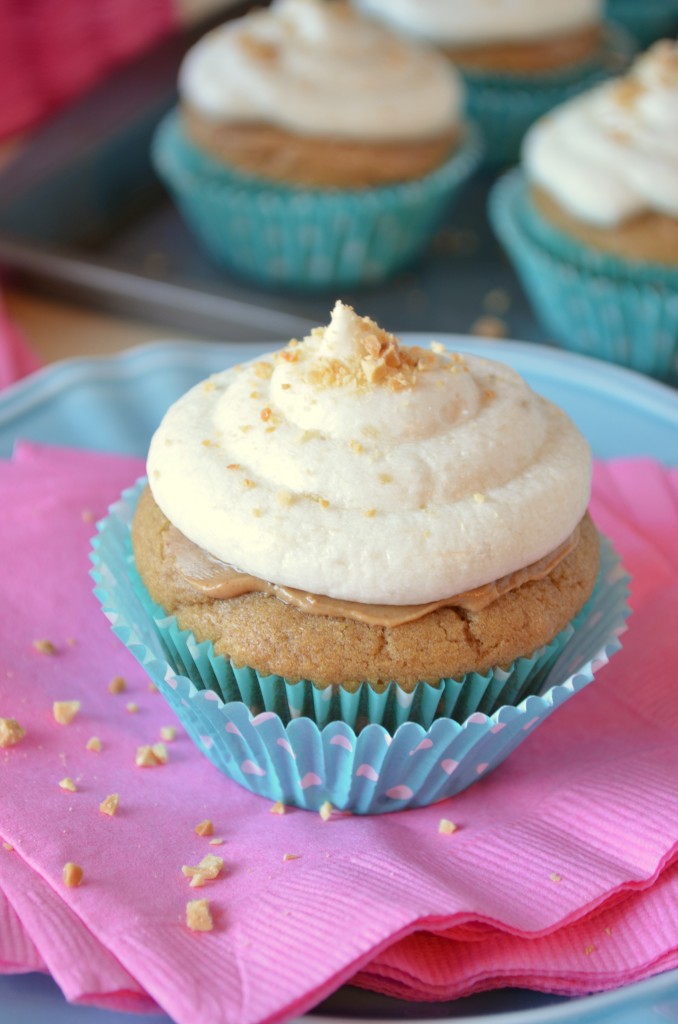
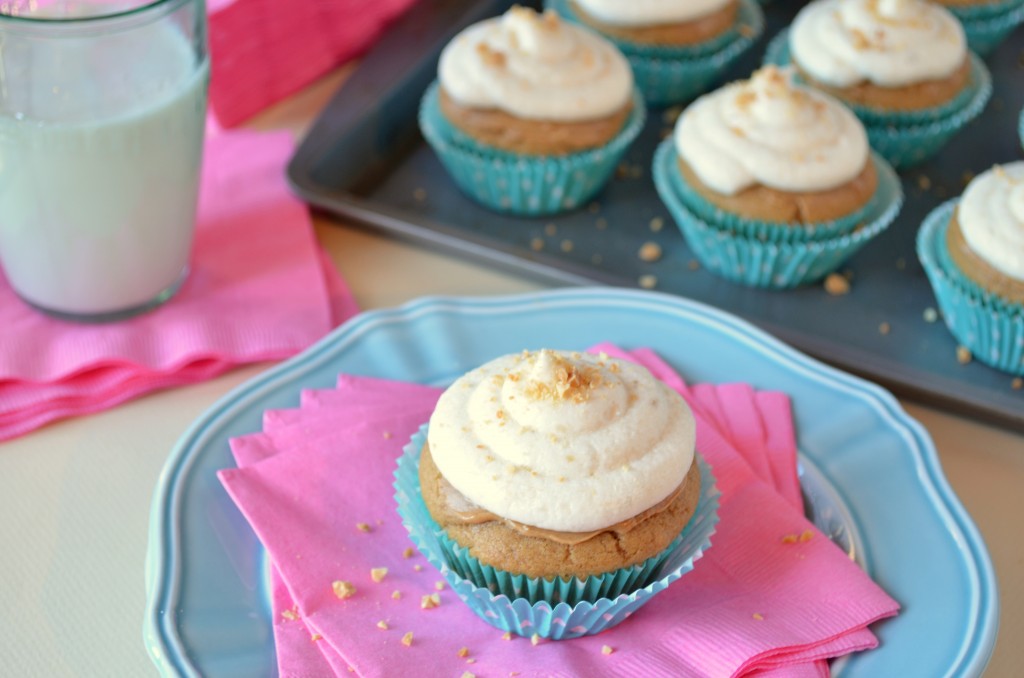
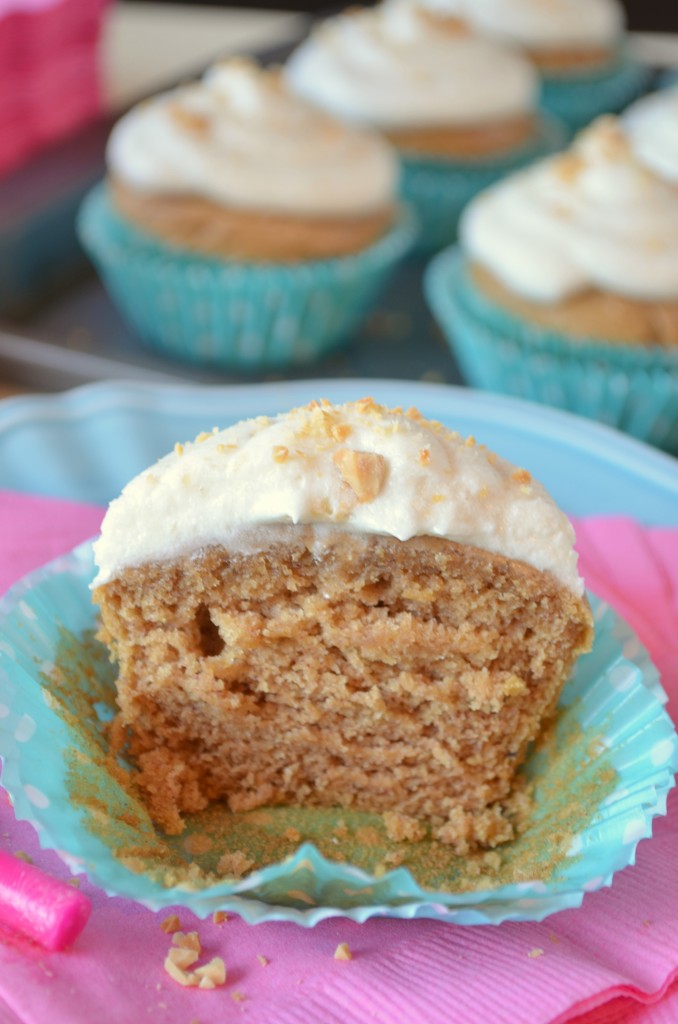
Peanut Butter Birthday Cupcakes with Banana Buttercream Frosting

Happy birthday to meeee!

I turn 26 today. Probably not the most exciting age, but still one I hope will bring good things.

Peanut Butter Birthday Cupcakes with Banana Buttercream Frosting

25 was a great year. It wasn’t full of huge changes or excitement, but I’d like to think I started spending more time on things I enjoy over the past year. I’m definitely feeling happy at the end of 25, so I can only hope 26 brings more of the same!

No big celebrations planned for 26. In case you don’t know, I kind of dread being the center of attention, so I sometimes find my birthday a bit embarrassing. Weird, I know. Last year Nate threw me a surprise party, which was amazing – I was SO surprised! – but I asked him pleeeease not to do that this year, because I just can’t handle it! My last surprise party before that was my 16th birthday, so hopefully I have another 10 years or so before the next one. On the 9 birthdays in between, I prefer just a romantic dinner with my sweetie!

Something else I think I’ll want on my birthday for the next 9 years? These cupcakes.

Peanut Butter Birthday Cupcakes with Banana Buttercream Frosting

Peanut butter cupcakes with a banana buttercream frosting. If that doesn’t make your heart skip a beat, I’m not sure what will.

I have been on a huuuuge peanut butter kick recently. Recently, like for the past year. Peanut butter dolloped on my oatmeal, spread on my fruit, melted over vanilla ice cream and a brownie (what?), and blended into my smoothies and salad dressings. And these cupcakes are pretty much my ultimate peanut butter lovin’ creation.

Peanut Butter Birthday Cupcakes with Banana Buttercream Frosting

As they should be; it took me THREE batches of cupcakes and FOUR batches of icing to perfect this combination. (Well, one of the batches of cupcakes was because I managed to double everything except the flour… details.)  These cupcakes aren’t fussy or anything, it’s just that I wanted to make sure I had the perfect cake+icing combo to celebrate my birthday. At one point I tried to use a peanut butter frosting with the peanut butter cupcakes. I thought it was delicious, but was informed by Nate that we might as well be eating peanut butter straight from the jar. I told him not to be silly… these are much healthier than straight PB! Kidding. But I’m glad I listened, because these cupcakes and this soft buttery banana icing are meant to be together.

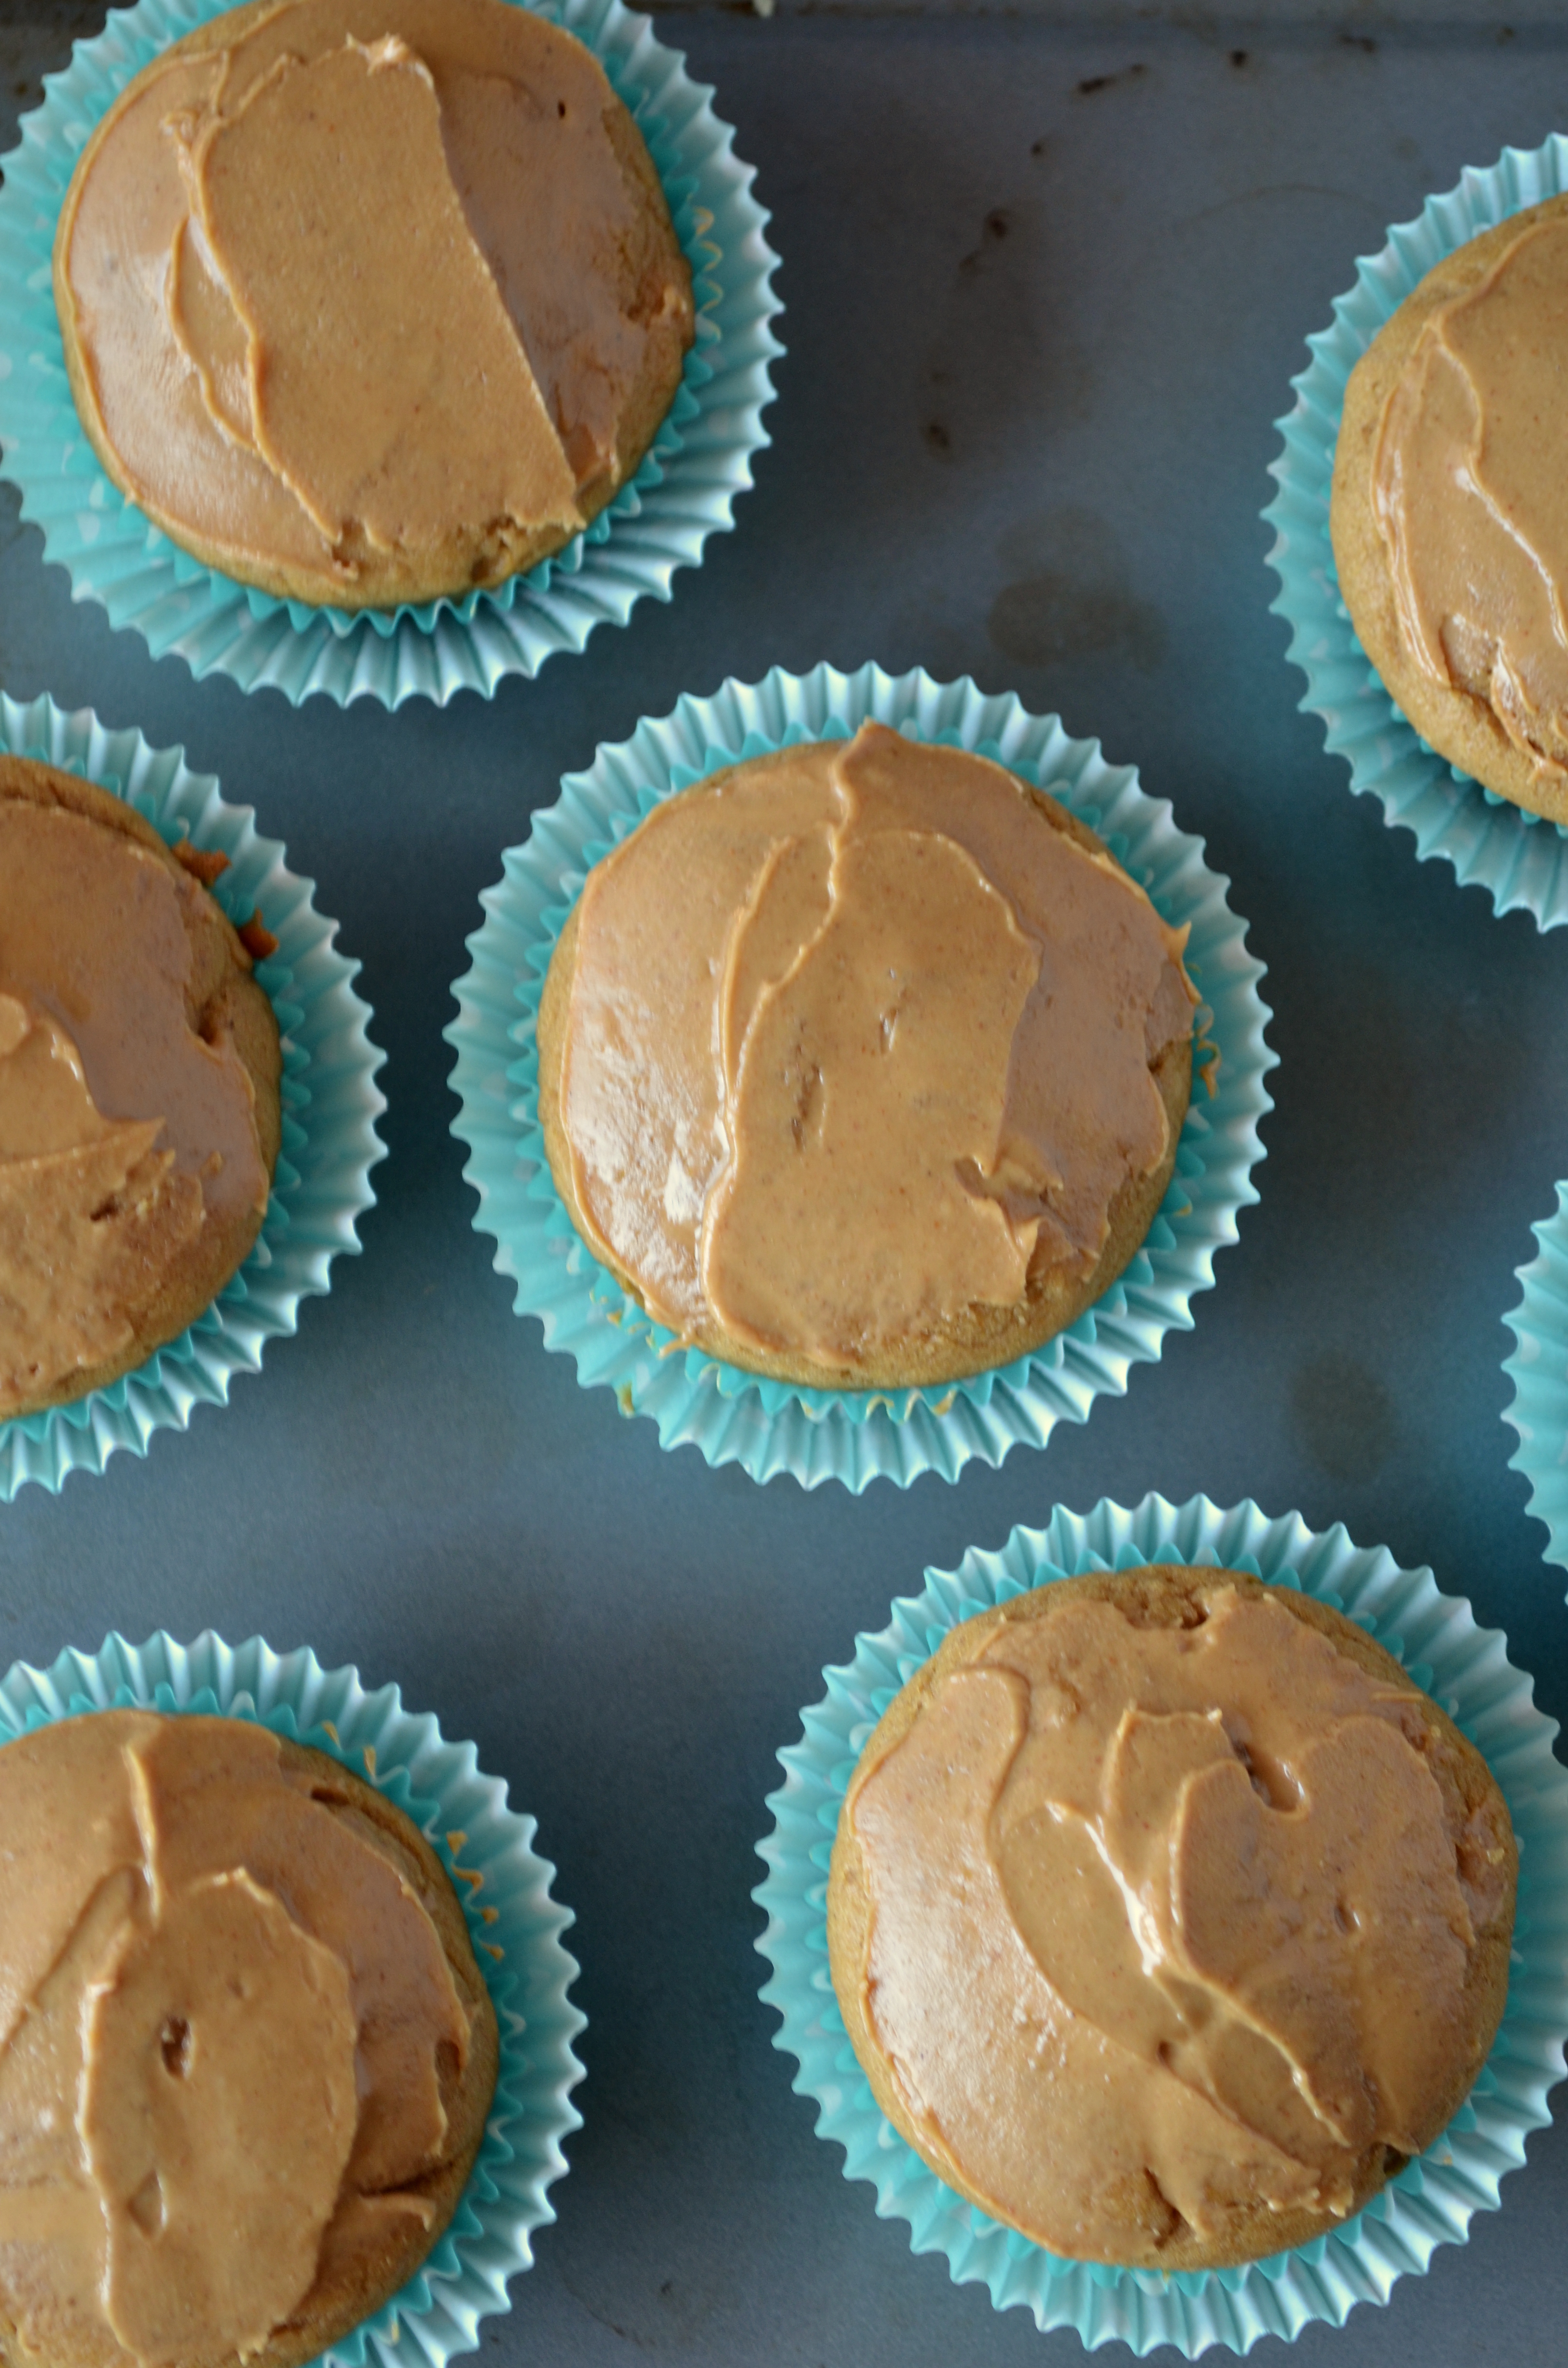
And as a compromise, I snuck a little extra smear of peanut butter onto each cupcake before I iced them.

DSC_1312

Heaven!

But OMG the frosting. Let’s not forget to talk about it. It is buttery, banana-y bliss. I wasn’t too sure how a banana would fare in a frosting, but it turns out the answer is VERY WELL. As long as you use a ripe, fresh banana. First I tried using an overripe banana I had defrosted from my freezer (cause those are delicious in smoothies and banana bread), but it turns out that was the wrong choice. (Remember how I had to make four different frostings?) But use a fresh banana here and I promise you’ll want to bathe in this frosting. For real.

Also, I should mention that it seems to keep well. I was a little nervous about it turning brown as bananas tend to do while the cupcakes sat in my fridge for a few days, but that wasn’t the case. Just as purdy as on day one!

Peanut Butter Birthday Cupcakes with Banana Buttercream Frosting

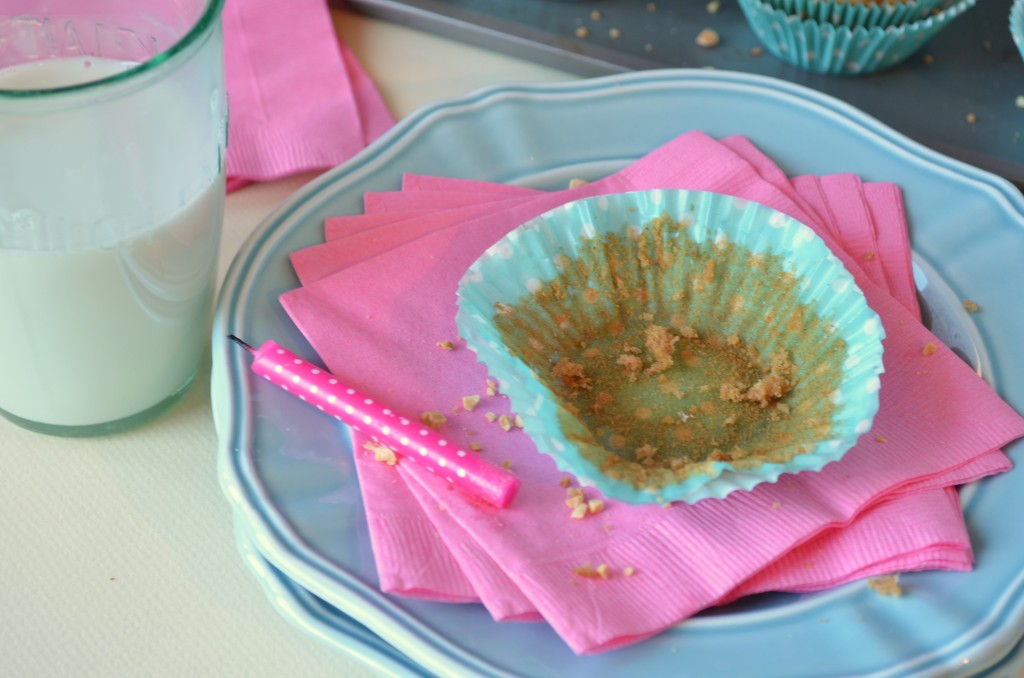
Wishing I could reach into my computer and grab that little cupcake right now. It’s my birthday, so I can totally lick the frosting off, right?

Peanut Butter Birthday Cupcakes with Banana Buttercream Frosting

5.0 from 1 reviews
Peanut Butter Birthday Cupcakes with Banana Buttercream Frosting
 
Print
Hands-on time
25 mins
Cook time
50 mins
Total time
1 hour 15 mins
 
Author: Erica
Yields: 10-12 cupcakes
Ingredients
For the peanut butter cupcakes:
  • 1/4 cup (1/2 stick) unsalted butter, softened
  • 1/2 cup smooth peanut butter
  • 1/2 cup packed brown sugar
  • 1 egg
  • 2 tsp vanilla extract
  • 1 1/4 cup all-purpose flour
  • 1 tsp baking soda
  • 1/4 tsp kosher salt
  • 2/3 cup milk (I used plain unsweetened almond milk)
For the banana buttercream:
  • 1 ripe banana, mashed (not overripe!)
  • 1/2 cup (1 stick) unsalted butter, softened
  • 1 tsp lemon juice
  • 1/2 tsp vanilla extract
  • pinch of salt
  • 3 cups powdered sugar
To top (optional):
  • Peanut butter
  • Finely chopped toasted peanuts
Instructions
  1. Preheat oven to 350 and place liners in cupcake tins.
  2. In a large bowl, beat together the butter, peanut butter and brown sugar for several minutes until light and fluffy. Add egg and vanilla and beat until smooth.
  3. In a separate medium bowl, sift together the flour, baking soda, and salt. Add the dry ingredients to the peanut butter mixture, alternating with the almond milk, beating well after each addition.
  4. Spoon batter into lined cupcake tins, filling each about 2/3 full. Bake until a toothpick inserted in the center of a cupcake comes out with moist crumbs, 18-20 minutes. Remove and cool completely before frosting.
  5. While cupcakes cool, make frosting. With a hand mixer (or stand mixer if you have one!), cream together the banana, butter, lemon juice, vanilla and salt. Beat in the powdered sugar, 1 cup at a time, until you have a creamy and spreadable frosting.
  6. Once cupcakes are completely cool, spread each with a thin layer of peanut butter, about a 1/2 teaspoon (optional). Spread or pipe with icing and sprinkle immediately with crushed peanuts, if using.
  7. Enjoy!
Notes
Adapted from Eat, Live, Run and AllRecipes.com.
3.2.1753


Peanut Butter Birthday Cupcakes with Banana Buttercream Frosting

Related Posts Plugin for WordPress, Blogger...

Filed Under: Cupcakes Tagged With: baking, banana, birthday, butter & eggs, dessert, peanut butter

  • « Previous Page
  • 1
  • …
  • 48
  • 49
  • 50
  • 51
  • 52
  • …
  • 69
  • Next Page »

Welcome

Hi, I'm Erica! I'm a lover of all types of food, although I’m mostly vegetarian these days. I like salad, but I LOVE chocolate. This blog is a place where I try to balance the two.
Read More…

  • 
  • 
  • 
  • 
  • 

Subscribe via email

Get new posts delivered straight to your inbox!

Recipes by Category

Salted Chocolate Almond Mug Cake - Vegan, GF, microwavable, and ready in 60 seconds!
white chocolate leaves | coffee & quinoa
Raspberry Coconut Tarts (Vegan & Almost Raw) // Coffee & Quinoa
Coconut Quinoa Granola Bars
Whole Wheat Pumpkin Spice Mug Cake

Archives

my foodgawker gallery
my healthy aperture gallery
View my Tasty Kitchen Profile

Connect

Hi, I'm Erica! I'm a lover of all types of food, although I’m mostly vegetarian these days. I like salad, but I LOVE chocolate. This blog is a place where I try to balance the two.

My Ultimate Avocado Toast | coffeeandquinoa.com
Herbed Tomato Soup with Cornbread Croutons | coffeeandquinoa.com
Our Wedding - Part Two | coffeeandquinoa.com
Blueberry Kale Stem Smoothie | coffeeandquinoa.com
Shredded Kale and Brussels Sprout Salad | coffeeandquinoa.com
Our Wedding 9.20.14 | coffeeandquinoa.com
  • 
  • 
  • 
  • 
  • 

Copyright © 2026 · Coffee & Quinoa · Site Design by Heather Mackan · Built on GenesisWP